
Mold has a talent for appearing where it was never invited: around the shower, beneath the kitchen sink, along a window frame, or behind a suspiciously damp cabinet. Once it arrives, simply wiping away the dark spots is not enough. Mold is a fungus, and its visible growth is often only part of the problem.
Distilled white vinegar can be useful for treating small patches of surface mold on compatible materials. However, it is not a miracle potion, it does not work against every mold species, and it cannot solve the water problem that allowed mold to grow. Successful mold removal requires three things: removing the growth, drying the material, and correcting the source of moisture.
This expert-backed guide explains when vinegar is appropriate, how to use it safely, which surfaces should never meet your spray bottle, and when the job belongs to a professional.
Does Vinegar Really Kill Mold?
Yes, vinegar can kill or inhibit certain types of mold, but its effectiveness has limits. Distilled white vinegar generally contains about 5% acetic acid. That acidity can disrupt some fungal cells and create an environment in which certain molds struggle to survive.
A laboratory study examining common antifungal agents found that vinegar containing approximately 4% to 4.2% acetic acid inhibited Penicillium chrysogenum, a mold commonly associated with damp indoor materials. The same vinegar was not effective against Aspergillus fumigatus. In other words, vinegar can work on some molds, but it should not be advertised as a universal mold assassin wearing a tiny cape.
Research basis: vinegar showed selective rather than universal antifungal activity.
Government mold guidance places even greater emphasis on physical removal and moisture control. The Environmental Protection Agency recommends scrubbing mold from hard surfaces with detergent and water, drying the surfaces completely, and fixing leaks or other water problems. Killing mold without removing it is not sufficient because dead mold particles may still trigger allergic or respiratory reactions.
Cleanup and moisture-control guidance.
When Vinegar Is an Appropriate Mold Treatment
Vinegar is best reserved for a limited, clearly visible patch of mold on a hard or semi-porous surface that will not be damaged by acid. Common examples may include sealed tile, glass, some painted surfaces, certain plastics, and small areas of properly finished wood.
The EPA says homeowners can generally handle a moldy area smaller than about 10 square feet, roughly a three-foot-by-three-foot patch, provided there has not been extensive water damage or sewage contamination. Larger areas may require containment, specialized equipment, removal of building materials, and professional remediation.
Small-area cleanup threshold.
Vinegar may be reasonable when:
- The affected area is smaller than 10 square feet.
- The mold is limited to the surface rather than growing deep inside a wall.
- The material is structurally sound and can be dried completely.
- The moisture source has been identified and corrected.
- No sewage, contaminated floodwater, or hazardous material is involved.
- The surface manufacturer permits cleaning with a mild acid.
Do not rely on vinegar when:
- Mold repeatedly returns after cleaning.
- Drywall, insulation, carpet padding, or ceiling tiles are heavily contaminated.
- The room has extensive water damage or a strong musty odor with no visible source.
- Mold appears inside an HVAC system.
- The affected area exceeds approximately 10 square feet.
- Someone in the home has severe asthma, chronic lung disease, significant mold allergies, or a weakened immune system.
Mold exposure can cause nasal congestion, coughing, wheezing, eye irritation, skin irritation, and more serious reactions in susceptible individuals. People with asthma, mold allergies, chronic respiratory disease, or weakened immune systems should avoid participating in mold cleanup whenever possible.
Health effects and higher-risk groups.
What You Need to Remove Mold with Vinegar
Gather everything before starting so you do not have to wander through the house wearing gloves and carrying a dripping scrub brush like the least glamorous superhero in history.
- Distilled white vinegar with approximately 5% acidity
- A clean spray bottle
- Protective gloves
- Safety goggles without ventilation holes
- A well-fitting N95 respirator
- A stiff nylon brush or nonabrasive scrub pad
- Disposable towels or washable microfiber cloths
- Mild dish detergent
- Clean water
- A fan, dehumidifier, or another safe drying method
- A plastic bag for contaminated disposable materials
Wear old clothing that can be washed immediately afterward. Keep children, pets, and anyone with respiratory sensitivities away from the work area. Open a window or operate an exhaust fan that vents outdoors when conditions allow, but do not aim a portable fan directly at dry mold because moving air can scatter spores.
How to Kill Mold with Vinegar Step by Step
Step 1: Stop the moisture source
Before spraying anything, determine why the area became damp. Check for leaking pipes, roof damage, failed caulk, condensation, overflowing gutters, poor bathroom ventilation, or indoor humidity that remains too high.
Cleaning mold while ignoring a leak is like mopping the floor while the bathtub is still overflowing. The work may look productive, but the problem is quietly winning.
Repair the leak or control the humidity first. Materials affected by a recent spill or leak should ideally be dried within 24 to 48 hours to reduce the likelihood of mold growth.
Drying and moisture-source recommendations.
Step 2: Inspect the material
Confirm that the mold is limited to a cleanable surface. Hard materials such as glass, plastic, and glazed tile can usually be scrubbed. Porous materials are more complicated because fungal growth may extend into spaces that a cleaning liquid cannot reliably reach.
Heavily moldy drywall, insulation, carpet padding, particleboard, and ceiling tiles often need to be removed and discarded. Attempting to perfume them with vinegar merely creates mold that smells faintly like salad dressing.
Porous-material guidance.
Step 3: Test the vinegar on a hidden spot
Apply a small amount of vinegar to an inconspicuous section and wait several minutes. Check for fading, dullness, softening, discoloration, or damage to a protective finish.
Never use vinegar on marble, limestone, travertine, onyx, or other acid-sensitive natural stone. The acid can etch and permanently dull these surfaces. Exercise caution with grout, waxed wood, unsealed wood, painted finishes, metals, appliance components, and surfaces covered by a manufacturer warranty.
Natural-stone compatibility guidance.
Step 4: Apply undiluted white vinegar
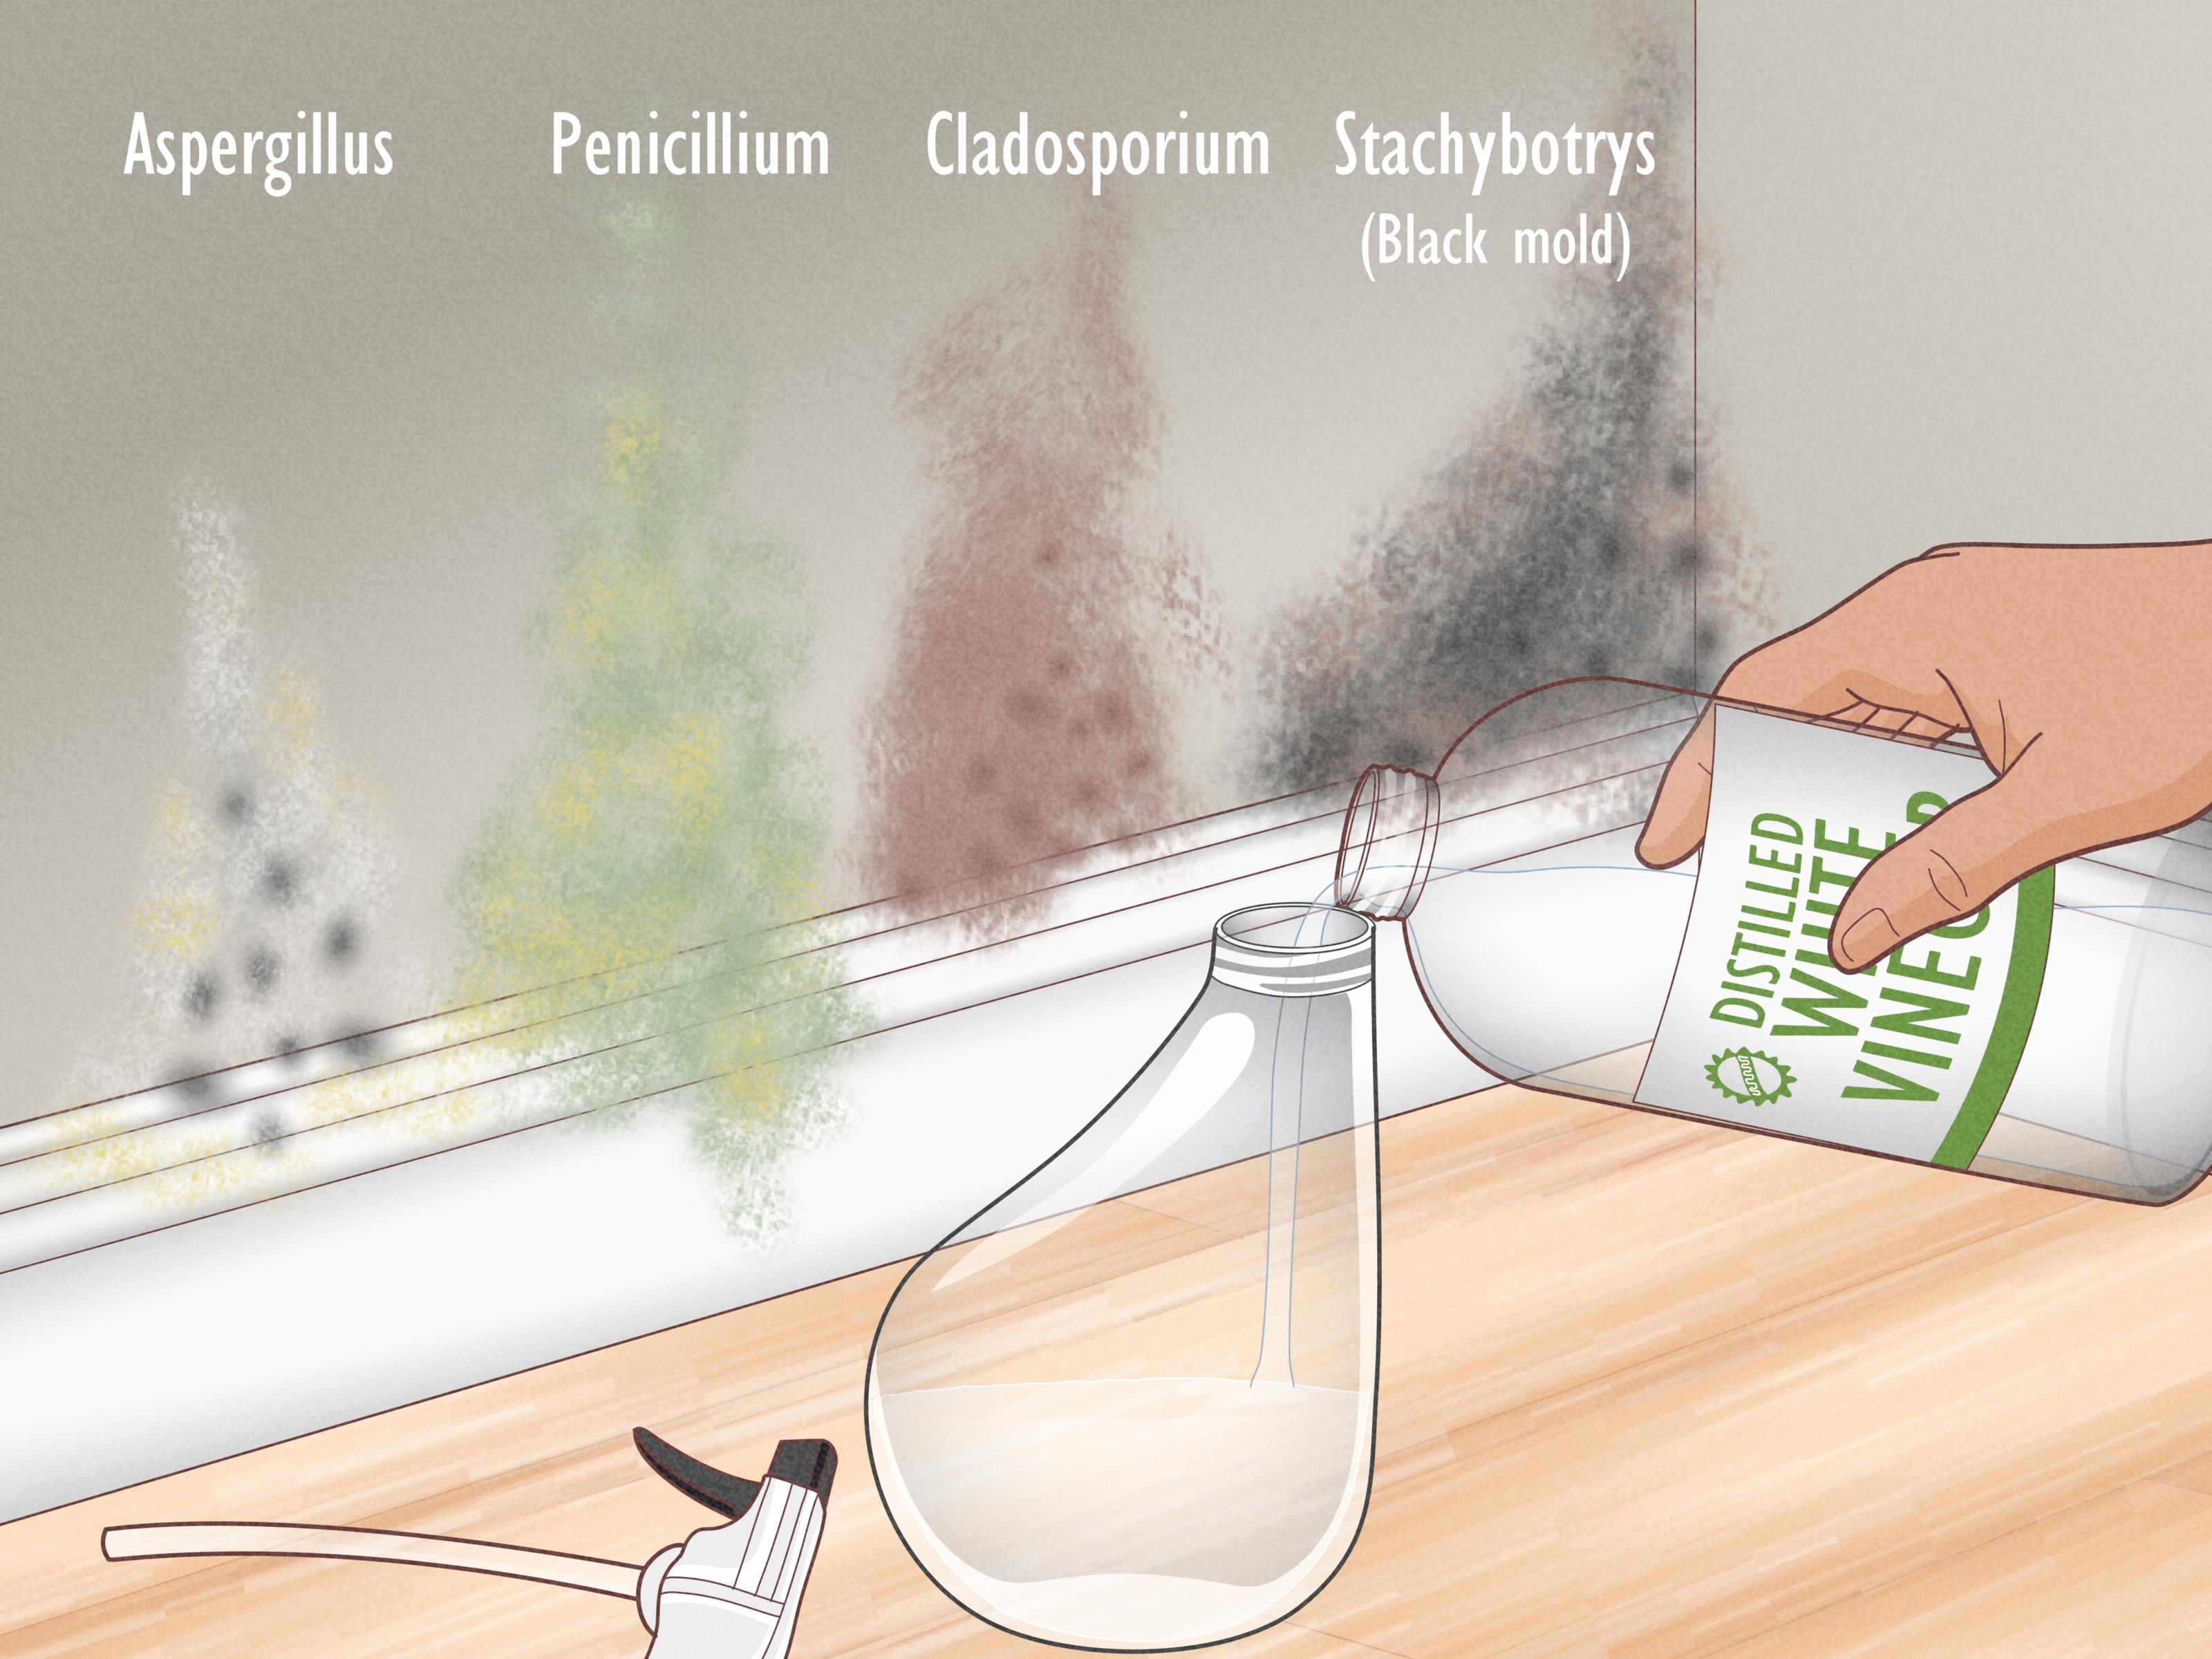
Pour ordinary distilled white vinegar into a labeled spray bottle. For a small mold patch on a compatible surface, using it undiluted preserves its typical 5% acetic acid concentration. Do not use flavored vinegar, apple cider vinegar, balsamic vinegar, or the expensive artisanal bottle you were saving for a heroic tomato salad.
Lightly spray the moldy area until the surface is evenly wet. Avoid soaking drywall seams, wood joints, electrical components, or any material that could be damaged by excessive liquid.
Step 5: Allow sufficient contact time
Leave the vinegar on the surface for approximately 30 to 60 minutes. An hour is a practical household contact period commonly used for small mold-cleaning jobs, although no single contact time guarantees that vinegar will kill every species of mold.
Keep the area damp during the contact period, but do not continually flood it. Adding unnecessary moisture to a mold problem is a little like trying to extinguish a campfire with additional firewood.
Step 6: Scrub away the mold
Use a nylon brush, scrub pad, or disposable cloth to physically remove the growth. Work from the outer edge toward the center to reduce spreading residue across a larger area.
For textured tile, grout lines, or unfinished wood that has been approved for vinegar treatment, use gentle repeated passes rather than aggressive grinding. Excessive force can damage the surface and send particles into the air.
Step 7: Clean the remaining residue
After scrubbing, wipe away the loosened mold with disposable towels. If dirt, soap scum, or organic residue remains, clean the surface with a small amount of mild detergent and water. Do not combine detergent with vinegar unless the product label specifically confirms compatibility.
Use a separate clean cloth for the final wipe. Place disposable brushes, towels, and other contaminated waste into a plastic bag before carrying them through the home.
Step 8: Dry the area completely
Drying is not an optional finishing touch. It is one of the most important parts of mold control. Wipe away moisture, increase ventilation, and operate a dehumidifier when necessary.
The EPA recommends keeping indoor relative humidity below 60%, ideally between 30% and 50%. The CDC advises keeping household humidity no higher than 50% throughout the day when possible. A basic hygrometer can help track changing conditions.
Recommended indoor humidity levels.
Step 9: Check the area again
Inspect the surface over the next several days and again after one or two weeks. Watch for new spots, staining that expands, peeling paint, soft drywall, bubbling finishes, or a returning musty odor.
If mold returns, do not simply repeat the vinegar routine forever. Recurrence usually indicates lingering moisture, hidden contamination, or a material that cannot be adequately cleaned.
Critical Safety Rule: Never Mix Vinegar with Bleach
Never combine vinegar with chlorine bleach. Vinegar is acidic, and mixing an acid with household bleach can release dangerous chlorine gas. Exposure may cause burning eyes, coughing, chest tightness, breathing difficulty, nausea, and serious lung injury.
Do not assume that using one product immediately after the other is safe. If bleach has previously been applied, rinse the surface thoroughly with clean water, ventilate the area, and allow it to dry before considering another cleaning method. The safest policy is wonderfully boring: use one cleaning product at a time and follow its label.
Chemical-mixing warning.
Vinegar vs. Bleach for Mold Removal
Bleach is often treated as the automatic answer to mold because it can lighten dark staining quickly. However, a clean-looking surface is not necessarily a mold-free surface. The EPA does not recommend routine use of biocides such as chlorine bleach for every mold-cleanup project. Its standard advice emphasizes removing contamination from hard surfaces with detergent and water and drying the area completely.
Vinegar has its own limitations. It does not kill all molds, may damage acid-sensitive materials, and is not a substitute for removing contaminated porous building products. Neither product repairs leaks, lowers humidity, replaces wet insulation, or opens a wall to reveal hidden growth.
The best method depends on the material, the amount of contamination, the source of moisture, and the health of the occupants. Mold remediation is primarily a removal-and-moisture-control project, not a competition to find the strongest-smelling bottle under the sink.
Can Vinegar Remove Mold from Specific Household Surfaces?
Bathroom tile and shower walls
Vinegar may be suitable for glazed ceramic tile and glass shower doors after a spot test. Spray, allow contact time, scrub, wipe, and dry. Avoid prolonged contact with natural stone and damaged or unsealed grout. Repair deteriorated caulk rather than repeatedly cleaning over it.
Painted walls
A small patch on washable paint may respond to careful vinegar treatment, but test first. If the drywall feels soft, swollen, crumbly, or damp, the mold may extend beneath the paint. Cleaning the visible surface will not correct internal contamination.
Wood
Surface mold on structurally sound wood may sometimes be cleaned, but results depend on the finish, wood species, depth of growth, and moisture content. Use as little liquid as possible and dry the wood promptly. Replace wood that is rotten, extensively contaminated, or structurally weakened.
Fabric and clothing
Washable fabrics require laundering according to the care label. Vinegar may help with odor or limited mildew residue, but it is not guaranteed to sterilize contaminated textiles. Upholstery, mattresses, carpet padding, and heavily moldy fabric may be difficult or impossible to clean completely.
HVAC vents and air-conditioning systems
Do not spray vinegar into ductwork, air handlers, insulation, or electrical components. Mold in an HVAC system can distribute particles throughout the building and should be evaluated by an appropriately qualified professional.
How to Prevent Mold from Returning
Once the surface is clean, prevention depends on keeping it dry. Mold does not care how organized your cleaning cabinet is; give it enough moisture and a food source, and it will return with the confidence of a relative who knows where you hide the spare key.
- Repair plumbing, roof, window, and foundation leaks promptly.
- Use bathroom and kitchen exhaust fans that vent outdoors.
- Run a dehumidifier in persistently damp rooms.
- Keep indoor humidity near 30% to 50% when practical.
- Dry shower walls and window condensation instead of leaving water in place.
- Ensure clothes dryers vent outdoors.
- Keep furniture slightly away from cold exterior walls to improve airflow.
- Replace water-damaged porous materials that cannot be dried quickly.
- Clean air-conditioner drip pans and keep drain lines unobstructed.
- Investigate musty odors even when no mold is immediately visible.
When to Call a Mold Remediation Professional
Professional help is advisable when the affected area is larger than approximately 10 square feet, contamination followed major flooding, sewage is involved, mold has entered an HVAC system, or damaged materials must be removed from walls and ceilings.
You should also seek assistance when mold returns despite repeated cleaning, a persistent odor suggests hidden growth, or occupants experience significant respiratory symptoms associated with the building.
A qualified professional should focus on identifying the moisture source, containing contaminated areas, safely removing unsalvageable materials, cleaning salvageable surfaces, and verifying that the structure is dry. Be cautious of anyone who promises to solve every problem by fogging the room with a mystery chemical while ignoring the dripping pipe behind the wall.
Experience-Based Lessons from Real-World Mold Cleanup
Practical mold-removal experiences reveal a consistent pattern: the visible patch is often the easiest part of the job. The real detective work begins when determining why that particular corner became damp.
Experience 1: The bathroom ceiling that kept coming back
A homeowner may clean several dark spots above a shower and enjoy a spotless ceiling for two weeks. Then the spots return, usually with reinforcements. Repeated cleaning fails because the exhaust fan is undersized, clogged, rarely used, or venting into the attic instead of outdoors.
In this situation, vinegar can remove limited surface growth, but the lasting fix is better ventilation. Running the fan during the shower and for about 20 to 30 minutes afterward, leaving the door open when appropriate, and drying condensation often make a greater difference than switching cleaning products.
Experience 2: The “tiny” leak beneath the sink
A cabinet may have only a few fuzzy spots on its back panel, yet closer inspection reveals a slow supply-line leak. Because the drip is small, it never creates a dramatic puddle. Instead, it keeps the cabinet slightly damp for months, which is essentially a luxury resort for mold.
Surface vinegar treatment may help if the cabinet material remains solid. Particleboard that has swollen, softened, or developed growth through its thickness usually needs replacement. Repairing the connection, drying the cavity, and checking the wall behind the cabinet are more important than spraying the visible stain.
Experience 3: The window frame with winter mold
Mold around a window does not always mean rainwater is entering from outdoors. Warm indoor air can condense against cold glass and framing during winter. Curtains, blinds, and tightly packed furniture may restrict airflow, allowing the area to remain damp.
Cleaning the frame can address the immediate growth, while daily condensation removal, improved airflow, lower indoor humidity, storm-window repairs, or better insulation address the cause. Without those changes, the mold is likely to schedule a seasonal reunion.
Experience 4: The basement wall that was painted too soon
Another common mistake is painting directly over mold or a damp masonry wall. Fresh paint temporarily conceals staining, but moisture eventually causes bubbling, peeling, and renewed growth. Paint is not a force field.
The better sequence is to investigate drainage, gutters, grading, foundation cracks, plumbing, and indoor humidity. The wall must be cleaned using a method appropriate for its material and allowed to dry thoroughly before coating. Mold-resistant paint can support prevention, but it cannot compensate for an active water problem.
Experience 5: The project that was larger than it looked
A small stain at the base of drywall can sometimes lead to a larger concealed area behind the wall, especially after a long-term leak. Warning signs include soft drywall, warped baseboards, peeling paint, persistent odor, and staining that expands after cleaning.
Stopping after treating the visible patch may allow hidden growth to continue. When materials must be opened, removed, or contained, professional remediation is often the safer choice. Experience repeatedly shows that knowing when to stop a do-it-yourself project is part of doing the project correctly.
Experience 6: Drying made the biggest difference
People often devote most of their attention to the cleaning solution and very little to the drying process. Yet a thoroughly scrubbed surface that remains damp can develop new growth, while a cleaned and rapidly dried surface is far less inviting.
After treatment, use towels, ventilation, controlled heating, air conditioning, or a dehumidifier as appropriate. Monitor humidity with a hygrometer instead of relying on how the air feels. Human skin is excellent at many things, but functioning as a calibrated moisture meter is not one of them.
Frequently Asked Questions
Should vinegar be diluted before using it on mold?
For a small patch on a compatible surface, ordinary 5% distilled white vinegar is commonly used undiluted. Diluting it reduces the acetic acid concentration and may reduce its antifungal activity. Always spot-test the surface first.
How long should vinegar remain on mold?
A practical contact period is approximately 30 to 60 minutes. Keep in mind that contact time alone does not guarantee complete mold elimination. Scrubbing, residue removal, drying, and moisture correction remain essential.
Does vinegar kill black mold?
Color does not reliably identify a mold species or indicate how hazardous it is. Vinegar may affect certain dark-colored molds but not others. Any extensive contamination, repeated growth, hidden moisture problem, or mold affecting high-risk occupants deserves professional evaluation.
Will the mold stain disappear immediately?
Not necessarily. Vinegar may help remove active surface growth while leaving discoloration behind. A remaining stain does not always mean living mold remains, but expanding spots, odor, moisture, or renewed fuzzy growth indicate that the problem is unresolved.
Can vinegar prevent mold permanently?
No cleaning solution provides permanent protection while moisture remains available. The most reliable mold prevention strategy is keeping surfaces clean and dry, controlling humidity, improving ventilation, and repairing leaks quickly.
Conclusion
Distilled white vinegar can be a useful, inexpensive treatment for a small amount of surface mold on materials that tolerate mild acid. Apply it carefully, allow adequate contact time, scrub away the growth, remove the residue, and dry the surface completely.
Its limitations matter just as much as its benefits. Vinegar does not kill every mold species, cannot reliably clean heavily contaminated porous materials, and should never be mixed with bleach. Most importantly, it cannot repair the leak, condensation problem, or high humidity that caused the mold.
For small, straightforward patches, vinegar may earn a place in the cleanup kit. For large, recurring, concealed, or water-damage-related contamination, put down the spray bottle and bring in professional help. The smartest mold strategy is not merely killing what you can see; it is creating a dry environment where mold cannot stage a comeback.