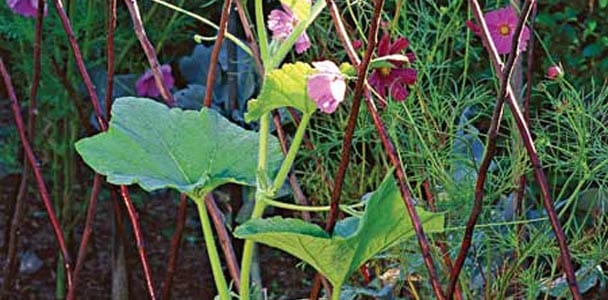

A diamond-patterned twig trellis is the kind of garden project that makes people pause, point, and say, “Wait, did you make that?” The best part is that you can answer with a heroic little shrug, because yes, you did make itand probably from branches that were already waiting in the yard like unemployed garden furniture.
This rustic trellis combines function and charm. It gives climbing plants a place to stretch upward, keeps vines from flopping across paths, adds height to garden beds, and turns ordinary twigs into a decorative lattice. The diamond pattern looks fancy, but the process is surprisingly approachable. If you can measure, tie knots, and forgive a few imperfect branches for being “artistically natural,” you can build one.
In this guide, you’ll learn how to choose branches, plan the diamond layout, lash the joints, install the trellis, and train plants onto it. We’ll also cover practical garden lessons, plant suggestions, mistakes to avoid, and a field-notes section based on real-world experience with twig structures.
Why Build a Diamond-Patterned Twig Trellis?
A twig trellis does more than look charming in a cottage garden photo. It solves several common garden problems at once. First, it supports climbing plants such as peas, beans, morning glories, clematis, sweet peas, cucumbers, and small flowering vines. Second, it helps use vertical space, which is especially helpful in raised beds, narrow side yards, container gardens, and small patios. Third, it keeps foliage lifted, improving airflow and making harvesting easier.
The diamond pattern adds an extra design bonus. Compared with a plain ladder-style trellis, a crisscross lattice gives vines more angles to grab. It also creates a balanced, decorative shape even before the plants fill in. In early spring, it looks sculptural. By midsummer, it can look like the garden decided to wear jewelry.
There is also a sustainability angle. A DIY twig trellis uses pruned branches, saplings, or fallen limbs instead of relying entirely on manufactured materials. You still need sturdy twine, wire, or screws depending on your method, but much of the structure can come from natural material that might otherwise be hauled away.
Best Materials for a Twig Trellis
The quality of your trellis starts with the quality of your twigs. Not every branch deserves a promotion. Choose straight, fresh, flexible branches whenever possible. Freshly cut branches bend and tie more easily than dry, brittle sticks. Dry branches can still work for rigid parts of the frame, but they are more likely to snap when you try to adjust them.
Good Wood Choices
Apple, willow, hazel, dogwood, maple shoots, and other young hardwood prunings are often useful for twig trellises. Willow is especially forgiving because it bends beautifully. Apple and other fruit tree prunings can be strong and attractive. The ideal branch is roughly pencil-thick to thumb-thick for the diamond lattice and slightly thicker for the outer frame.
A good target is branches about 1/2 inch in diameter for the crisscross pieces and 3/4 inch to 1 inch for the frame. For a small decorative trellis, thinner material is fine. For a trellis that will support vegetables or vigorous vines, choose stronger branches and reinforce the frame well.
Materials List
- Two sturdy vertical branches or stakes for the side frame
- One top crosspiece and one bottom crosspiece
- Several straight, flexible twigs for the diagonal lattice
- Jute twine, garden twine, hemp cord, sisal, or thin galvanized wire
- Hand pruners or loppers
- Measuring tape
- Gloves
- Garden scissors
- Optional: small drill, screws, or brad nails for a stronger frame
- Optional: exterior wood sealer for longer life
Natural twine looks beautiful and blends into the branches, but it eventually breaks down. Wire lasts longer and holds tighter, though it gives a slightly less rustic look. Many gardeners use twine for visible joints and wire for hidden reinforcement. That is not cheating. That is garden engineering with better manners.
Choose the Right Size and Location
Before cutting branches, decide where the trellis will live. A diamond-patterned twig trellis can stand inside a raised bed, lean against a wall, frame a path, or sit behind a container. The location should match the plants you want to grow.
Most flowering annual vines and vegetables prefer plenty of sunlight. A spot with six or more hours of sun is useful for many climbers, while some ornamental vines appreciate afternoon shade in hot climates. The soil should drain well, and the trellis should be installed before the vines become tangled. It is much easier to put a trellis in place when seedlings are small than to wrestle a fully grown cucumber plant that has already decided the tomato cage is its soulmate.
Suggested Trellis Sizes
- Small container trellis: 18 to 24 inches wide and 30 to 36 inches tall
- Raised bed trellis: 24 to 36 inches wide and 48 to 60 inches tall
- Decorative wall trellis: 36 to 48 inches wide and 60 to 72 inches tall
- Vegetable support trellis: 48 inches wide and 60 inches or taller, depending on the crop
For heavier crops, such as cucumbers or small melons, build sturdier than you think you need. A twig trellis is wonderful for lightweight vines, peas, beans, and flowers. It can support small edible crops if reinforced, but large fruits need extra slings or a stronger structure. The goal is charming rustic support, not a dramatic mid-July collapse titled “The Great Cucumber Avalanche.”
Step-by-Step: How To Build a Diamond-Patterned Twig Trellis
Step 1: Gather and Sort the Branches
Collect more branches than you think you need. Twig projects always consume extra material because some pieces are too crooked, too short, too brittle, or too determined to become modern art. Lay everything on the ground and sort branches by thickness and length.
Choose the straightest, strongest pieces for the outer frame. Then set aside slimmer, flexible pieces for the diagonals. Trim off side shoots, leaves, and rough stubs. Keep a few forked branches if you like a natural look, but avoid anything that will make the lattice bulky or difficult to tie.
Step 2: Build the Outer Frame
Lay two vertical branches parallel on a flat surface. Space them according to your desired width. Place one crosspiece near the top and one near the bottom to create a rectangle. The bottom crosspiece should sit several inches above the soil line if the vertical branches will be pushed into the ground.
Secure each corner with twine, wire, screws, or a combination. For a classic rustic trellis, use square lashing: wrap twine around both pieces several times, then wrap between the pieces to tighten the joint before knotting it firmly. If the trellis will carry heavier growth, predrill small pilot holes and use screws, then hide the joints with twine.
Check that the frame is square enough. It does not have to be mathematically perfect. This is a twig trellis, not a NASA docking procedure. Still, a reasonably straight frame makes the diamond pattern much easier to arrange.
Step 3: Mark the Diamond Spacing
Use a measuring tape to mark equal intervals along the top and bottom crosspieces. Four to six inches between marks works well for small trellises. Six to eight inches gives a more open pattern for larger vines. Mark the same spacing on both vertical sides if needed.
The secret to good-looking diamonds is consistency. If the spacing wanders too much, the pattern can look less like a garden lattice and more like a spider had coffee. A little irregularity is charming; total chaos is harder for vines and eyes to follow.
Step 4: Add the First Set of Diagonal Twigs
Place the first diagonal twig from the lower left side toward the upper right side. Tie it where it crosses the frame. Continue adding parallel twigs at the same angle, using your spacing marks as guides. Keep the angle consistent so the diamonds will line up neatly when the second diagonal layer goes on.
Trim each twig only after you are happy with its position. Branches can shift as you tie them, so leave extra length until the pattern is secure. If a twig is slightly curved, rotate it until the curve works with the design rather than against it.
Step 5: Add the Second Set of Diagonal Twigs
Now place twigs in the opposite direction, from lower right to upper left. As the second layer crosses the first, diamond shapes will appear. This is the satisfying part. It is the garden DIY equivalent of watching a messy drawer become organized.
At each crossing point, decide whether to tie every joint or only key intersections. For lightweight annual vines, tying the frame and several major intersections may be enough. For a stronger trellis, tie every crossing. Use small, neat wraps so the pattern remains visible.
Step 6: Strengthen the Joints
Once the diamond pattern is complete, gently lift the trellis and test it. If it wobbles like a nervous flamingo, reinforce it. Add extra twine around loose joints, tighten wire connections, or add a hidden horizontal support across the back.
Loose joints are not always bad; a little flexibility helps natural materials handle wind. But the trellis should not twist badly when moved. A good twig trellis feels light but unified, like all the branches finally agreed to be a team.
Step 7: Trim and Finish
Use pruners to trim uneven ends. You can leave the top branches slightly irregular for a handmade look or cut them flush for a cleaner profile. Remove sharp stubs that could scrape hands or damage plant stems.
If you want the trellis to last longer, let it dry in a sheltered place for several days, then brush on a garden-safe exterior sealer. Many gardeners skip sealer and simply treat twig trellises as seasonal or semi-seasonal structures. Natural aging is part of the appeal. Silvered wood, twine knots, and curling tendrils have more personality than a plastic grid ever will.
Step 8: Install the Trellis
Push the vertical supports 8 to 12 inches into the soil, depending on the height of the trellis and the firmness of the ground. For soft soil or windy areas, go deeper or attach the trellis to stakes. If placing it in a container, anchor the legs firmly and choose a heavy pot that will not tip over once vines catch the wind.
For wall placement, avoid pressing damp branches directly against siding. Leave airflow behind the trellis and use proper spacers or hooks. Plants need support, but houses prefer not to become part of the compost cycle.
Best Plants for a Diamond Twig Trellis
The best plants are climbers with light to moderate growth. Peas, pole beans, sweet peas, morning glories, black-eyed Susan vine, hyacinth bean, nasturtiums, small clematis varieties, and annual flowering vines all work well. These plants can twine, cling, or be gently tied to the lattice.
For vegetables, peas and beans are excellent choices because they naturally reach for support. Cucumbers can work on a stronger twig trellis, especially compact varieties, but the structure should be well anchored. If you grow small melons or squash vertically, support the fruit separately with mesh slings or soft fabric.
Different vines climb in different ways. Some twine around supports, some use tendrils, and some need help being tied. Guide young stems gently and use soft ties. Avoid tight knots around living stems because they can cut into the plant as it grows.
Common Mistakes To Avoid
Using Brittle, Dead Sticks
Dry sticks are tempting because they are easy to find, but they often crack during construction. Use fresh or slightly green branches when possible, especially for the diagonal pieces.
Making the Pattern Too Tight
A very tight diamond pattern looks pretty at first, but it can make pruning, harvesting, and airflow more difficult. Leave enough room for leaves and hands to move through the structure.
Forgetting About Plant Weight
A trellis that looks sturdy in April may face a jungle by July. Match the build to the plant. Lightweight flowers need less reinforcement. Fruiting vines need stronger anchors.
Installing Too Late
Put the trellis in place before vines sprawl. Training young plants is easy. Untangling mature vines is like trying to separate earbuds after they spent a week in a backpack.
Tying Plant Stems Too Tightly
Use soft, loose ties and check them as plants grow. The goal is guidance, not garden handcuffs.
Maintenance Tips for a Longer-Lasting Twig Trellis
Inspect the trellis every few weeks during the growing season. Tighten loose knots, replace broken twine, and gently redirect vines that wander. After heavy rain or wind, check the base to make sure the legs remain firmly anchored.
At the end of the season, remove dead vines carefully instead of yanking them. Pulling hard can snap the lattice. If the trellis is still sturdy, store it in a dry shed or garage for winter. If it has weakened, compost untreated twigs and save any wire or reusable ties.
Expect a natural twig trellis to last one to three seasons, depending on wood type, weather, soil contact, and construction method. Willow and soft woods may break down faster. Harder prunings may last longer. Keeping the base out of constantly wet soil helps extend its life.
Design Variations
Once you understand the basic diamond-patterned twig trellis, you can customize it. Add an arched top for a romantic cottage-garden look. Make two panels and hinge them into an A-frame trellis for peas or beans. Build a narrow panel for a container, or create a wide backdrop for a flower border.
You can also mix materials. Use bamboo stakes for the frame and twigs for the diamonds. Use copper wire for a subtle decorative touch. Add a small wooden label at the base with the plant name. Or leave everything plain and let the vines do the decorating.
Experience Notes: What Building a Twig Trellis Teaches You
The first thing you learn when building a diamond-patterned twig trellis is that nature does not manufacture straight lines. You may start with a perfect sketch, a measuring tape, and the confidence of a person who has watched three tutorials. Then you pick up your branches and realize every single one has a personal opinion. One curves left. Another has a mysterious bump. A third looks straight until you place it beside the frame, where it reveals itself as a tiny wooden banana.
That is not a flaw. It is the point. The beauty of a twig trellis comes from working with natural irregularity instead of fighting it. The best results often happen when you stop demanding perfection and start choosing branches that visually balance each other. A slightly curved twig can soften one side of the pattern. A thicker branch can strengthen a weak corner. A small fork can become a charming detail instead of a problem.
Another practical lesson is that preparation saves frustration. Sorting branches before you begin feels boring for about five minutes, then suddenly becomes the smartest thing you did all day. Grouping pieces by length and thickness helps the build move faster. It also prevents the classic mid-project treasure hunt where you crawl around the yard muttering, “I know I saw one more good stick.”
Knots matter more than expected. Loose twine can make the whole trellis shift, while overly tight wrapping can snap brittle wood. The sweet spot is firm but forgiving. Wrapping joints in a consistent direction also makes the finished trellis look cleaner. If you are using natural twine, pull it snug, knot it twice, and trim the tails. Long dangling pieces may look rustic for one afternoon, but after rain they can resemble a scarecrow having a bad hair day.
Installation teaches another big lesson: wind is stronger than your optimism. Even a lightweight vine can act like a sail once it fills in. Push the trellis legs deeply into the soil, and do not be shy about adding hidden stakes. If the trellis is in a container, choose a heavy pot and place the structure toward the back so the plant and support balance each other.
Plant training is also a gradual process. Young vines rarely climb exactly where you want on day one. Guide them gently every few days. Peas may grab quickly with tendrils. Beans may twine with enthusiasm. Clematis may need soft ties at first. Morning glories often behave like they already read the instructions. The trick is to help without forcing. Living stems bruise, bend, and grow thicker, so loose ties are always better than tight ones.
The most satisfying moment comes a few weeks after planting, when the trellis starts to disappear behind leaves. The diamonds are still there, peeking through like a handmade secret. Flowers open, tendrils curl, and the whole structure begins to look as if it has always belonged in that spot. That is the quiet magic of this project: it starts as sticks on the ground and becomes architecture for plants.
And yes, you will probably start noticing useful branches everywhere afterward. Pruning day becomes a materials hunt. Fallen twigs become future projects. The yard stops looking messy and starts looking like a hardware store with birds. That may be the real danger of building one twig trellis: it is almost impossible to stop at one.
Conclusion
Building a diamond-patterned twig trellis is a simple, affordable way to add structure, height, and handmade character to a garden. With fresh branches, strong joints, thoughtful spacing, and the right climbing plants, you can create a rustic support that is both useful and beautiful. The project rewards patience more than perfection. A few crooked twigs only make it better.
Whether you use it for peas in a raised bed, sweet peas near a patio, clematis along a fence, or morning glories in a container, a twig trellis brings a natural charm that store-bought supports often lack. It is sustainable, customizable, and just fancy enough to make your garden look like it has a tiny landscape architect on staff.