In the world of tower defense, victory rarely comes down to raw firepower alone; it is almost always a result of superior spatial awareness and design. Mastering grid based tower placement is the single most effective way to turn an overwhelming enemy force into a manageable stream of defeated units. By understanding the geometric constraints of your battlefield, you can transition from simple reaction-based building to sophisticated, proactive engineering.
Whether you are new to the genre or looking to sharpen your competitive edge, this guide breaks down the essential principles of tactical positioning. You will learn how to manipulate enemy AI, optimize your range coverage, and manage your resources to ensure no wave makes it past your defenses. If you are ready to move beyond basic setups, we will explore the underlying mechanics—such as lane management and kill zone optimization—that separate casual players from true masters. For those interested in deeper economic strategies to fuel these defensive setups, you can also explore our guide on resource accumulation defense to ensure your bankroll keeps pace with your ambition.
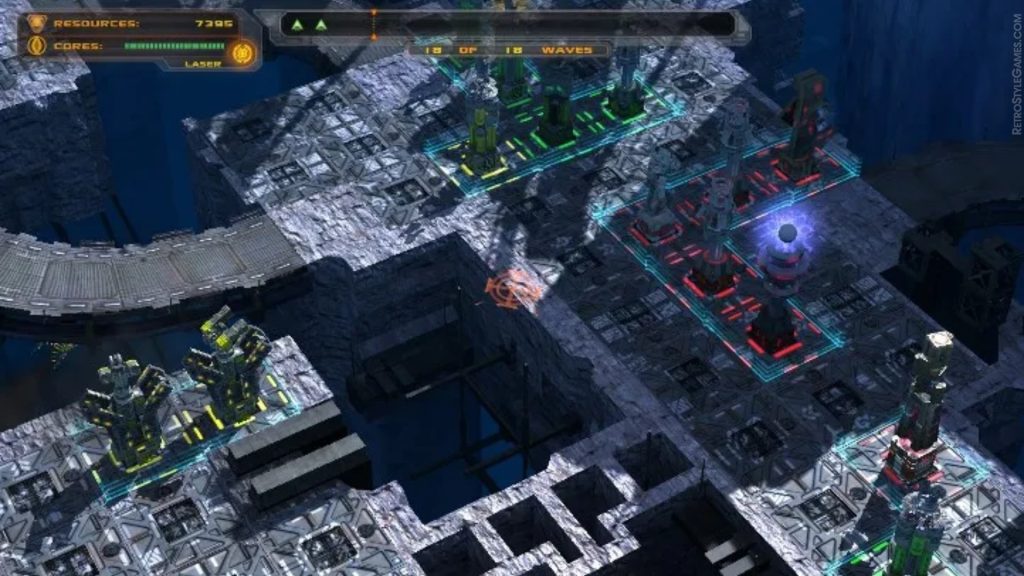
1. Mastering Grid Based Tower Placement Fundamentals and Spatial Geometry
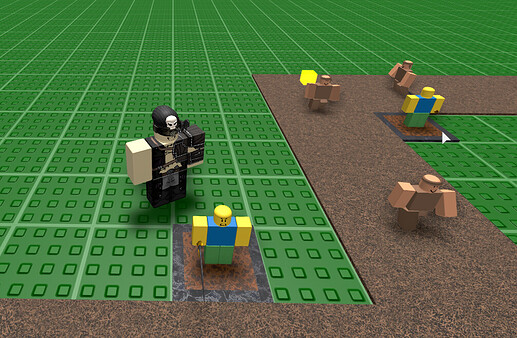
Successful tower defense is rarely about brute force; it is about precision. Mastering grid based tower placement is the art of manipulating spatial geometry to force enemy units into unfavorable conditions. By understanding how the map’s architecture dictates movement, you can shift from a reactive player to a proactive strategist.
1.1 Analyzing Grid Systems and Movement Mechanics
The foundation of your defense lies in the underlying grid. Whether a map uses square tiles or hexagonal cells, the math behind unit movement remains consistent: the shortest path is almost always preferred by enemy AI. Square grids offer predictable, 90-degree pathing, which is ideal for creating rigid walls and clean corridors. Conversely, hexagonal grids often feel more organic, requiring a more nuanced approach to coverage due to the six-directional movement options that can occasionally lead to unexpected pathing shifts.
1.1.1 Evaluating Square Versus Hexagonal Grid Efficiency
Square grids simplify the calculation of range. If you place a tower, you can easily count the tiles to determine exactly which lanes are covered. Hexagonal grids, however, often provide better diagonal coverage, which can be a double-edged sword when trying to create a tight defensive perimeter without leaving gaps.
1.1.2 Identifying Map Constraints and Unbuildable Terrain
Always scout for natural obstacles before committing your resources. Rivers, mountains, and debris are your best friends; they act as permanent walls that you don’t have to build yourself. Identifying these unbuildable zones early allows you to funnel enemies toward your most powerful weapons, maximizing the utility of every square inch of the map.
1.2 Calculating Optimal Tower Range and Coverage Zones
Range is your most critical resource. Even the highest-damage tower is useless if it sits outside the path of the encroaching waves of enemy defense. Your goal is to maximize the amount of time a unit spends within your effective firing radius.
1.2.1 Visualizing Circular Range Overlap Without Blind Spots
Most towers have a circular range indicator. When placing multiple units, try to overlap these circles to create “death zones” where enemies take cumulative fire. However, be wary of stacking too tightly, as this can leave blind spots on the edges of your perimeter that agile units might exploit.
1.2.2 Managing Building Density and Resource Expenditure
Avoid the trap of over-building. Every tower represents a specific cost in materials. Efficient defense focuses on high-impact placements rather than mass-spamming low-level structures. By prioritizing dense, strategic clusters, you conserve your economy for late-game upgrades.
1.3 Essential Placement Philosophies for Beginner Defense
New players often scatter towers randomly, hoping to catch enemies as they pass. Instead, adopt a philosophy of controlled engagement. Think of your defenses as a series of gates that filter incoming threats.
1.3.1 Implementing Funneling Techniques for Enemy Pathing
Even if the map is open, you can dictate movement by placing structures that block direct routes. By creating a narrow path—or a “funnel”—you force enemies to walk exactly where you want them. This makes it significantly easier to plan your tactical unit positioning for maximum damage.
1.3.2 Establishing Kill Zones at Critical Map Intersections
The most dangerous points on any map are intersections where paths converge. Focus your strongest towers here. By creating a concentrated kill zone, you ensure that every wave—no matter how large—is hit by the full weight of your arsenal the moment they cross the threshold.
2. Advanced Grid Based Tower Placement Tactics and Strategic Execution
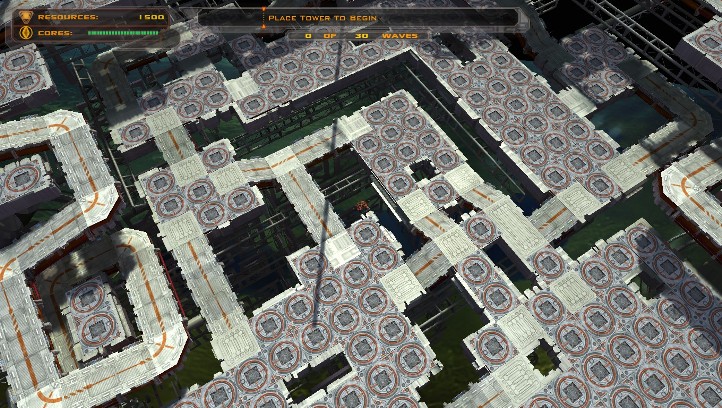
Once you have mastered the basics of spacing, the real challenge in grid based tower placement lies in manipulating the game environment to your advantage. Advanced players don’t just react to enemy waves; they actively architect the battlefield to dictate enemy movement, ensuring every unit spends the maximum amount of time within the reach of your most powerful defenses.
2.1 Manipulating Enemy AI through Maze Construction
2.1.1 Building Artificial Walls to Extend Pathing Distance
Most tower defense games rely on enemy AI that seeks the shortest path to your base. You can exploit this behavior by using your towers or defensive structures as obstacles to build a maze. By creating a winding, elongated path, you force enemies to travel a longer distance, effectively granting your towers more time to fire before the threat reaches your gate. When placing towers, look for gaps in the grid that allow you to guide units into a single file line, preventing them from bypassing your front line.
2.1.2 Controlling Chokepoints to Maximize Enemy Exposure Time
A chokepoint is any narrow segment of the map where enemy density is naturally high. By concentrating your high-damage units at these junctions, you create a kill zone that efficiently burns through the waves of enemy defense. Instead of spreading your budget across the entire grid, focus your resources on these specific bottlenecks. This strategy ensures that your turrets maintain constant uptime, as they are not wasting shots on empty tiles, but are instead focused entirely on the high-traffic lanes you have carefully curated.
2.2 Synergistic Stacking and Late Game Optimization
2.2.1 Pairing Debuff Towers with High Damage Dealers
Late game success often hinges on how well you layer your defenses. Simply placing high-damage towers is rarely enough to stop tougher, armored units. Instead, place utility towers—such as those that apply slows, armor shred, or damage-over-time effects—directly adjacent to your primary damage dealers. By slowing enemies at the start of a chokepoint, you provide your heavy hitters the necessary window to maximize their output. You can find more in-depth advice on these synergies in our guide to Resource Accumulation Defense: Master Tactical Base Strategy.
2.2.2 Accounting for Tower Footprints to Prevent Dead Zones
As your grid fills up, you must be hyper-aware of individual tower footprints. Every structure occupies space that could otherwise be used for range overlap. Avoid creating clusters that leave gaps in coverage, commonly known as dead zones. Always visualize the circular radius of each unit; if a portion of your grid is not covered by at least one tower’s range, your layout is inefficient. Regularly audit your placement to ensure that no single tile of the enemy path remains unmonitored.
2.3 Common Strategic Errors and How to Mitigate Them
2.3.1 Avoiding Over-Building and Resource Waste
A common pitfall is placing too many low-level towers instead of upgrading a few critical ones. Over-building clutters the grid and wastes gold that could be better spent on high-tier units with better damage-to-cost ratios. Focus on quality over quantity to keep your economy healthy for the late game.
2.3.2 Adapting Defenses for Flying and Ranged Counter-Units
Static ground-based mazes often fail when faced with flying enemies that ignore pathing or ranged units that strike from outside your tower’s reach. Always ensure that your grid design includes dedicated anti-air turrets at key junctions and long-range towers to snipe ranged units before they can neutralize your frontline defenses.
2.3.3 Selling and Replacing Static Early Game Defenses
Do not be afraid to sell your early-game towers. As you progress, your initial “cheap” defenses may lose their effectiveness. Selling these units can provide a crucial cash injection to upgrade your late-game core, allowing you to reconfigure your grid layout to meet the specific threats posed by final-wave bosses.
Mastering grid based tower placement is the difference between a fleeting victory and a true tactical triumph. By shifting your focus from random unit placement to calculated spatial geometry, you can transform simple maps into impenetrable fortresses. Whether you are manipulating enemy pathing through complex mazes, creating high-impact kill zones at critical intersections, or managing your economy for late-game scaling, the principles of efficient construction remain your most powerful tool. Remember that every grid square represents a strategic opportunity; by understanding how to balance tower density against your resource accumulation defense, you ensure that no enemy wave catches you unprepared.
As you encounter increasingly difficult challenges, remember that the most successful strategies are fluid rather than static. Do not be afraid to sell early-game structures to make room for high-tier synergy, and always prioritize the health of your economy alongside your perimeter integrity. If you want to dive deeper into balancing your long-term fiscal health with your immediate military needs, check out our guide on resource accumulation defense to ensure your infrastructure can support your ambition. Stay observant, adapt to the evolving demands of every wave, and continue refining your grid layouts to conquer the toughest campaigns.