
A festive front door does not require a designer wreath, a cart full of premium craft supplies, or the patience of someone who alphabetizes their ornament collection. With a basic wreath form, inexpensive greenery, ribbon, ornaments, and a few clever layering tricks, you can create a DIY Dollar Tree Christmas wreath for your front door that looks cheerful, full, and surprisingly polished.
This beginner-friendly project uses mostly lightweight materials, so the finished wreath is easy to hang and simple to store. Better yet, the design can be customized for farmhouse, traditional, candy-cane, woodland, glam, or retro Christmas decor. Dollar Tree currently carries crafting categories that include wire wreath forms, decorative mesh, ribbon, floral supplies, and seasonal embellishments, although exact inventory varies by store and time of year.
Why Make a Dollar Tree Christmas Wreath?
Store-bought holiday wreaths can be beautiful, but they often come with a price tag that makes you wonder whether the pinecones have a college degree. A homemade wreath gives you control over the size, color palette, fullness, and overall personality of your front-door display.
Wire wreath frames are especially useful because ribbon, faux greenery, fabric, mesh, ornaments, and floral picks can be tied or wired directly to the frame. Craft and home-decor publications regularly recommend building wreaths by layering materials, arranging decorations before gluing, mixing textures, and attaching heavier accents with floral wire rather than relying on glue alone.
What This Project Should Cost
A realistic budget is approximately $15 to $25 when you already own scissors and a hot-glue gun. Your total will depend on the number of greenery stems, ornament packs, ribbon rolls, and specialty signs you choose. You can spend less by reusing old ornaments, leftover ribbon, pinecones, or greenery from previous Christmas decorations.
The secret is not buying every sparkly object that whispers your name from the seasonal aisle. Choose one wreath form, one main covering material, two supporting textures, and one focal decoration. Your wreath will look more intentional, and your shopping basket will remain on speaking terms with your budget.
Materials for a Classic Dollar Tree Christmas Wreath
This tutorial creates a traditional green wreath with red ornaments, berries, pinecones, and a generous plaid bow. Substitute colors and decorations freely while keeping the same basic construction method.
Dollar Tree Supplies
- One round wire wreath form, preferably 14 to 18 inches
- Four to six faux evergreen stems, garland pieces, or Christmas floral picks
- Two or three berry picks
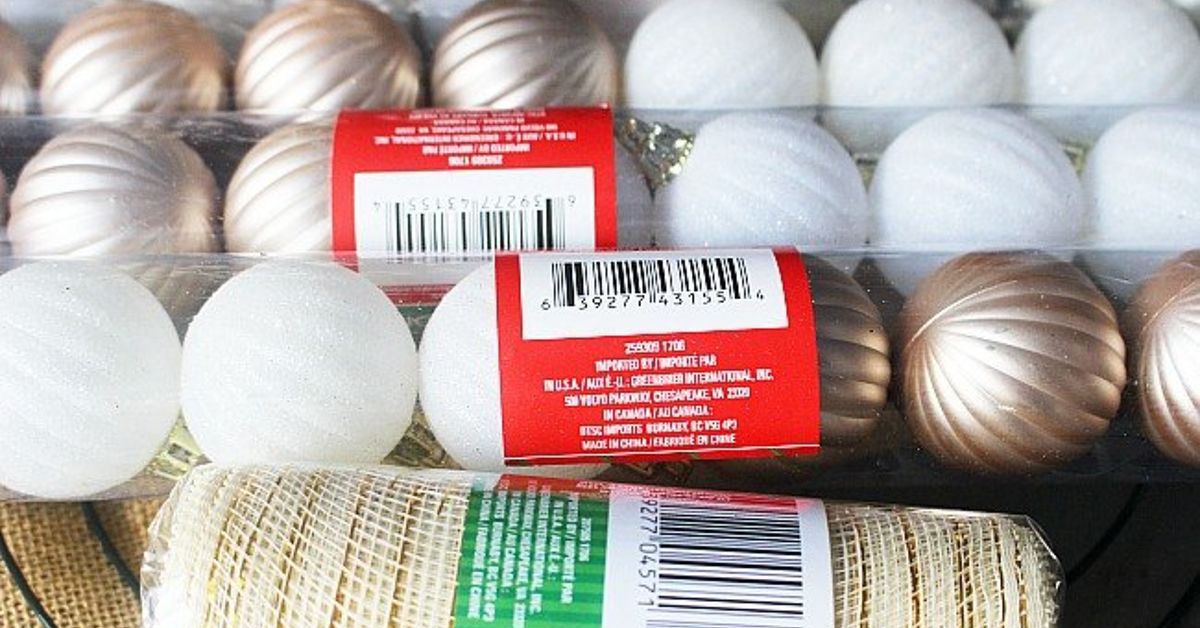
- One package of small shatter-resistant ornaments
- One roll of wired Christmas ribbon
- One roll of decorative mesh, burlap ribbon, or contrasting narrow ribbon
- Two or three pinecones or pinecone picks
- One small wooden sign, bell cluster, ornament, or seasonal focal piece
- Floral wire, chenille stems, or small zip ties
- Optional faux snow, decorative picks, mini gift boxes, or battery-powered lights rated for your intended location
Tools You May Already Own
- Hot-glue gun and glue sticks
- Scissors
- Wire cutters
- Work gloves
- Measuring tape
- Cardboard or a craft mat to protect the table
Wired ribbon is the easiest option for a front-door wreath because it holds loops, curves, and tails better than soft ribbon. Both Better Homes & Gardens and Martha Stewart recommend adjusting bow loops and tails after tying so the finished shape appears balanced rather than flattened.
How to Make a DIY Dollar Tree Christmas Wreath
Step 1: Choose a Simple Color Palette
Before opening glue sticks like you are preparing for battle, choose two main colors and one accent finish. A limited palette helps inexpensive decorations look coordinated.
Reliable combinations include:
- Red, green, and gold for traditional Christmas style
- White, silver, and pale blue for a snowy winter look
- Red, white, and peppermint pink for candy-cane decor
- Green, brown, and cream for rustic woodland style
- Black, white, and champagne gold for modern holiday decor
- Turquoise, hot pink, red, and silver for retro Christmas cheer
Holiday design collections from HGTV, Good Housekeeping, Country Living, The Spruce, and Southern Living demonstrate that wreaths do not have to follow one traditional formula. Ornament wreaths, pom-pom designs, pinecone arrangements, minimalist hoops, bells, dried fruit, ribbons, and playful shapes can all create effective door decor.
Step 2: Prepare the Wreath Form
Place the wire wreath frame flat on your table. If your greenery is sparse, wrap the frame with green decorative mesh, burlap, ribbon, or a strand of inexpensive garland. Tie the starting end to the back of the frame with floral wire or a chenille stem.
Loosely bunch the mesh or garland and secure it every four to five inches. Continue around the circle until the metal rings are mostly hidden. Do not worry about making this layer perfect. It is the supporting actor, not the celebrity arriving on the red carpet.
For a cleaner result, keep all knots, wire ends, and zip-tie heads on the back. Trim sharp ends or bend them inward so they cannot scratch the door.
Step 3: Divide the Greenery Into Small Bundles
Cut large faux stems into smaller sections approximately five to eight inches long. Small bundles provide more control and help you spread limited supplies around the wreath.
Combine two pieces of evergreen with one berry sprig or textured pick. Make six to ten bundles, depending on the size of the wreath. Layering branches gradually is a common wreath-building method because it creates fuller coverage and allows each new bundle to hide the attachment point of the previous one.
Step 4: Attach the Greenery
Position the first bundle on the wreath form at a slight angle. Secure the stems with floral wire, a chenille stem, or a small zip tie. Place the second bundle in the same direction, overlapping the first bundle’s stems.
Continue working clockwise until the wreath is covered. For a lush design, alternate the direction of a few tips so the greenery does not look like it is running around the frame in a panic.
Pause every few bundles and hold the wreath upright. A design that looks balanced on a table can develop a mysterious bald spot when viewed vertically. Fill visible gaps with short greenery clippings.
Step 5: Dry-Fit the Main Decorations
Arrange your bow, sign, pinecones, berries, and ornaments without attaching them. Take a photo with your phone. Then move a few pieces and take another photo. Comparing pictures is easier than staring at the wreath until every ornament begins to look judgmental.
Try placing the focal decoration slightly off-center rather than directly at the top or bottom. An asymmetrical cluster around the four-o’clock or eight-o’clock position often looks more dynamic. HGTV craft instructions frequently begin with larger focal elements and supporting greenery before smaller filler decorations are added.
Step 6: Add Ornaments in Clusters
Use small ornaments in groups of three or five. Mix sizes and finishes, such as one shiny red ornament, one matte red ornament, and one small gold ornament. Grouping decorations produces stronger visual impact than spacing identical ornaments around the wreath like numbers on a clock.
Thread floral wire through each ornament cap and twist it around the wreath frame. For lightweight shatter-resistant ornaments, you can also apply hot glue around the cap and nestle the ornament into the greenery. Wire is the safer choice for pieces exposed to wind, repeated door movement, or freezing temperatures.
Ornament wreath guides commonly recommend mixing colors, sizes, and finishes to create dimension, while floral wire provides a mechanical connection through ornament loops and around the underlying frame.
Step 7: Add Pinecones, Berries, and Filler Picks
Place pinecones near ornament clusters or the bow. Wrap wire around the lower scales of each pinecone and twist it securely to the frame. Add berries, frosted stems, bells, or narrow ribbon curls to fill remaining gaps.
Avoid making every section equally busy. Leave small areas of plain greenery between decorative clusters. These quiet spaces allow the focal pieces to stand out and prevent the wreath from resembling a craft store after a minor tornado.
Step 8: Make the Bow
Cut approximately five to seven feet of wired ribbon for a medium bow. Form one loop, pinch the center, and make a matching loop on the opposite side. Continue creating two or three loops per side, making each outer loop slightly larger.
Secure the pinched center with floral wire. Cut a separate ribbon length for the tails, pinch it in the middle, and wire it behind the bow. Trim the ends into a V-shaped dovetail by folding each tail lengthwise and cutting diagonally upward from the folded edge.
Attach the bow firmly to the metal frame rather than gluing it only to greenery. Fluff each loop by pulling it forward and curving the wired edges. Your first bow may not look ready for a department-store window. Give it thirty seconds of rearranging before declaring it a ribbon-based emergency.
Step 9: Attach the Focal Sign or Bell Cluster
If your sign has a hanging cord, thread floral wire through the cord and attach it to two points on the frame. Two attachment points prevent the sign from rotating whenever the door closes.
For signs without hangers, glue chenille stems or floral wire to the back, reinforce them with small pieces of felt or cardboard, and allow the glue to cool completely before attaching the piece. Heavy decorations should always be supported by wire or zip ties.
Step 10: Perform the Front-Door Test
Lift the wreath, shake it gently, and open and close the door several times. Check whether ornaments swing, the sign tilts, or ribbon tails become trapped. Secure loose pieces and trim anything that interferes with the doorknob, peephole, lock, or door frame.
Finally, look at the wreath from ten to fifteen feet away. Up close, you notice individual glue strings. From the sidewalk, you notice the overall shape, color balance, and whether your bow appears to be escaping.
Three Easy Dollar Tree Wreath Variations
Candy-Cane Christmas Wreath
Use red-and-white decorative mesh, striped ribbon, peppermint ornaments, and white berry picks. Add a small candy-cane sign or a cluster of oversized faux peppermint candies. Keep green accents minimal so the red-and-white theme remains clear.
Neutral Farmhouse Wreath
Cover the frame with faux cedar, pine, or eucalyptus. Add burlap ribbon, cream ornaments, natural pinecones, wooden beads, and a simple bell cluster. A little black-and-white plaid gives the design contrast without making it feel overly busy.
Colorful Retro Ornament Wreath
Skip most of the greenery and wrap the form with tinsel or mesh. Attach bright shatter-resistant ornaments in turquoise, pink, red, lime green, silver, and gold. Mix shiny and matte finishes, then add a velvet bow or miniature retro-style sign. Good Housekeeping and HGTV both highlight playful ornament-heavy and unconventional wreath styles as lively alternatives to traditional evergreen designs.
How to Hang the Wreath Without Damaging Your Door
The correct hanging method depends on the door material, wreath weight, exposure to weather, and clearance above the door.
- Over-the-door hanger: Fast and reusable, but check that the door can close without scraping the frame. Add felt padding where metal touches the door.
- Ribbon over the door: Tie strong ribbon to the wreath and secure it on the inside using an upside-down removable hook.
- Magnetic hanger: Useful for compatible metal doors or paired magnets on some glass doors.
- Exterior-rated removable hook: Convenient on smooth, properly prepared surfaces when the wreath stays within the hook’s listed weight limit.
- Existing screw or nail: Appropriate when the door already has permanent hanging hardware.
Better Homes & Gardens describes ribbon, over-the-door hooks, adhesive hooks, and magnetic hangers as practical wreath-hanging options. Lowe’s also markets magnetic hangers as a damage-conscious solution, while Southern Living recommends removable and tension-based systems for seasonal greenery when permanent holes are undesirable.
Never assume an adhesive product will be safe for every paint or finish. Read the manufacturer’s surface, temperature, preparation, curing-time, and weight instructions before attaching the wreath.
How to Make a Budget Wreath Look More Expensive
Use More Greenery Near the Outer Edge
Extend several branches beyond the wreath form to increase the apparent diameter. A fourteen-inch frame can look substantially larger when greenery radiates outward.
Repeat Materials
Repeating the same ribbon, ornament finish, or berry color in three locations creates visual rhythm. Random decorations look like leftovers. Repeated decorations look like a plan.
Mix Matte and Shiny Finishes
Combining matte ornaments, glossy ornaments, velvet ribbon, metallic bells, and natural pinecones adds depth. Better Homes & Gardens has specifically highlighted the visual balance created by combining matte decorations with shinier holiday accents.
Hide the Mechanics
Turn the wreath over and trim excess wire, glue strings, mesh tails, and zip ties. Cover obvious attachment points with greenery tips or small ribbon loops. The front should look festive; the back should look tidy enough that it does not attack the paint.
Coordinate With the Porch
Repeat one wreath color in a doormat, planter, lantern, or ribbon around the doorway. Front-entry decorating guides from Real Simple, Better Homes & Gardens, and Southern Living emphasize cohesive color and repeated materials as an effective way to make an entrance feel deliberately styled.
Common DIY Wreath Problems and Quick Fixes
The Wreath Looks Flat
Bend the greenery tips forward instead of leaving them pressed against the wire form. Add short filler pieces underneath existing branches to create lift.
The Center Hole Has Disappeared
Move inward-facing branches toward the outer edge. A visible center opening helps the wreath retain a clear circular shape.
The Bow Keeps Drooping
Use wired ribbon and secure the bow directly to the metal frame. Shorten excessively long loops, which can collapse under their own weight.
The Decorations Keep Falling Off
Replace glue-only connections with floral wire or zip ties. Hot glue is useful for positioning lightweight filler, but mechanical fasteners are more dependable for ornaments, signs, bells, and pinecones.
The Wreath Scratches the Door
Cover exposed wire with felt, ribbon, foam tape, or soft hook-and-loop material. Add small felt pads to the back at the points that touch the door.
The Finished Design Is Too Busy
Remove one category of decoration. Keep the bow, ornaments, and berries, for example, but eliminate extra signs, flowers, bells, snowflakes, miniature gifts, and the tiny Santa who somehow joined the project without authorization.
Protecting and Storing Your Christmas Wreath
A covered porch generally provides better protection than an exposed door. Direct sun, rain, strong wind, and repeated freeze-thaw cycles can fade ribbon, weaken glue, and make decorative coatings deteriorate. Choose weather-resistant materials for exposed locations and bring the wreath indoors during severe weather.
Avoid adding paper, untreated cardboard, delicate dried materials, or indoor-only electrical decorations to a wreath that will be exposed to moisture. Real Simple notes that direct sunlight and heat accelerate drying in fresh greenery, while Better Homes & Gardens cautions that fragile paper-based wreaths require protection from moisture and heat.
After Christmas, remove batteries from lights and electronic decorations. Place tissue paper inside bow loops to preserve their shape. Store the wreath upright in a wreath container, large plastic bag, or sturdy box. Do not stack heavy decorations on top unless your goal is to rediscover the wreath next year as a festive pancake.
A reusable wire, grapevine, or wicker base can also be redecorated for other seasons. Designers interviewed by The Spruce recommend keeping versatile wreath bases and replacing seasonal elements such as pinecones, flowers, eggs, berries, or ribbon throughout the year.
My Experience Making a Dollar Tree Christmas Wreath
The most useful lesson from making budget wreaths is that the shopping list matters less than the order of assembly. My early attempts usually began with ornaments because ornaments are fun, shiny, and highly persuasive. Unfortunately, attaching them first made it difficult to add greenery afterward. The branches pushed ornaments into strange positions, glue became visible, and the wreath developed one beautifully decorated side and one side that looked as though Christmas had been canceled.
Starting with the largest background material changed everything. Once the wreath form was covered with greenery or mesh, I could identify the thin areas before adding anything decorative. Small clippings were more useful than whole stems because they could be tucked into precise locations. One inexpensive stem often produced four or five usable pieces after cutting. That single habit made the wreath fuller while reducing the number of supplies required.
Dry-fitting also saved me from several questionable creative decisions. At one point, I had a large plaid bow, three bells, a wooden truck, two candy canes, six pinecones, and enough red berries to feed an imaginary flock of holiday birds. Individually, every piece was cute. Together, they resembled a Christmas parade trapped in a traffic circle. Removing the truck and half the berries immediately made the design feel calmer and more expensive.
I also learned to photograph the wreath before attaching anything permanently. A phone camera reveals balance problems that are surprisingly easy to miss while standing over a worktable. In photographs, I could see when one side was too heavy, when the bow was blocking the center opening, or when ornaments formed an accidental straight line. Moving one cluster by two inches sometimes improved the entire composition.
The bow was the most frustrating part until I stopped trying to tie it like a shoelace. Building loops by pinching the center gave me more control, especially with wired ribbon. I secured the center tightly, attached separate tails, and then shaped each loop after the bow was on the wreath. This method was easier than wrestling several feet of ribbon into one heroic knot.
Hanging the finished wreath provided another lesson: lightweight does not automatically mean stable. A wreath can weigh very little and still bounce every time the door closes. Adding two small felt pads to the lower back reduced movement and protected the door. Securing the central sign at two points also prevented it from rotating sideways. Nothing undermines a cheerful welcome faster than a sign that reads “Merry Christmas” at a forty-five-degree angle.
The best budget-saving discovery was that a wreath does not need decorations around its entire circumference. A concentrated asymmetrical arrangement can look intentional and modern while using fewer supplies. Greenery covered most of the frame, while the ornaments, berries, pinecones, and bow formed one generous cluster near the lower side. The open greenery created breathing room, and the focal cluster appeared more substantial because it was not competing with decorations everywhere else.
Finally, I learned not to judge the wreath while sitting twelve inches away from it. Handmade decor is meant to be seen on a door, usually from a porch, sidewalk, or driveway. Tiny glue strings and slightly uneven loops disappear at that distance. Strong color contrast, a recognizable shape, and a well-positioned bow matter far more than microscopic perfection. Once hung, even a modest Dollar Tree wreath can deliver a warm, personal welcomeand it comes with the satisfaction of knowing you made it yourself without requiring a holiday decorating loan.
Final Thoughts
A DIY Dollar Tree Christmas wreath for the front door succeeds when it combines a sturdy base, layered greenery, a controlled color palette, secure attachments, and one clear focal point. Start with inexpensive materials, work from large elements to small details, and resist the temptation to use every decoration in the package.
Your wreath does not need to resemble anyone else’s. Add family initials, favorite colors, miniature toys, vintage ornaments, rustic bells, or a ribbon that coordinates with your porch. The goal is not to fool guests into believing the wreath came from an expensive boutique. The goal is to make something festive, welcoming, and personalalthough looking boutique-worthy for around twenty dollars is certainly a delightful bonus.