
Moving has a funny way of making perfectly reasonable adults argue about whether an expired bottle of barbecue sauce deserves space in are sitting on the floor surrounded by tangled charging cables and wondering why you own seven spatulas.
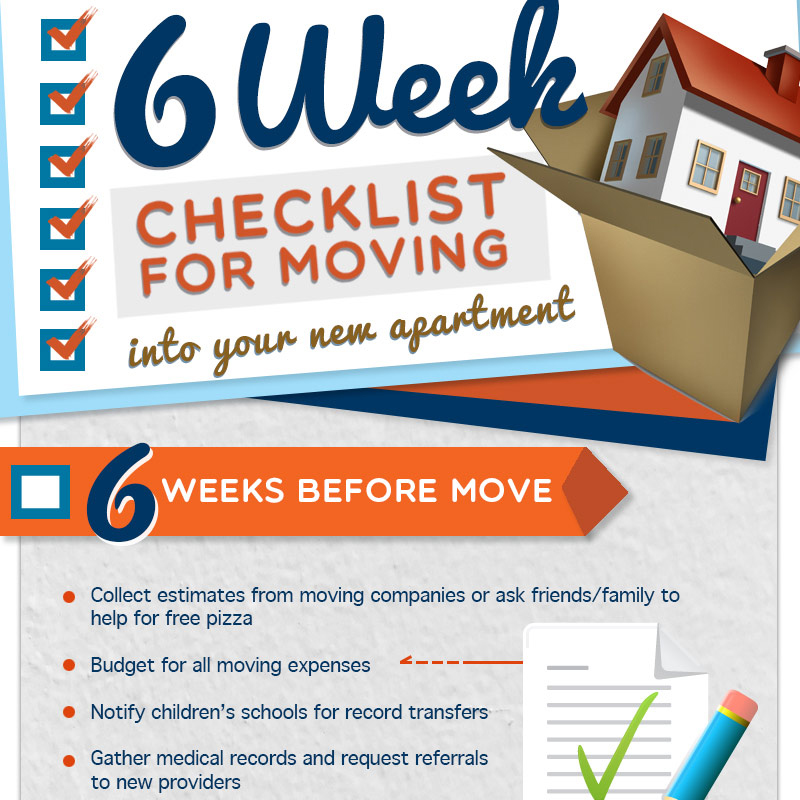
A successful move is not about achieving military-level perfection. It is about doing the right tasks in the right order. This 6 week checklist for moving breaks the process into manageable weekly steps, giving you enough time to compare movers, reduce clutter, organize paperwork, pack safely, transfer services, and prepare for moving day without living in a cardboard fortress for a month.
Use the checklist as a flexible timeline. A local apartment move may require fewer arrangements, while an interstate relocation, family move, or cross-country journey may need additional planning. Either way, starting six weeks ahead gives you room to solve problems before they become expensive emergencies involving a rented truck, a locked loading dock, and several deeply unimpressed relatives.
Before Starting Your Six-Week Moving Countdown
Choose a target moving date and work backward from it. Confirm when your lease ends, when possession of your new home begins, and whether either building has restrictions involving elevators, parking, loading areas, or move-in hours. Midweek and midmonth dates may offer more availability than popular weekend or month-end dates, although actual pricing depends on location, season, demand, and the services required. one moving command center. This can be a physical binder, a cloud folder, or both. Keep estimates, contracts, receipts, inventories, measurements, confirmation numbers, utility records, school documents, and contact information in one place. Your future self will appreciate not having to search 4,000 screenshots for the mover’s arrival time.
Week 6: Build the Plan and Hire Help
Set a Realistic Moving Budget
Begin with a written budget covering more than the moving truck. Include packing materials, professional labor, transportation, fuel, lodging, meals, pet care, child care, cleaning, storage, building fees, tips, and a cushion for unexpected costs. If you are moving yourself, account for equipment such as dollies, furniture pads, straps, and additional vehicle mileage.
Separate expected costs into three categories:
- Required costs: movers, truck rental, fuel, deposits, and packing supplies.
- Optional costs: professional packing, temporary storage, cleaners, and specialty handling.
- Emergency reserve: money for delays, replacement supplies, extra labor, lodging, or last-minute repairs.
A practical budget prevents the classic moving mistake of spending generously on color-coded labels and then discovering that the couch requires an additional handling fee.
Research and Compare Moving Companies
For a professional move, request written estimates from several companies. Provide a complete description of what will be moved, including stairs, elevators, long carries, oversized furniture, storage stops, and difficult access. An estimate based on incomplete information may look attractive initially and become much less charming on moving day.
For an interstate move, verify the company through the Federal Motor Carrier Safety Administration and review its registration, complaint information, and safety records. Read every estimate, inventory, valuation option, and bill of lading before signing. Be cautious of unusually low quotes, large upfront payment demands, blank documents, vague company identities, or businesses unwilling to inspect the shipment or collect a detailed inventory. a Master Moving Checklist
Divide the move into major workstreams: hiring, packing, address changes, utilities, transportation, cleaning, family arrangements, and new-home preparation. Assign responsibilities to household members. “Everyone helps” is a lovely sentiment, but “Jordan packs the garage by Saturday” is a plan.
Week 5: Declutter, Measure, and Take Inventory
Decide What Is Worth Moving
Go room by room and sort belongings into four groups: keep, sell, donate, and discard. Start with storage areas, guest rooms, closets, and garages because they often contain items you use least frequently.
Ask three questions about uncertain belongings:
- Have I used this during the past year?
- Would I buy it again today?
- Is moving it cheaper and easier than replacing it?
Starting the decluttering process at least several weeks before moving gives you time to sell useful items, make donation trips, and use appropriate disposal services. It also reduces the number of boxes, labor hours, and square feet of truck space you may need. e Furniture and Doorways
Measure large furniture, doorways, hallways, staircases, elevators, and the rooms in your new home. Sketch a basic floor plan and decide where major pieces will go. This prevents you from paying to transport a sectional sofa that will never make it around the new staircase.
Identify furniture that needs to be disassembled. Photograph complicated assemblies before taking them apart, place hardware in labeled bags, and attach each bag securely to the corresponding item.
Create a Home Inventory
Record valuable belongings with photographs, serial numbers, descriptions, and estimated values. A simple spreadsheet or home inventory app can help you track what is being moved and which box contains it. Organizing the inventory by destination room makes unloading and unpacking much faster. : Gather Supplies and Start Packing
Buy the Right Packing Materials
Gather sturdy boxes, packing tape, packing paper, bubble wrap, markers, labels, mattress bags, stretch wrap, and specialty containers when needed. Use smaller boxes for books, canned goods, and heavy tools. Reserve larger boxes for pillows, bedding, lampshades, and other lightweight belongings.
Avoid creating enormous boxes that require the strength of three professional wrestlers to lift. A box should close flat, hold its shape, and be manageable for one person whenever possible.
Pack Nonessential Items First
Begin with belongings you will not need during the next month:
- Seasonal clothing and decorations
- Books and collectibles
- Artwork and decorative accessories
- Extra linens and guest-room supplies
- Specialty cookware and duplicate kitchen tools
- Hobby equipment that is not currently in use
Packing nonessentials six to eight weeks ahead is commonly recommended because it spreads the workload across several manageable sessions instead of producing one exhausting weekend. A room-by-room approach also keeps unpacking more organized. Clear Labeling System
Label every box on the top and at least one side. Include the destination room, general contents, handling instructions, and an unpacking priority. For example:
KITCHEN Pots and baking pans Priority 2 Heavy
Number the boxes and record them in your inventory. Instead of wondering whether the coffee maker disappeared into another dimension, you will know it is in Kitchen Box 07.
Handle Hazardous Materials Correctly
Moving companies and rental trucks may restrict flammable, corrosive, reactive, or toxic products. Review policies for paint, fuel, propane, pesticides, pool chemicals, cleaners, fireworks, and automotive fluids. Do not pour unwanted chemicals down drains or place hazardous batteries in ordinary recycling. Contact your local environmental, health, or solid-waste agency for approved household hazardous-waste options. : Handle Addresses, Records, and Services
Submit Your Change of Address
Arrange mail forwarding through the official U.S. Postal Service process and update your address directly with organizations that send important documents. Mail forwarding is useful, but it does not permanently update your account information everywhere. relevant organizations, including:
- Banks, credit-card companies, and lenders
- Employers and payroll departments
- Insurance providers
- Health-care providers and pharmacies
- Subscription and delivery services
- Schools and child-care providers
- Professional licensing organizations
- Government agencies when applicable
The Internal Revenue Service provides several address-change methods, including filing Form 8822 for individuals or using a new address on a tax return. State tax agencies and motor vehicle departments have their own requirements and deadlines. le Utility Transfers
Contact electricity, gas, water, trash, internet, security, and other service providers. Schedule disconnection at the old home after you expect to finish cleaning and schedule activation at the new home before arrival whenever possible.
Confirm whether a technician must enter the property, whether deposits are required, and whether equipment needs to be returned. Save confirmation numbers and take final meter photographs when appropriate. Setting up services ahead of time helps prevent arriving at a dark home with no internet and one rapidly warming refrigerator. er School, Medical, and Pet Records
Request school transcripts, vaccination documents, prescriptions, medical records, and veterinary information. Research new providers before the move, particularly when someone in the household needs regular care or medication.
For pets, verify identification tags and microchip contact information, obtain necessary health documents, and plan safe transportation. Keep familiar bedding, food, medication, water, and cleaning supplies accessible during the journey.
Week 2: Confirm Logistics and Pack Most of the Home
Reconfirm Every Moving-Day Detail
Contact the moving company or rental provider and confirm the date, arrival window, addresses, telephone numbers, services, expected charges, payment method, parking arrangements, and special handling instructions. Confirm elevator reservations and loading permits with building management.
Review the mover’s paperwork again. Make sure you understand the estimate, inventory, valuation coverage, claims process, and delivery window. Keep signed documents accessible until delivery is complete and any claims have been settled. aily-Life Items Strategically
By the end of this week, most belongings should be packed. Leave out only items needed for approximately ten days, such as basic cookware, work clothing, toiletries, medications, children’s essentials, pet supplies, and cleaning products.
Back up computers and phones. Photograph electronic connections before unplugging them, label cords, and pack devices in original boxes when available. Keep passwords, backups, and critical files secure rather than relying on a laptop buried somewhere beneath the waffle maker.
Plan Food and Cleaning
Stop buying large quantities of groceries and begin using refrigerated and frozen food. Confirm whether your mover will transport food and whether a long trip makes doing so practical.
Schedule professional cleaners or build cleaning time into your moving plan. Gather supplies for patching small holes, wiping cabinets, cleaning appliances, sweeping floors, and removing trash.
Week 1: Prepare for the Final Push
Pack a First-Night Essentials Kit
Pack essentials in suitcases, clear bins, or clearly marked boxes that travel with you or are loaded last. Include:
- Medications and basic first-aid supplies
- Important documents, keys, and identification
- Phone chargers and a portable battery
- Toiletries, towels, and toilet paper
- Two changes of clothing
- Bedding and pillows
- Snacks, water, coffee, and simple cookware
- Pet food, leashes, carriers, and medication
- Children’s comfort items and bedtime supplies
- Basic tools, scissors, tape, and cleaning products
An essentials kit should be transported in your vehicle or placed where it can be unloaded first. Emergency-preparedness guidance also supports keeping copies of important documents, cash, water, food, flashlights, batteries, and essential medical information readily accessible. Packing and Prepare the Property
Complete all remaining packing except for immediate necessities. Empty furniture compartments unless your mover specifically approves leaving contents inside. Remove pictures, curtains, shower rods, and wall-mounted accessories. Defrost and dry freezers according to manufacturer instructions.
Dispose of trash, return borrowed items, collect spare keys, and check the attic, basement, shed, crawl space, garage, and outdoor storage areas. Prepare a folder containing contracts, receipts, inventory records, and contact details.
Protect Valuables and Personal Documents
Carry jewelry, cash, identification, financial documents, medication, legal papers, irreplaceable photographs, and small electronics yourself. Do not place these items in an unattended truck or an ordinary box labeled “miscellaneous,” the natural habitat of things that disappear for six months.
Moving Day Checklist
Before Loading Begins
- Charge your phone and keep chargers accessible.
- Protect floors, walls, railings, and doorways.
- Confirm the mover’s identity and paperwork.
- Review the inventory and note existing damage.
- Keep children and pets in a secure area.
- Reserve a clear path between rooms and the truck.
- Keep water, snacks, and basic supplies available.
During Loading
Stay available to answer questions and supervise the process. Confirm that fragile items receive appropriate handling and that every item appears on the inventory. Provide the driver with your contact information and directions to the destination.
Before the truck leaves, perform a complete walkthrough. Open every cabinet, closet, drawer, appliance, and storage area. Check behind doors, inside the dishwasher, beneath stairs, in the attic, and in the oven drawerthe unofficial retirement community for forgotten baking sheets. Official moving guidance recommends staying until loading is complete and checking the property carefully before departure. New Home
Direct boxes to their labeled rooms and compare delivered items with the inventory. Inspect furniture and cartons for visible damage before signing final delivery documents. Photograph problems immediately and follow the mover’s written claims procedure.
Unpack the bathroom, beds, medications, pet supplies, and basic kitchen items first. Trying to organize the decorative pillows before finding the toothbrushes is how moving day becomes a psychological experiment.
The First 48 Hours After Moving
Focus on safety and basic function before decorating. Confirm that water, electricity, heating, cooling, internet, and major appliances work. Test smoke and carbon-monoxide detectors, locate shutoff valves and the electrical panel, and change exterior locks when appropriate and permitted. one complete room at a time rather than opening every box simultaneously. Begin with bedrooms, bathrooms, and the kitchen. Break down empty boxes as you go and maintain a small donation container for belongings that no longer make sense in the new space.
Explore the immediate neighborhood and identify the nearest grocery store, pharmacy, urgent-care center, gas station, veterinarian, and emergency services. Then order dinner, sit somewhere comfortable, and acknowledge that you successfully relocated your entire life using tape, lists, and an unreasonable number of boxes.
Moving Experiences That Make a Six-Week Plan Work Better
Moving advice often sounds wonderfully simple on paper: label everything, book reliable help, and pack early. The experience of actually moving reveals why those steps matter. The biggest problems are rarely dramatic. They are usually a collection of small oversights that arrive together at the least convenient moment.
Consider a typical two-bedroom move. Six weeks out, the household believes it does not own very much. Then someone opens the hallway closet and discovers camping gear, three broken umbrellas, wrapping paper from 2019, and a mysterious electronic device nobody recognizes. Decluttering early changes the entire move. It provides time to donate useful belongings thoughtfully instead of throwing everything into expensive boxes during a midnight panic.
Another lesson is that vague labels are almost useless. A box marked “stuff” may technically be accurate, but it offers no help when someone needs a can opener. A better label identifies the room, contents, and urgency: “KitchenCoffee, mugs, toasterOpen first.” Detailed labels take a few additional seconds while packing and can save hours after arrival.
People also tend to underestimate the value of measurements. A cabinet can look perfectly reasonable in the old house and become an architectural enemy at the new one. Measuring doorways, elevator interiors, stair turns, and furniture dimensions early gives you time to disassemble, sell, replace, or reroute oversized pieces. Discovering that problem while four movers are billing by the hour is a far more expensive form of geometry.
The first-night kit is another task that seems optional until it is missing. After a long day, nobody wants to open twelve kitchen boxes to find one fork. A useful kit should support the household through at least one night and the following morning. Bedding, toiletries, medication, chargers, basic tools, pet supplies, snacks, coffee, and clean clothes can transform the first evening from survival mode into something almost civilized.
Experienced movers also confirm arrangements rather than assuming earlier conversations are still accurate. A reservation made weeks ago may contain an outdated telephone number, a missing elevator requirement, or the wrong arrival address. One confirmation call during the final week can catch errors while there is still time to correct them.
Children and pets add another layer. Packing may remove the familiar objects and routines that make home feel stable. Keeping favorite toys, bedding, food, school supplies, and comfort items available can make the transition easier. A designated quiet room on moving day also keeps pets away from open doors and children away from heavy furniture and busy walkways.
Finally, a good checklist should leave room for imperfection. A box may be mislabeled. Dinner may come from a drive-through. The internet technician may arrive during the only ten minutes when everyone is at the old house. The goal is not a flawless performance. The goal is to protect important belongings, meet essential deadlines, control costs, and create enough structure that one unexpected problem does not derail the entire move.
A six-week plan works because it turns one enormous project into dozens of small decisions. During Week 6, you choose help and build the budget. During Week 5, you reduce the load. During Week 4, you establish a packing rhythm. During Week 3, you handle records and services. During Week 2, you confirm logistics. During Week 1, you prepare for immediate needs. By moving day, the big decisions have already been made.
That is the real advantage of this 6 week checklist for moving: it does not eliminate every surprise, but it prevents most surprises from arriving at the same time.
Conclusion
Moving will probably never qualify as a relaxing hobby, but it does not have to become six weeks of uncontrolled chaos. Start with the decisions that affect everything else: your date, budget, transportation, and mover. Then declutter, pack in stages, transfer records and services, confirm the details, and protect the essentials you will need immediately.
Follow this timeline consistently, adjust it to your household, and check off a few tasks every day. When the final week arrives, you will be closing boxes rather than making major decisions. You may still lose the tape dispenser occasionally, but at least you will know which labeled box contains the backup.
Editorial note: This article synthesizes current guidance from U.S. government agencies, consumer-protection organizations, housing publications, and moving experts. Requirements involving movers, utilities, insurance, leases, vehicle registration, waste disposal, and address changes may vary by state, provider, property, and type of move. Verify the rules that apply to your relocation.>