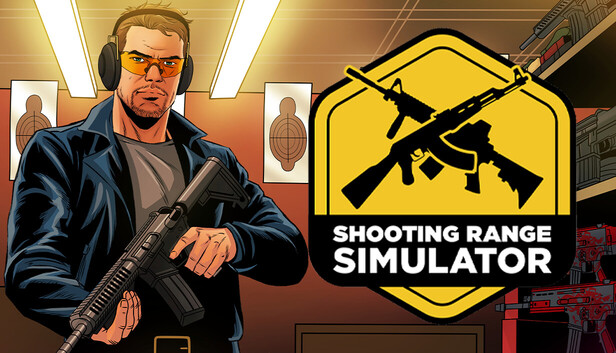
There is a unique, high-stakes thrill that comes with holding a single position against overwhelming odds. Stationary turret shooters strip away the freedom of movement found in modern FPS titles, forcing players to rely on raw reflex, precise aiming, and strategic foresight. Whether you are reliving the tension of classic arcade style gallery shooters or defending a critical objective in a modern tactical title, success in this sub-genre is rarely about how fast you can run—it is about how efficiently you can manage the space around you. To survive, you must master the art of target prioritization, projectile avoidance, and resource management.
In this guide, we dive deep into the mechanics that separate casual players from stationary masters. From optimizing your weapon upgrade and customization paths to understanding the geometry of cover-based tactical firefights, we provide the actionable advice you need to improve your efficiency. Learn how to transform from a sitting duck into an impenetrable defensive force that keeps your enemies at bay.
1. Mastering the Mechanics and Tactical Positioning of Stationary Turret Shooters
1.1 Tactical Foundations for Static Defensive Play
1.1.1 Evaluating Map Geometry for Optimal Chokepoint Management
Success in stationary turret shooters relies heavily on your ability to read the battlefield. Map geometry dictates your survival; look for structural bottlenecks where enemy movement is naturally funnelled. By locking down these chokepoints, you convert a wide-open map into a controlled kill zone. Always prioritize high-ground positions that offer line-of-sight advantages while minimizing the surface area you expose to incoming fire.
1.1.2 Balancing Field of View Against Exposure to Long-Range Threats
The primary trade-off in static gameplay is between vision and vulnerability. While a wide field of view allows you to suppress multiple enemy paths, it also makes you a prime target for long-range attackers. When settling into a position, ensure you have immediate access to hard cover. If a spot offers a panoramic view but leaves you wide open, you are likely overextending. Effective play requires constant scanning of distant perches where snipers often hide.
1.1.3 Managing the Risk of Immobilization in High-Mobility Metas
In modern shooters where mobility is king, standing still feels counterintuitive. To combat this, you must treat your position as a temporary resource rather than a permanent home. Adopt a mindset where you move to a new vantage point every two to three waves of engagement. Staying mobile between stationary bursts prevents enemies from flanking your position or zeroing in on your coordinates.
1.2 Essential Strategies for Turret Deployment and Maintenance
1.2.1 Timing Deployment Cycles to Match Enemy Waves or Team Pushes
Your turret should never be deployed haphazardly. Sync your deployment cycles with the ebb and flow of the match. For example, wait until a teammate initiates a push before setting up, ensuring your suppressing fire provides the cover they need to advance safely. Knowing when to hold your fire is just as critical as knowing when to unleash it.
1.2.2 Executing Cross-Fire Patterns to Protect Blind Spots
A lone turret is easily outflanked. Coordinate with teammates to create overlapping zones of fire. When your turrets are angled to cover each other’s blind spots, you create a defensive web that becomes incredibly difficult for opponents to infiltrate. This level of coordination effectively turns a standard automatic turret defense into a formidable wall of lead.
1.2.3 Mastering Resource Management for Emergency Redeployment
Always keep a portion of your cooldowns or resources in reserve. Getting caught with your turret on a long recharge timer during an enemy ambush is a recipe for defeat. Develop the habit of manual retraction if the combat intensity dips, as this often reduces the cooldown duration compared to letting the turret be destroyed by enemy fire.
1.2.4 Minimizing Predictability Through Dynamic Positioning Cycles
Predictability is the enemy of the defensive player. If you occupy the same corner for an entire round, you invite enemy counter-measures. Rotate through at least three different anchor points throughout the map to keep opponents guessing. When you frequently change your setup point, you force the enemy team to commit resources to scouting you rather than pushing objectives.
1.3 Advanced Defensive Synergies
1.3.1 Coordinating Shield and Healing Support for Sustained Uptime
Static play is significantly more effective when combined with support utility. Align your turret placement with team-based barriers or healing zones. By anchoring your turret behind a shield, you extend its operational lifespan, allowing you to focus purely on target acquisition rather than defensive maneuvering.
1.3.2 Utilizing Turret Placement as a Decoy for Bait-and-Switch Tactics
Sometimes, the best use of a turret is to draw attention. By placing a turret in a semi-exposed position, you can bait enemies into attacking it, exposing them to your teammates who are waiting in ambush. This bait-and-switch technique forces opponents to make suboptimal decisions under pressure, turning your defensive equipment into a tool for aggressive map control.
1.3.3 Adapting to Anti-Stationary Counterplay and Sniping Tactics
Sophisticated players will eventually adjust their loadouts to specifically counter your presence. If you notice an increase in anti-stationary gadgets or sniper fire, pivot your strategy immediately. Rather than fighting fire with fire, adjust your placement to lower levels of the map or move into tighter corridors where long-range projectiles cannot reach you. Adaptability is the final layer of mastery in this sub-genre.
Optimizing Stationary Turret Shooters Through Customization and Upgrades

Mastering stationary turret shooters requires more than just raw reflexes; it demands an analytical approach to your loadout. By understanding how weapon upgrades and customization influence your turret’s performance, you can turn a vulnerable defensive position into an impenetrable stronghold.
Prioritizing High-Alpha Damage Versus Sustained Suppression Fire
The core of your build strategy lies in selecting between burst damage and sustained fire. High-alpha damage builds are designed for players who need to neutralize high-priority targets, such as armored elites or snipers, in a single volley. This playstyle rewards precision and trigger discipline. Conversely, sustained suppression fire is ideal for crowd control, forcing enemy movement and creating cover-based tactical firefights where the opposition is too busy hiding to mount an effective counter-offensive. Choose high-alpha when your objective is objective-clearing and sustained fire when you are tasked with holding a chokepoint against waves of weaker infantry.
Extending Effective Engagement Ranges for Open-Map Dominance
In maps with expansive lines of sight, your biggest enemy is damage drop-off. Investing in barrel attachments or optics that extend your effective engagement range is vital to prevent enemies from picking you off from safety. This allows you to exert map control well beyond the standard engagement zones. Balancing this reach with stability upgrades ensures that you can maintain accurate fire on distant targets, turning your static position into a long-range threat that dictates the flow of the entire match.
Balancing Reload Speed and Heat Management for Higher DPS
Nothing exposes a player in a stationary position more than a long reload animation or an overheated barrel. To maintain optimal uptime, prioritize upgrades that decrease reload times or increase your weapon’s heat capacity. In fast-paced arcade style gallery shooters, even a second of downtime can lead to a compromised position. By tightening the gap between firing cycles, you ensure a higher consistent damage-per-second (DPS) output, which is often the difference between holding your ground and being overrun by incoming waves.
Integrating Elemental Effects for Crowd Control and Debuffs
Modern turret customization often allows for elemental modifiers that drastically change how your weapon interacts with targets. Incorporating frost effects can slow down aggressive rushing units, while burn or shock modifiers provide essential debuffs that wear down tough enemies. These effects are particularly useful for creating synergy with teammates, as they set up enemies to take increased damage from your squad’s primary weapons.
Improving Turret Durability Against High-Damage Sniper Profiles
When you are locked into a projectile avoidance shooters scenario, your durability is your lifeblood. Upgrading your turret’s armor plating or shield generators is a priority when facing high-damage sniper profiles. By mitigating the burst damage from long-range threats, you buy yourself the necessary time to identify and suppress those dangerous targets before your defensive integrity fails.
Selecting Tiered Upgrades Based on Resource Scarcity
Resource management is a critical skill for any high-level player. You must learn to evaluate which upgrades offer the most “bang for your buck.” In situations where currency or salvage is limited, focus on base damage and critical hit chance before investing in niche utility perks. Regularly reviewing boss fight combat training patterns can help you identify which specific upgrades will help you bypass common mechanical hurdles.
Overcoming Tunnel Vision During Stationary Combat
Tunnel vision is the silent killer of stationary players. It is easy to get hyper-focused on an incoming wave, forgetting to scan for flanking maneuvers or sniper glints. To combat this, physically shift your viewpoint periodically, even when you are behind your turret. Maintain awareness of your periphery to ensure that you are not being baited into a position that lacks an exit strategy.
Recognizing the Threshold for Abandoning a Compromised Position
Every defensive position has a shelf life. Knowing when to quit is as important as knowing where to set up. If your turret health falls below 30 percent or if multiple enemies have successfully flanked your line of sight, it is time to pack up. Abandoning a position to reset and re-engage from a new angle is a hallmark of an expert player; stubbornly dying at a lost post only feeds the opposing team.
Analyzing Performance Data to Refine Loadout Efficiency
The best way to improve is through objective analysis. After every match, take a moment to look at your accuracy stats, time-to-kill, and total damage output. If your reload speed is constantly hindering you, shift your customization points to prioritize efficiency. Iterating on your loadout based on hard performance data will allow you to fine-tune your playstyle for maximum effectiveness in any game mode.
Mastering stationary turret shooters is about far more than just holding down the trigger; it requires a disciplined approach to map awareness, loadout optimization, and tactical adaptability. Whether you are engaging in intense, cover-based tactical firefights or managing the high-pressure environment of arcade style gallery shooters, your success depends on your ability to balance offensive suppression with smart defensive positioning. By focusing on efficient resource management and refining your weapon upgrade and customization paths, you can turn static defenses into impenetrable walls that dictate the flow of the battlefield.
As you continue to refine your skills, remember that the most effective players are those who treat every engagement as a learning opportunity. If you enjoy testing your precision and reflexes against wave-based challenges, you might find our guide on target practice range simulators helpful for honing the mechanical aim required to excel in this genre. Ultimately, the transition from a target to a threat is defined by your tactical foresight and the strategic synergy of your chosen loadouts. Keep experimenting with different weapon combinations, stay mindful of your surroundings, and don’t be afraid to reposition when the situation demands a shift in strategy. With persistence, you will dominate the leaderboard in any stationary shooter you encounter.