Some craft projects arrive with glitter, drama, and a supply list long enough to qualify as a grocery receipt. Then there are mini yarn hats: tiny, cozy, ridiculously cute little winter caps made from leftover yarn and an empty toilet paper roll. They are proof that the recycling bin has been hiding a holiday craft department this whole time.
Inspired by the cheerful DIY spirit behind “Mini Yarn Hats- Upcycled Toilet Paper Roll ‘Jersey Girl Knows Best’”, this project turns a cardboard tube and scrap yarn into miniature hats that can be used as Christmas ornaments, gift toppers, garland decorations, doll accessories, classroom crafts, table place-card accents, or tiny winter décor that makes people say, “Wait… that used to be a toilet paper roll?”
The best part is that you do not need to knit, crochet, sew, or understand mysterious yarn terminology. No purling. No counting rows. No wondering why your scarf became a triangle. This is a simple loop-and-tie craft that works beautifully for beginners, families, teachers, and anyone who wants a budget-friendly project with big handmade charm.
Why Mini Yarn Hats Are So Popular
Mini yarn hats have become a favorite among DIY crafters because they hit the sweet spot between easy and impressive. They look like something from a boutique ornament shop, but the method is wonderfully simple. A small ring cut from a toilet paper roll becomes the hat brim. Short pieces of yarn are looped around the ring, pushed through the center, tied at the top, and trimmed into a fluffy pom-pom shape.
That is the whole magic trick. Cardboard becomes structure. Yarn becomes texture. A few minutes later, you have a tiny beanie that looks ready for a snowman with a strong sense of style.
This craft also fits several trends that continue to thrive in home décor and seasonal crafting: upcycling, handmade ornaments, cozy textures, low-waste projects, and personalized holiday decorating. Instead of buying another plastic ornament that looks like it came from the same factory as everyone else’s, you can make something warm, soft, and full of personality.
What Makes This Upcycled Toilet Paper Roll Craft Special?
At first glance, a toilet paper roll does not exactly scream “decorative potential.” It mostly whispers, “Please recycle me.” But in this project, the cardboard tube becomes the hidden base that gives each mini yarn hat its shape. Because the tube is lightweight, easy to cut, and already round, it is perfect for forming a tiny hat brim.
The upcycled element is one reason this project feels so satisfying. You are not buying a foam base or specialty ornament form. You are taking something ordinary and giving it a second life. That makes the craft inexpensive, eco-friendly, and great for using supplies you probably already have at home.
It is also a smart way to use leftover yarn. Every crafter has those small yarn scraps that are too pretty to throw away but too short to become anything major. Mini yarn hats give those leftovers a starring role. Even mismatched yarn pieces can become charming when arranged intentionally. Think of it as a tiny fashion show for yarn that was previously unemployed.
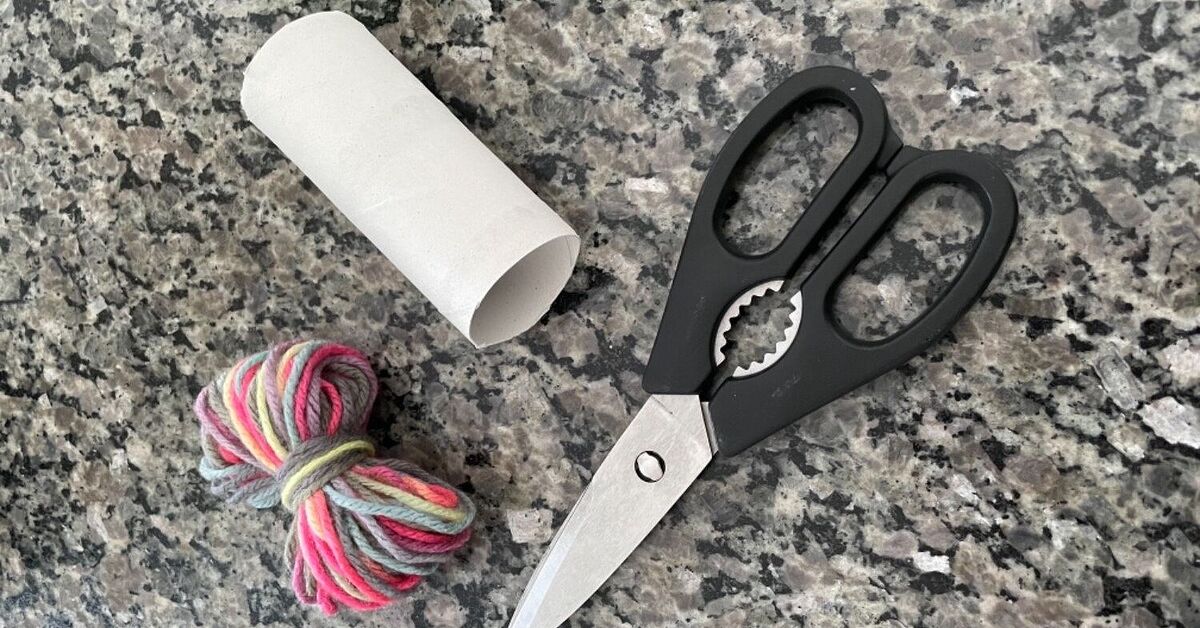
Supplies You Will Need
You only need a handful of materials to make mini yarn hats. Most of them are common household or craft-bin items.
Basic Supplies
- Empty toilet paper rolls or paper towel rolls
- Yarn in one or more colors
- Scissors
- Ruler or measuring tape
- Pencil for marking the cardboard
- Cotton ball, tissue, or scrap paper for shaping the hat
- String, twine, ribbon, or ornament hook for hanging
Optional Decorating Supplies
- Mini pom-poms
- Small beads
- Glitter thread or metallic yarn
- Gift tags
- Hot glue or craft glue
- Faux greenery for holiday styling
If children are helping, use child-safe scissors and skip hot glue unless an adult handles that part. The project is mostly knotting and looping, which makes it friendly for older kids, teens, and adults. Younger children can help choose colors, pass yarn pieces, or fluff the finished hats.
Best Yarn for Mini Yarn Hats
Medium-weight yarn is the easiest choice for this craft. Worsted weight yarn works especially well because it is thick enough to cover the cardboard ring but not so bulky that it becomes hard to thread through the center. Acrylic yarn is affordable, colorful, and widely available, making it a practical option for group crafting.
Chunky yarn can create a plush, oversized look, but you may need fewer strands. Thin yarn can work too, though it usually requires more pieces to cover the cardboard completely. If you want a soft wintery look, try cream, gray, icy blue, forest green, burgundy, or classic red and white. For a playful version, use rainbow yarn, school colors, sports team colors, or leftover strands from old projects.
Texture matters too. Smooth yarn gives a tidy beanie effect, while fuzzy yarn creates a cozy, snow-day look. Metallic yarn adds sparkle, but it can be slippery, so it works best mixed with regular yarn instead of used alone.
Step-by-Step Tutorial: How to Make Mini Yarn Hats
This method is beginner-friendly and does not require sewing, knitting, or crochet. Once you make one hat, the process becomes fast and almost addictive. Consider yourself warned: one tiny hat may become twenty tiny hats before you realize what happened.
Step 1: Cut the Cardboard Ring
Start with an empty toilet paper roll. Use a ruler and pencil to mark rings about half an inch to one inch wide. A narrower ring creates a smaller brim, while a wider ring gives the hat a chunkier cuff. Cut along the marks with scissors.
If the cardboard ring bends while cutting, gently round it back into shape with your fingers. It does not need to be perfect. Once the yarn is added, minor bumps disappear like magic.
Step 2: Cut the Yarn Pieces
Cut yarn pieces about 10 to 15 inches long. The exact length depends on the size of your cardboard ring and how fluffy you want the top of the hat to be. Longer strands are easier to work with because they give you more room to tie and trim later.
A quick trick is to wrap yarn around a book, piece of cardboard, or phone-sized object several times, then cut one end of the loops. This creates multiple equal-length strands at once. It is faster than measuring each piece individually, unless you enjoy turning craft time into a math test.
Step 3: Fold and Loop the Yarn
Take one strand of yarn and fold it in half. Place the folded loop through the cardboard ring. Pull the two loose ends over the ring and through the folded loop, then tighten gently. This creates a simple lark’s head knot around the cardboard.
Repeat this process around the entire ring, pushing the knots close together as you go. The goal is to cover the cardboard completely. If you can still see the toilet paper roll peeking through, add more yarn. Cardboard is useful, but it does not deserve a spotlight here.
Step 4: Push the Yarn Through the Center
Once the ring is covered, gather all the loose yarn ends and push them through the center of the cardboard ring to the other side. This flips the strands upward and creates the folded brim look. You will begin to see the hat shape appear.
If the yarn feels bulky, twist the strands together gently before pushing them through. A pencil or the blunt end of a crochet hook can help, but avoid anything sharp that might snag the yarn.
Step 5: Add Stuffing for Shape
Roll a small piece of tissue, scrap paper, or a cotton ball and tuck it inside the hat. This helps the mini hat hold a rounded shape instead of collapsing. Do not overstuff it; the goal is structure, not a tiny yarn helmet.
This step is especially helpful if you plan to use the hats as ornaments or gift toppers. A little hidden stuffing keeps the hat looking full and polished.
Step 6: Tie the Top
Cut another short piece of yarn and tie it tightly around the gathered strands near the top of the hat. This creates the pom-pom area. Double-knot the yarn so it stays secure.
If you want to hang the hat as an ornament, use the tying yarn to create a loop. You can also attach ribbon, twine, or clear ornament string afterward.
Step 7: Trim the Pom-Pom
Use scissors to trim the top yarn ends into a neat pom-pom shape. You can make it round and fluffy or leave it slightly wild for a playful handmade look. There is no official pom-pom police, so trim until it looks cute to you.
Shake the hat lightly to fluff the yarn, then adjust any strands that look uneven. Your mini yarn hat is finished.
Creative Ways to Use Mini Yarn Hats
Once you make a batch of mini yarn hats, you will start seeing places for them everywhere. They are small, lightweight, and easy to customize, which makes them surprisingly versatile.
Christmas Tree Ornaments
Add a hanging loop and place the mini hats on a Christmas tree. They pair beautifully with rustic ornaments, felt decorations, wood beads, handmade stars, and dried orange slices. Use matching colors for a polished tree or mix colors for a cheerful homemade look.
Gift Toppers
Tie a mini yarn hat onto wrapped gifts instead of using a traditional bow. It adds texture and makes the package feel personal. After opening the gift, the recipient can keep the hat as an ornament. That is basically two gifts in one, and one of them used to be recycling.
Winter Garland
String several hats together to make a winter garland for a mantel, shelf, classroom wall, or window. Alternate colors for a striped effect. Add wooden beads, felt snowflakes, or mini mittens for extra charm.
Place Cards and Party Favors
For a winter dinner, holiday brunch, or classroom party, tuck a name tag into each hat and use it as a place card. Guests can take the hats home afterward. This idea works especially well for cozy themes, ski-lodge parties, and handmade holiday tables.
Doll and Snowman Accessories
Mini yarn hats fit small dolls, plush animals, handmade snowmen, and gnome crafts. Try pairing them with cotton-ball snowmen, pinecone gnomes, or wood-slice characters. Suddenly every tiny object in your house can have winter fashion.
Color Ideas and Style Variations
Color is where this craft becomes personal. You can make every mini hat different or create a coordinated collection.
Classic Holiday Hats
Use red, white, green, and cream for traditional Christmas style. A red brim with a white top creates a Santa-inspired look, while green and white feels fresh and festive.
Neutral Farmhouse Hats
Choose ivory, oatmeal, taupe, gray, and soft brown for a farmhouse or Scandinavian-inspired look. These colors work beautifully with wood bead garlands, kraft paper wrapping, and simple evergreen branches.
Sports Team Hats
Use two or three team colors to create mini fan hats. These make fun ornaments for sports lovers, coaches, teachers, or family members who believe game day décor is a year-round lifestyle.
Rainbow Scrap Hats
Use leftover yarn in random colors for a bright, playful batch. This is a great option for kids because there are no strict rules. The results look cheerful, creative, and full of personality.
Monochrome Mini Hats
Use one color per hat for a clean, modern look. White hats feel snowy, black hats feel chic, and deep jewel tones look elegant on a holiday tree.
Common Mistakes and How to Fix Them
The Cardboard Shows Through
Add more yarn strands and push the knots closer together. If your yarn is thin, you will need extra pieces to cover the ring fully.
The Hat Looks Flat
Add a small piece of tissue or cotton inside the hat before tying the top. This gives the hat shape and prevents it from collapsing.
The Pom-Pom Looks Uneven
Trim slowly. Rotate the hat as you cut and take off tiny amounts at a time. Pom-poms are like bangs: one dramatic cut can change the whole situation.
The Yarn Slips Loose
Pull each loop snugly around the ring, but do not yank so hard that the cardboard bends. If needed, use thicker yarn or tie the top more tightly.
The Hat Is Too Big or Too Small
Adjust the width of the cardboard ring and the length of the yarn. A taller cardboard ring creates a chunkier brim. Longer yarn creates more height and fluff.
Why This Craft Is Great for Kids and Families
Mini yarn hats are a wonderful family craft because they are simple enough for beginners but still satisfying for adults. Kids can practice measuring, cutting, color matching, pattern making, and fine motor skills. Adults can enjoy the calm rhythm of looping yarn around the cardboard ring. It is the kind of project that works well with music, cocoa, and a table that is allowed to become slightly chaotic.
This craft is also budget-friendly for classrooms, scout groups, church events, library programs, and holiday workshops. One empty paper towel roll can create several rings, and a single skein of yarn can make multiple hats. If families collect toilet paper rolls and yarn scraps ahead of time, the cost becomes very low.
Another benefit is that there is room for creativity without pressure. Every mini hat turns out a little different, and that is part of the charm. Handmade crafts should look handmade. A slightly crooked pom-pom is not a failure; it is character.
Eco-Friendly Crafting: Small Project, Big Lesson
Upcycled crafts teach a useful lesson: not every creative project requires new materials. By reusing toilet paper rolls and leftover yarn, you reduce waste and encourage resourcefulness. It is a small action, but it helps build the habit of looking at everyday items differently.
That cardboard tube could become a mini hat, a napkin ring, a seed starter, a toy garage, a wreath element, or a holiday ornament. The point is not that every toilet paper roll must become art. The point is that creativity often begins with asking, “What else could this be?”
For kids, that question is powerful. It encourages imagination, problem-solving, and confidence. For adults, it is a reminder that crafting does not need to be expensive or complicated to be meaningful.
Extra Experience: What I Learned Making Mini Yarn Hats
The first thing you learn when making mini yarn hats is that they are much cuter than they have any right to be. You start with a cardboard ring that looks deeply unimpressive. Then you add yarn, flip it through the center, tie the top, and suddenly you are holding a tiny winter hat that looks like it belongs on a cheerful snowman with a mortgage and a hot cocoa habit.
One helpful experience is to cut more yarn than you think you need. The first time, many crafters underestimate how many strands it takes to cover the cardboard ring. A half-covered ring looks a little sad, like the hat is going through an awkward phase. When the yarn is packed closely together, the finished hat looks fuller, softer, and more professional.
Another tip is to keep the yarn lengths consistent. They do not need to be perfect, but wildly different lengths make the top harder to trim. Wrapping yarn around a book or cardboard template saves time and keeps the pieces fairly even. This is especially useful if you are making a dozen hats for ornaments or gifts.
Color planning also makes a big difference. A single-color hat looks clean and classic, while two-color hats feel more playful. For stripes, alternate yarn colors as you loop them around the ring. For a snowy look, use white yarn at the top and a colored brim. For a rustic holiday style, cream and gray yarns are surprisingly beautiful. Add twine as the hanging loop, and suddenly the ornament looks like it came from a cozy mountain cabin, even if you made it at the kitchen table next to a pile of laundry.
Stuffing is another small detail that improves the final result. A tiny piece of tissue or cotton inside the hat gives it shape. Without stuffing, some hats collapse inward, especially if the yarn is soft or thin. With stuffing, the hat stands up proudly, as if it knows it is adorable.
Trimming the pom-pom is the most satisfying part, but it is also where patience matters. Trim slowly and rotate the hat often. It is better to make several small cuts than one aggressive haircut. If the pom-pom looks too round, fluff it with your fingers. If it looks too wild, trim a little more. There is a sweet spot between “cute winter pom-pom” and “tiny yarn explosion.”
Mini yarn hats are also excellent for group crafting because everyone can succeed. Some crafts have a gap between the sample photo and the real-life result that feels personally insulting. This one is forgiving. Even beginners usually end up with something charming. The hats do not have to be identical. In fact, they look better when each one has its own personality.
Finally, this project is a reminder that handmade décor does not need to be fancy to feel special. A tiny yarn hat made from a toilet paper roll can carry the warmth of a winter afternoon, the fun of crafting with family, and the satisfaction of turning scraps into something worth keeping. That is the real charm of the “Jersey Girl Knows Best” style of upcycled crafting: practical, cheerful, a little clever, and completely lovable.
Conclusion
Mini Yarn Hats- Upcycled Toilet Paper Roll “Jersey Girl Knows Best” is the kind of craft that makes DIY feel joyful again. It is simple, affordable, beginner-friendly, and surprisingly stylish. With just yarn, a cardboard tube, scissors, and a few minutes, you can create ornaments, gift toppers, garlands, party favors, or tiny winter accessories full of handmade charm.
Whether you are crafting for the holidays, planning a classroom activity, using up leftover yarn, or looking for a cozy weekend project, mini yarn hats are a perfect choice. They prove that creativity does not always begin in the craft aisle. Sometimes it begins with an empty toilet paper roll and the bold decision to make it fashionable.