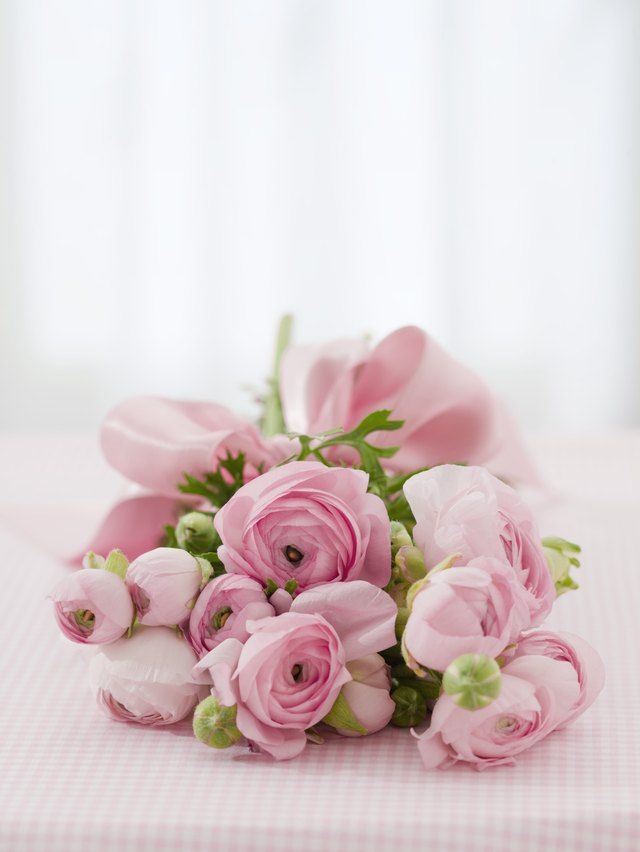

A teardrop wedding bouquet delivers all the romance of a dramatic cascading arrangement without requiring a refrigerated van, a hydration schedule, or a bridesmaid whose only job is to whisper encouraging words to wilting roses. When made with silk flowers, this elegant bouquet can be assembled weeks before the ceremony, adjusted as many times as necessary, and preserved long after the last slice of wedding cake disappears.
The classic design resembles an upside-down teardrop: full and rounded near the bride’s hands, gradually narrowing into a soft point below. The secret is not simply attaching long greenery to an ordinary round bouquet. A convincing teardrop bouquet needs a strong framework, carefully layered flowers, controlled movement, and enough visual balance to prevent it from looking like the bouquet is attempting an escape.
This detailed guide explains how to choose realistic artificial flowers, build the cascading silhouette, secure the stems, finish the handle, and correct common design mistakes. It also includes practical examples and experience-based lessons to help first-time floral designers produce a bouquet that looks polished from every camera angle.
What Is a Teardrop Wedding Bouquet?
A teardrop bouquet, also called a cascade or cascading bridal bouquet, has a rounded upper section that tapers downward into one defined point. Traditional cascade bouquets may be extremely long and loose, while a teardrop design is generally more controlled and symmetrical. It creates graceful vertical movement without completely covering the front of the wedding dress.
The shape works especially well with ball gowns, A-line dresses, cathedral-length veils, and formal ceremonies. However, a smaller teardrop bouquet can also complement a fitted dress, courthouse wedding, garden celebration, or modern minimalist event. The bouquet’s size should support the overall bridal look rather than arrive several seconds before the bride does.
Why Use Silk Flowers?
Modern artificial wedding flowers are available in silk-like fabrics, latex-coated materials, foam, and realistic “real touch” finishes. High-quality options often include natural-looking color variations, detailed leaves, flexible stems, and petals with softly curled edges.
Silk flowers offer several practical advantages:
- They can be arranged well before the wedding.
- They do not wilt in heat or dry indoor air.
- They are useful when a favorite flower is out of season.
- They can be reshaped, removed, and repositioned during assembly.
- They create a lasting keepsake after the ceremony.
- They are generally easier to transport than delicate fresh flowers.
Artificial flowers are not automatically inexpensive, especially when purchasing premium stems. Their greatest value is predictability. You can see the exact color, size, and condition of every flower before the wedding day, which is comforting when the rest of the event involves approximately 900 moving parts.
Supplies for a DIY Silk Flower Teardrop Bouquet
Flowers and Greenery
For a medium bridal bouquet, begin with approximately 20 to 30 flower and foliage stems. The exact quantity depends on the size of the blooms and the fullness you prefer.
- Five to seven focal flowers: roses, peonies, dahlias, garden roses, hydrangeas, or magnolias
- Six to ten medium flowers: ranunculus, spray roses, anemones, lisianthus, or carnations
- Three to six filler stems: baby’s breath, waxflower, berries, astilbe, or small blossoms
- Five to eight greenery stems: eucalyptus, ruscus, ivy, fern, jasmine vine, smilax, or olive branches
- Two to four trailing elements: hanging amaranthus, ivy, orchids, wisteria, narrow ferns, or flexible flowering vines
Long greenery such as Italian ruscus, ivy, and fern is particularly useful for creating the tapered lower section. Mixing several leaf shapes prevents the cascade from looking like one long green tail attached to a completely unrelated bouquet.
Tools and Finishing Materials
- Heavy-duty wire cutters
- Floral shears or strong scissors
- Green floral tape
- Floral wire in 18- to 22-gauge thicknesses
- A bouquet holder, floral cage, bouquet egg, or several sturdy base stems
- Hot glue gun and glue sticks
- Zip ties or thin cable ties
- Satin, velvet, chiffon, or grosgrain ribbon
- Decorative pins
- Optional lace, charms, lockets, or heirloom jewelry
- A vase, stand, or box for temporary support
A bouquet cage or bouquet egg is helpful for beginners because it creates openings that hold stems at different angles. A fully hand-wired design offers more freedom, but it requires careful binding to keep the bouquet stable.
Plan the Bouquet Before Cutting Anything
Silk flowers are forgiving, but a plan still saves time, wire, and mild emotional distress. Place every stem on a large table and sort the materials into focal flowers, supporting flowers, fillers, rounded greenery, and trailing greenery.
Choose a Color Palette
A professional-looking bouquet usually relies on a controlled palette rather than every attractive flower available in the craft store. Choose one of these easy formulas:
- Monochromatic: ivory, cream, and white
- Romantic: blush, champagne, dusty rose, and soft green
- Modern: white, deep green, and a small amount of black or burgundy
- Autumnal: rust, terracotta, plum, peach, and muted foliage
- Coastal: white, pale blue, soft peach, and silvery eucalyptus
Use several shades within the same color family. Real flowers rarely appear in one perfectly flat tone, so mixing ivory with warm white or blush with dusty pink creates a more believable result.
Decide on the Finished Size
For many brides, a bouquet approximately 11 to 14 inches wide and 16 to 22 inches long provides noticeable drama without becoming difficult to carry. Petite brides or brides wearing streamlined dresses may prefer a smaller arrangement. A large ballroom gown can support more width and length.
Before assembling, hold several stems in front of your body while standing near a mirror. Check how much of the dress the flowers cover. This simple test is more useful than choosing bouquet dimensions based entirely on a product photograph taken by someone who may be seven inches taller than you.
How to Make a Teardrop Wedding Bouquet With Silk Flowers
Step 1: Prepare and Shape the Artificial Stems
Remove price tags, plastic packaging, loose threads, and damaged leaves. Gently steam wrinkled fabric petals from a safe distance or use a hair dryer on a cool, low setting. Never press a hot tool directly against synthetic petals.
Bend leaves and flower heads into natural positions. Flowers should not all face straight upward. Angle some blooms forward, turn others slightly outward, and allow a few smaller flowers to face sideways. This variation creates depth and makes artificial flowers appear more lifelike. Michaels recommends shaping faux stems before arranging and positioning focal blooms at different heights rather than placing everything on one flat plane.
Step 2: Build the Longest Point of the Teardrop
Select one flexible vine or greenery stem to establish the bouquet’s maximum length. Position it so the tip hangs below the future center of the arrangement. This becomes the visual guide for the entire cascade.
Add two slightly shorter trailing stems on either side. The outline should narrow gradually toward the bottom. Avoid placing three pieces at exactly the same length, which can create a stiff, fork-shaped ending.
Secure these stems to the bouquet holder or temporary handle with floral wire. Add floral tape over the wire to prevent shifting.
Step 3: Create the Greenery Framework
Add medium-length greenery around the central cascade. Angle the upper stems outward to establish width, then direct lower stems downward to strengthen the teardrop shape.
Work with the bouquet facing you, but rotate it frequently. A design that looks perfect from the front may have a surprising bald spot on the side. Layer longer pieces near the bottom and shorter pieces toward the top to create an airy, sculptural silhouette rather than a dense wall of leaves.
Step 4: Establish the Rounded Upper Section
Place three to five focal flowers in the upper half of the bouquet. Begin with one bloom near the visual center, then position the others around it at slightly different heights.
Do not push every flower head into a perfect circle. A loose triangle or gentle oval often looks more natural. Leave enough space between focal flowers for medium blooms, filler flowers, and greenery.
At this stage, the bouquet may look slightly strange. That is normal. Floral arrangements often pass through an awkward phase similar to growing out bangs: you must remain calm and continue.
Step 5: Connect the Rounded Top to the Cascade
This is the most important step. Add two or three medium flowers below the focal cluster, following the downward line of the greenery. Use progressively smaller blooms as you move toward the tip.
For example, begin with large ivory peonies near the top, place medium blush roses through the middle, and finish the lower section with spray roses, small orchids, or individual ranunculus. This graduated scale visually connects the bouquet’s full upper portion to its narrow lower point.
Avoid placing one large flower at the very bottom. It can make the bouquet look heavy and may swing while the bride walks.
Step 6: Add Filler Flowers and Texture
Insert small blossoms, berries, and delicate greenery into visible gaps. Filler materials should soften transitions rather than bury the focal flowers.
Use texture strategically. A small amount of baby’s breath creates softness, berries add definition, and wispy fern introduces movement. For a contemporary design, limit filler and emphasize clean flower shapes. For a garden-style bouquet, allow a few stems to extend beyond the main outline.
Odd-numbered clusters of focal materials often feel less rigid than perfectly matched pairs. Varying stem height and spacing also gives the arrangement a more organic appearance.
Step 7: Strengthen the Teardrop Outline
Step back six to eight feet and examine the bouquet. The top should appear full, the middle should narrow gradually, and the bottom should end in one soft point.
Correct the outline by bending wired stems rather than immediately removing them. Artificial greenery can often be curved inward, tilted outward, or shortened by folding a hidden section of wire.
If the bouquet looks too round, add another medium-length vine through the lower half. If it looks too narrow, widen the upper greenery. If the cascade appears detached, add small flowers and short leaves through the transition zone.
Step 8: Check the Bouquet’s Weight and Balance
Hold the bouquet at waist level for several minutes. A cascade can become front-heavy, especially when large flower heads and long wired greenery are concentrated on one side.
Adjust the angle of the stems so the handle sits naturally in your hand. Move heavy blooms closer to the handle and use lighter materials toward the end of the cascade. You may also shorten or remove unnecessary plastic stems hidden inside the bouquet.
The finished arrangement should point downward when held comfortably. The bride should not need to rotate her wrist forward throughout the ceremony as though pouring tea from an unusually decorative kettle.
Step 9: Secure the Entire Bouquet
Once satisfied with the shape, bind the stems firmly with floral wire, a zip tie, or both. Place the binding point several inches below the flower heads so the bouquet remains compact while still allowing the upper stems to spread naturally.
Wrap floral tape tightly around the handle, stretching it slightly as you work. Floral tape adheres best when pulled and overlapped. Continue wrapping until all wires, sharp edges, and plastic branches are covered.
Apply hot glue only where necessary. A small amount can stabilize loose flower heads or secure stems inside a holder, but excessive glue adds weight and creates visible lumps. Keep fingers away from heated glue and allow every repaired section to cool before handling.
Step 10: Finish the Handle With Ribbon
Trim the stems to a comfortable length, generally leaving a handle about 5 to 7 inches long. Start the ribbon near the top of the handle and wrap downward with overlapping layers. Keep the ribbon smooth and moderately tight.
Secure the end with decorative pins inserted upward at an angle so the sharp points remain inside the handle. You can also use a discreet dot of hot glue beneath the ribbon.
For a romantic finish, tie long chiffon ribbons around the handle and allow them to trail beside the flowers. For a formal bouquet, use a neat satin wrap. Lace from a family wedding dress, a small portrait charm, or a piece of heirloom jewelry can add personal meaning without changing the basic structure.
How to Make Silk Flowers Look More Realistic
Mix Flower Sizes and Stages
Combine open flowers, half-open blooms, and buds. A bouquet filled only with fully opened, identical roses can resemble a store display. Natural flowers develop at different rates, so variation improves realism.
Hide Plastic Connections
Cover molded plastic joints with leaves, filler flowers, or floral tape. Remove unusually shiny foliage and replace it with more realistic greenery when necessary.
Use Color Variation
Mix warm ivory with cool white, pale blush with muted pink, or two different greens. You can also apply a small amount of florist-approved tint or matte floral spray, testing it on a hidden petal first.
Give the Bouquet Movement
Bend vines and delicate stems into soft curves. Perfectly straight lines are one of the fastest ways to announce that a bouquet is artificial. Cascading arrangements are especially attractive when the greenery appears to flow rather than hang vertically like electrical cords.
Choose Quality Focal Flowers
Spend more of the budget on the largest, most visible flowers. Less expensive filler stems can work well when used sparingly, but unrealistic focal blooms will dominate every photograph.
Common Teardrop Bouquet Mistakes
Making the Cascade Too Long
An extra-long bouquet can hide dress details, bump into the bride’s knees, and become tiring to hold. Start shorter than you think you need. Length can be added easily, while shortening a completed cascade may require rebuilding the lower section.
Using Too Many Flower Varieties
A complicated mix can look chaotic. Two or three primary flower types, one filler, and two or three greenery varieties are usually enough for a cohesive design.
Creating a Flat Front
When every flower is placed at the same depth, the bouquet loses dimension. Pull some flowers forward and recess others slightly. View the arrangement from the side as well as the front.
Forgetting the Back
The back does not need to be as elaborate as the front, but it should look finished. Add a few broad leaves to cover mechanics, wire, and exposed plastic stems.
Skipping the Carrying Test
A bouquet can look beautiful on a table and feel awkward in the hand. Practice carrying it while wearing shoes with a similar heel height to the wedding shoes. Walk, turn, sit, and hold it beside the body to identify balance problems.
Storing and Transporting the Finished Bouquet
Keep the completed silk flower bouquet in a clean, dry space away from direct sunlight, cooking odors, pets, and curious children. Cover it loosely with a clean cotton sheet or place it in a large breathable box. Avoid crushing it inside a plastic bag.
Transport the bouquet upright in a stable container padded with tissue paper or clean towels. Do not place heavy items on top of trailing flowers. Pack a small repair kit containing floral tape, wire cutters, ribbon, pins, extra filler stems, and a glue gun if electricity will be available at the venue.
Before the ceremony, gently reshape any flattened petals and reposition the cascade. A handheld steamer may help release wrinkles, but keep moisture and heat at a safe distance and follow the flower manufacturer’s care instructions.
Practical Experience: What Making a Silk Teardrop Bouquet Is Really Like
The first useful lesson is that a teardrop bouquet rarely looks correct during the first half of the process. Beginners often expect an instant waterfall shape after adding two vines and several roses. Instead, the arrangement may resemble a round bouquet wearing a leafy necktie. The transition becomes convincing only after medium flowers, short greenery, and filler stems are layered between the top and bottom.
A productive approach is to divide the project into two sessions. During the first session, prepare the stems, select the color palette, build the greenery framework, and place the main flowers. Then photograph the bouquet from the front, both sides, and slightly above. Leave it alone for several hours. Returning with fresh eyes makes uneven areas surprisingly obvious. One side may be wider, a focal bloom may be facing the floor, or the cascade may bend in a direction that looks accidental rather than artistic.
Another common experience is underestimating how much artificial stems weigh. A single silk peony feels light, but seven peonies, wired vines, a bouquet holder, floral tape, ribbon, and decorative charms can create a substantial arrangement. It is usually better to remove excess stem length and bulky plastic branches as the bouquet develops. However, cutting everything short at the beginning removes your ability to reposition flowers. Shape first, trim later.
Color also behaves differently once the flowers are grouped. A blush rose that looks subtle by itself may turn surprisingly peach beside cool white hydrangeas. For that reason, place all proposed flowers together under lighting similar to the ceremony venue. Check them in daylight and indoor light. Wedding photographers can adjust color, but they cannot negotiate peace between five unrelated shades of pink.
Many first attempts improve immediately when the designer reduces the number of flowers. Overfilling is tempting because empty spaces feel unfinished at close range. From normal viewing distance, however, small pockets of greenery and shadow create depth. Removing one large bloom can reveal several supporting flowers and make the bouquet appear lighter, more expensive, and more intentional.
The carrying angle is another detail that becomes clear only through practice. A teardrop bouquet is not usually held straight up like a microphone. The handle sits at a slight angle while the cascade points toward the floor. Mark the preferred front of the handle with a tiny pin, ribbon seam, or hidden dot so the bride can quickly orient the bouquet after setting it down.
Finally, expect to make adjustments on the wedding day. Artificial flowers do not wilt, but they can be flattened during transport. A vine may rotate, a ribbon tail may wrinkle, or a petal may fold inward. These are minor repairs, not bouquet emergencies. Five quiet minutes with floral tape and gentle reshaping can restore the design.
The most satisfying part of the project is its flexibility. Unlike a fresh bouquet assembled under a tight deadline, a silk teardrop wedding bouquet allows experimentation. Flowers can move three times. Ribbon can be changed. A family charm can be added at the last minute. That freedom gives DIY designers room to produce something personal rather than merely acceptableand the finished bouquet remains a decorative keepsake long after the ceremony.
Final Thoughts
Learning how to make a teardrop wedding bouquet with silk flowers is primarily an exercise in controlling shape. Begin with a clear downward line, build a rounded upper section, connect the two areas with gradually smaller flowers, and check the design from every angle. Strong mechanics keep the bouquet secure, while careful spacing, curved stems, realistic colors, and varied textures give it a natural appearance.
Do not rush the final arrangement. Photograph it, carry it, set it down, and view it beside the wedding dress. A few thoughtful corrections can transform an obvious DIY project into a polished artificial bridal bouquet worthy of the walk down the aisleand several hundred close-up photographs afterward.