You know what’s magical about a craft studio? The creativity. You know what’s not magical? The moment you sit down to make something and your scissors have teleported, your ribbon has formed a spaghetti knot, and your “tiny beads” have recreated the Milky Way on the floor.
The good news: a seriously functional, good-looking craft room doesn’t require a celebrity budget or custom cabinetry. With smart zones, vertical storage, and a few DIY buildsespecially pallet-basedyou can turn chaos into a studio that actually supports your hobbies (instead of judging you silently from the corners).
This guide focuses on studio craft room organization with pallet projects and other budget-friendly storage solutions you can mix and match, even in a small space. We’ll cover safety basics, planning, DIY builds, and cheap upgrades that feel high-end.
Why pallets work so well in a craft studio
Pallets are basically the Swiss Army knife of budget DIY: sturdy wood, already slatted, and easy to cut into smaller pieces. Those slats naturally create slots for jars, hooks, dowels, baskets, and shelvesperfect for craft supplies that want to be seen and grabbed quickly.
The big wins
- Vertical storage: Pallet slats can become wall organizers, thread racks, or tool boards.
- Custom sizing: Cut down a pallet to fit that awkward wall section behind your door.
- Cost control: Often free or low-cost, leaving your money for the fun stuff (glitter you’ll find in 2037).
Pallet safety first (because “mystery wood” is a vibebut not a good one)
If pallets are free, they’ve had a life. Sometimes that life involved safe shipping of boxed goods. Sometimes it involved… unknown liquids. Before you bring one into your studio, do a quick safety check.
How to choose safer pallets
- Look for an official stamp on the side stringer. For internationally used wood packaging, the mark often includes a treatment code like HT (heat treated) or MB (methyl bromide fumigated). For indoor projects, many DIY guides recommend favoring HT pallets and avoiding MB when possible.
- Avoid pallets with spills, strong odors, or oily stains. Craft rooms should smell like creativity, not a gas station.
- Skip painted/unknown “colored” pallets for indoor use unless you know what’s on them.
- Clean, sand, and seal before indoor useespecially for shelves that will hold fabric, paper, or items you touch constantly.
A simple prep routine
- Scrub with a stiff brush and mild soap solution; rinse and dry fully.
- Screw check: Remove protruding nails/staples and tighten loose boards.
- Sand to reduce splinters (start medium grit, finish finer).
- Seal with a low-odor clear finish if you want a wipe-clean surface.
Start with a studio layout that matches how you actually craft
Organization works when it supports your real habits, not your “future self” who labels everything in perfect handwriting and never buys duplicates. Before building anything, set up a quick plan.
Step 1: Make three zones
- Make zone: Your main work surface (cutting, gluing, assembling).
- Store zone: Shelves, bins, drawers, cartswhere supplies live.
- Mess zone: Drying area, in-progress projects, and the “I’ll deal with this later” tray.
Step 2: Use the “frequency rule”
Store your most-used items between shoulder and hip height. Less-used supplies go higher or lower. This simple rule is why pegboards, open shelves, and clear containers keep winning: they reduce friction.
Step 3: Decide what should be visible
Some supplies do better out in the open (scissors, rulers, paints). Others do better contained (glitter, beads, sequinsaka “micro-confetti”). Use open storage for quick-grab categories and lidded bins for tiny, spill-prone, or visually noisy items.
5 pallet-based organization builds for a craft studio
These pallet projects are designed to be doable with basic tools. Pick one, then build up as your space evolves.
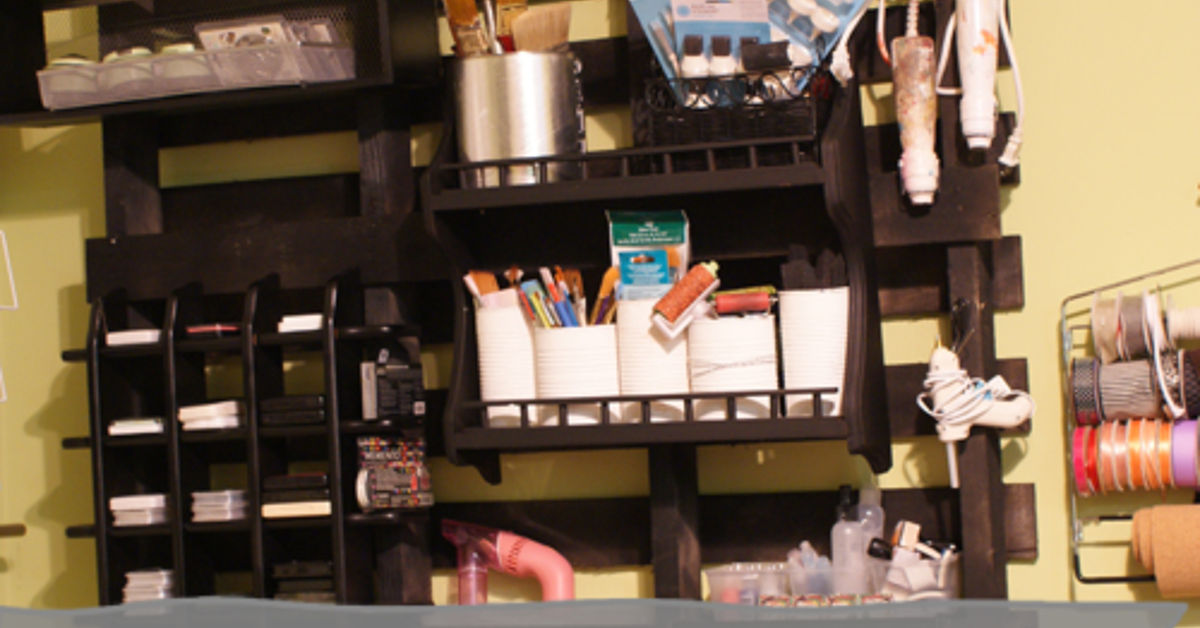
1) Pallet wall organizer (the craft command center)
Best for: scissors, rulers, tape, washi, paintbrushes, glue guns, small baskets, mason jars.
How it works: Cut a pallet section to size, mount it securely to studs, and use the slats as a framework for hooks, baskets, or jar clamps. Add labeled jars for pens, markers, and brushes so everything is visible at a glance.
Pro tip: Create “rows” by category: cutting tools, adhesives, drawing tools, finishing tools. When you’re mid-project, your brain shouldn’t have to play hide-and-seek.
2) Pallet thread rack or ribbon rail
Best for: sewing thread, ribbon spools, vinyl rolls, wrapping paper.
Build idea: Screw short dowels into a pallet board (or between slats) so spools slide on and off. For ribbon, use a longer dowel/tension-rod style setup to create a “dispensing bar.”
Why it’s great: You stop buying “another spool of black thread” because your original is no longer missing in action.
3) Pallet shelf ledges for paints and inks
Best for: acrylic paint bottles, ink pads, small spray bottles, adhesives.
Build idea: Use pallet slats to create shallow ledges (think spice-rack depth). Shallow shelves prevent the classic “paint bottle avalanche” and keep labels visible.
Extra credit: Add a small lip or dowel rail so nothing tumbles off when you grab one bottle.
4) Pallet rolling cart topper (upgrade a cheap cart)
Best for: turning an inexpensive rolling cart into a mobile craft station.
Build idea: Use a sanded pallet panel as a removable top or tray insert for a utility cart. Seal it so glue drips and paint wipe off easily. Add two cup-holes (hole saw) for “rinse water” and “brush parking.”
Why it’s great: Mobility. You can craft near a window for daylight, then roll everything away when life happens.
5) Pallet cubbies for paper and fabric
Best for: cardstock, sketch pads, fabric cuts, foam sheets, cutting mats.
Build idea: Create vertical slots using pallet slats as dividers. Keep sheets upright like files so you can flip through them instead of digging through a stack like an archaeologist.
Budget add-on: Use binder clips or labeled tabs to separate “holiday,” “scraps,” and “premium paper I’m afraid to use.”
Budget-friendly storage upgrades that pair perfectly with pallets
Pallets give you structure. These low-cost add-ons make the structure actually work for real crafting.
Pegboard: the MVP of vertical storage
Pegboard is popular for a reason: it’s flexible, affordable, and endlessly reconfigurable. Use hooks for tools, baskets for odd shapes, and small shelves for paint or glue. If your needs change, your wall changes with you.
- Where it shines: frequently used tools, works-in-progress supplies, small bins.
- Smart combo: mount a pegboard next to a pallet organizer so your wall becomes one continuous “tool and supply” system.
Clear jars and clear bins: see it, use it
Clear storage reduces duplicate buying (“I swear I don’t have any googly eyes…”) and makes cleanup faster. Use jars for small supplies (buttons, beads, clips), and clear bins for categories like “felt,” “paper scraps,” or “holiday craft.”
Label everythingeven if it’s obvious today. Future-you is busy and deserves kindness.
Dollar-store organizers: small wins add up
Trays, small baskets, drawer inserts, and over-the-door hooks can turn one cluttered drawer into a set of tidy “micro-zones.” Use shallow trays for sticker sheets, embellishments, and tiny tools. Stackable bins can become a mini-supply library on a shelf.
Tension rods and S-hooks: cheap, weirdly powerful
Don’t underestimate tension rods. They can hold ribbon spools, paper rolls, and even create a “hanging bin” zone with S-hooks and small baskets. It’s one of those solutions that feels too simpleuntil it solves three problems at once.
Make your studio feel bigger with these small-space tricks
Go vertical (but keep it light)
Use walls for storage and keep the floor as clear as possible. Floating shelves, pallet organizers, pegboards, and tall bookcases help you store more without shrinking your workspace.
Use the backs of doors
Add hooks or an over-the-door organizer for lightweight items: cutting mats, rulers, aprons, or yarn. The back of a door is basically free real estate.
Create a “project parking” system
WIP projects are the #1 reason a craft room looks messy even when storage is good. Try:
- A labeled bin per project (shoebox-size works)
- A vertical file holder for paper-based projects
- A tray on a shelf labeled “Drying / In Progress / Don’t Touch”
A practical organizing method that won’t collapse in two weeks
Here’s a low-drama system you can maintain:
1) Sort by activity, not by “type”
Instead of one giant “adhesives” bin, try “paper crafting adhesives” vs. “fabric adhesives.” Group items the way you use them together.
2) Give every category a container limit
One bin for ribbon. One drawer for beads. If it overflows, you either need a better container or a gentle supply edit. Limits keep the studio from expanding into your entire home like a crafty octopus.
3) Label at the shelf level
Label shelves and zones, not just bins. When you’re tired, you’ll put things back correctly if the “home” is obvious.
4) Do a five-minute reset
Set a timer after a session. Put tools back on the wall, toss scraps, and place WIPs in their parking spots. Five minutes now beats one weekend later.
Specific examples: two studio setups using pallets + budget finds
Example A: The small-room “wall-first” studio
Space: spare bedroom corner or studio apartment nook.
- Wall-mounted pallet organizer above the desk for daily tools.
- Pegboard to the side for flexible hooks and baskets.
- Clear jars for pens/brushes + clear bins for sorted categories.
- Rolling cart under the desk for “active projects” only.
Result: Your desktop stays open for making things, not storing things.
Example B: The “maker bench” studio for messy crafts
Space: garage-adjacent craft area or dedicated room.
- Pallet shelf ledges for paints and adhesives (easy to wipe down).
- Pallet cubbies for large paper and vinyl rolls.
- Budget trays inside drawers for small parts.
- A labeled “mess zone” tray for drying paint, resin molds, or glue-ups.
Result: You can be messy on purposewithout losing everything.
Maintenance tips: keep it organized without becoming a full-time librarian
- Use clear containers when possible so you don’t forget what you own.
- Store refills together (extra glue sticks, replacement blades) so you don’t buy backups you already have.
- Keep a donation box in the studio. If you haven’t used it in a year and it doesn’t spark joy or utility, let it go to a better home.
- Do seasonal swaps: holiday craft bins can live higher up until needed.
Conclusion: your budget studio can still look “Pinterest-level”
A studio craft room doesn’t need to be huge or expensive to feel amazing. When you combine pallet projects (custom, sturdy, vertical) with budget-friendly helpers (pegboard, clear bins, jars, labels, trays), you get a space that’s easier to useand easier to reset.
Start with one wall: a pallet organizer plus a few labeled containers. Then add a project parking system. Once your workflow feels smooth, you’ll spend less time searching and more time making. Which is the whole point… besides collecting craft supplies like they’re rare artifacts.
Experiences and real-world lessons from organizing a budget craft studio (about )
Most people don’t fail at craft room organization because they “don’t have enough storage.” They fail because the storage doesn’t match what actually happens during a project. In a real studio, you don’t gently return every item to its designated home after each step. You’re cutting, measuring, testing colors, changing your mind, and occasionally staring into the middle distance wondering why you chose a project with 900 tiny pieces.
That’s why pallet-based wall storage feels so satisfying in practice: it reduces the number of times you have to open something, dig through something, and close something. When your scissors, rulers, tape, and brushes are visible, your hands can grab them without interrupting your focus. It’s not just neatnessit’s momentum.
A common “aha” moment happens when you stop organizing by what an item is and start organizing by what you do. For example, crafters often stash all adhesives together, then realize mid-project they keep bouncing between paper glue, fabric glue, glue sticks, and hot glueeach with different tools and cleanup needs. Splitting supplies into mini-stations (“paper station,” “fabric station,” “painting station”) can feel like cheating, because everything becomes easier to start and easier to finish.
Another real-world lesson: the first version of your system won’t be the final versionand that’s normal. Pegboards and pallet organizers are friendly to trial-and-error. You can move hooks, swap baskets, and resize shelves without feeling like you “ruined” a fancy cabinet. Many people find that after two weeks, they notice repeat patterns: a certain tool always ends up on the desk, a certain bin is always overstuffed, or a category is too broad. Those patterns are helpful data. The studio is telling you what it needs.
In budget studios, labels do more than look cute. They prevent the slow drift into chaosespecially if more than one person uses the space, or if you do multiple types of crafts. Clear bins help you see what you have, but labels help you put it back fast. The best labeling style is the one you’ll actually maintain: printed labels, marker on tape, or even a simple “BEADS” note. Perfection is optional; finding things is not.
Finally, the biggest difference between a craft room that stays organized and one that explodes is the “project parking” habit. It’s tempting to leave everything out because you’ll “get back to it.” But the longer a project sits, the more likely it becomes background clutter. A dedicated tray or bin for in-progress work is a small habit with huge payoff: you can pause without losing pieces, and you can reset the room without abandoning the project.
If you take only one idea from all of this, let it be this: build for your real life. Your studio should support your creativity, your schedule, and your mess level. With pallets, a few budget organizers, and a flexible layout, you can make a craft room that feels calmeven when you’re making something wonderfully chaotic.