If you have ever picked up a 3D-printed part and thought, “This looks sturdy,” only to hear the tiny plastic equivalent of a sad trombone when it cracked, you are not alone. FDM and FFF printing are wonderful for making custom brackets, jigs, prototypes, and oddly specific tools that only make sense in your own workshop. But anyone who has pushed printed parts beyond “desk ornament with ambition” knows the usual problem: the inside is not fully solid, the layers do not always bond equally in every direction, and stress has an annoying habit of finding the weakest route out.
That is why the idea behind an infill injection experiment is so interesting. Instead of simply increasing infill density and waiting three extra business days for the printer to finish, the concept is to print intentional internal cavities and then inject molten plastic into them to reinforce the structure. It is part clever hack, part materials experiment, and part “what if we made the printer work harder after it already finished working?” The result is a fresh way to think about stronger printed parts: not by making everything solid, but by strengthening the places that matter most.
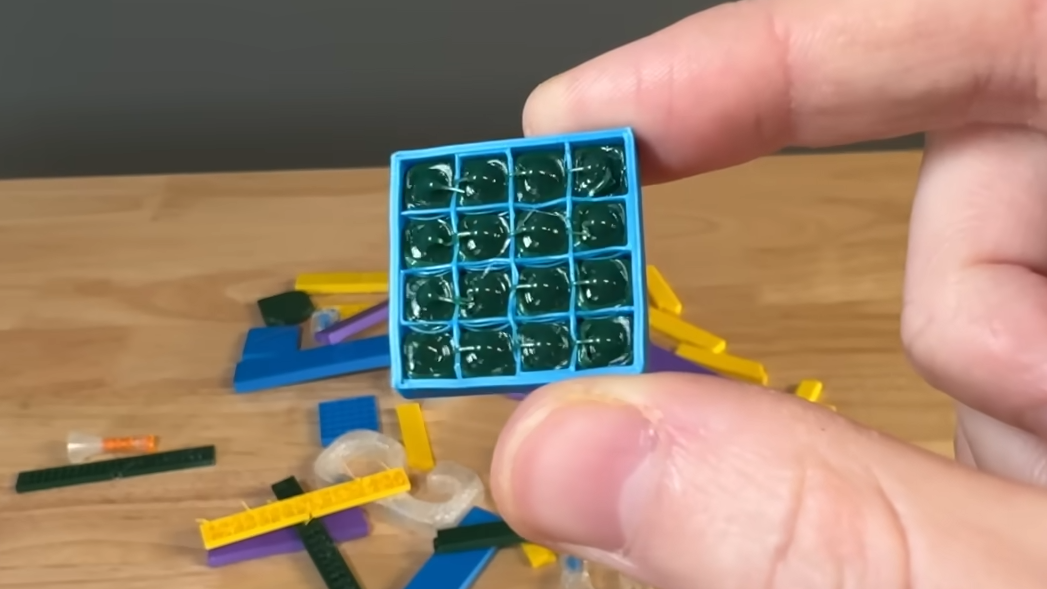
What Is the Infill Injection Experiment, Exactly?
The idea gained attention after an experiment highlighted by Hackaday showed a modified 3D printer hot end being used to inject molten plastic into internal channels and voids inside a print. The concept was inspired by reinforcement methods such as z-pinning and by industrial-style approaches like VoxelFill, where internal cavities are designed to improve strength in targeted directions. In plain English, it is like giving a printed part a hidden skeleton upgrade after the main body is already built.
What makes this different from simply using 100% infill is precision. Traditional dense infill fills the entire interior and consumes more time and material. Infill injection aims to place extra material only where reinforcement is needed. That matters because strength in 3D printing is not just about volume. A heavier part is not automatically a tougher part. Sometimes it is just a more expensive way to crack.
Why the experiment is clever
The experiment showed that long empty cavities cannot just be filled in one heroic blast of molten plastic. The plastic cools quickly after leaving the nozzle, which means deep channels are hard to fill from the top all at once. Better results came from filling periodically and working from the bottom up. A modified hot end with an extended tip, created using an airbrush nozzle, helped reach deeper into the cavity. Higher temperatures also improved fill performance. In other words, the concept works best when the geometry, tool, and thermal behavior all stop fighting each other.
Why Stronger 3D-Printed Parts Still Need More Than More Infill
Most FDM parts are built as shells with internal infill because that balance saves material and print time while still producing functional parts. Xometry, Markforged, and Autodesk all emphasize the basic tradeoff: denser infill generally improves strength, but it also increases weight, material consumption, and print time. That sounds obvious until you realize how often hobbyists still respond to a weak part by slamming the infill slider upward like it is a volume knob at a backyard barbecue.
But printed part strength depends on several variables at once. MatterHackers points to infill percentage as only one of many factors affecting tensile strength. Print speed, cooling, layer height, walls, and top and bottom layers all matter. Xometry also notes that parts are strongest in planes parallel to the print bed and weaker in the build direction. That means a poorly oriented part can still fail even if it is packed with plenty of plastic. You can give a flimsy chair golden shoelaces, but it is still a flimsy chair.
The shell matters more than many people think
One important lesson from professional 3D printing guidance is that perimeters and shells often do more heavy lifting than users expect. In many practical parts, strength gains come not just from internal fill but from stronger outer walls, better wall-to-infill connection, and smarter force paths. Xometry notes that infill overlap helps anchor perimeters by reinforcing the connection between the internal structure and the outer walls. That makes infill injection especially interesting because it hints at a future where internal reinforcement is not random filler, but deliberately bonded structure.
Where Infill Injection Could Beat Traditional Printing
The biggest appeal of infill injection is efficiency. Instead of printing every cubic millimeter as solid plastic, designers can keep lightweight internal architecture and only reinforce selected regions. Think load-bearing ribs, zones around bolt holes, cantilever roots, or high-stress transitions. This selective strategy makes sense because real parts do not experience load equally across their entire volume. A bracket does not care if its middle is overbuilt if the crack begins near a sharp corner or at the base of a mounting feature.
That idea also lines up with broader engineering practice. Protolabs highlights that adding radii to corners improves strength by reducing stress concentration and lowering crack risk. Markforged repeatedly frames part strength as a function of geometry, toolpath, material, and reinforcement strategy rather than raw bulk. So infill injection is not magic fairy dust for weak prints. It is best understood as another reinforcement method that can be useful when paired with good design.
Potential real-world use cases
This kind of reinforcement could be especially useful for functional prototypes, jigs, fixtures, replacement parts, and custom shop tools. It may also help with parts that need localized stiffness without becoming unnecessarily heavy. A print that includes internal channels designed for post-print reinforcement could, in theory, give makers more control over where mass and strength are added. That is a smarter engineering mindset than “print it again, but angrier.”
What the Wider 3D Printing World Says About Internal Reinforcement
The infill injection experiment does not exist in a vacuum, though it definitely likes cavities. Industry and research sources have long focused on porosity, anisotropy, sealing, and reinforcement in additive manufacturing. NIST has noted that porosity in additive parts can contribute to premature failure in critical applications. Godfrey & Wing explains that vacuum impregnation can seal micro-voids and improve leak resistance, dimensional stability, and mechanical performance in 3D-printed parts. Stratasys also identifies epoxy impregnation as a common finishing technique for FDM aerospace parts, especially when sealing and smoothing matter.
Those sources point to a larger truth: internal voids are not always your friend. Sometimes they save time and weight. Other times they become weak points, leak paths, or stress concentrators. That is why post-print reinforcement methods are attractive. Even when the exact method changesmolten plastic injection, resin impregnation, coatings, or fiber reinforcementthe goal is the same: reduce the penalties of layer-based fabrication without losing the design freedom that made 3D printing attractive in the first place.
Sealing is not the same as structural salvation
Still, it is important to stay grounded. Vacuum impregnation and surface coatings are not identical to structural redesign. Godfrey & Wing makes clear that impregnation addresses internal porosity and leak paths, not cosmetic layer lines or external cracks. Make: has shown how epoxy coatings can improve surface finish, but a glossy part is not automatically a stronger one. A part can look like a movie prop and still snap like a cracker if the load path is bad. Infill injection is exciting precisely because it targets the internal structure more directly than a cosmetic finish does.
Materials, Geometry, and Print Settings Still Rule the Game
If you want stronger parts, infill injection should be viewed as an advanced option, not a shortcut around fundamentals. Material choice remains critical. Formlabs points out that polycarbonate stands out when high strength and heat resistance are needed. Markforged emphasizes that reinforcement fibers can dramatically boost stiffness, heat resistance, and durability. If the base material is poorly chosen for the application, no clever cavity trick will fully rescue it.
Geometry also matters. Thin walls, sharp internal corners, and bad print orientation can undermine a part before any reinforcement step begins. Protolabs recommends radii to reduce stress buildup. Xometry emphasizes that orientation strongly affects strength because layer-based parts are weaker in the build direction. That means the smartest workflow often looks like this: design the part well, orient it well, choose the right material, tune the shells and infill, and then consider selective internal reinforcement if the application justifies the extra effort.
When ordinary tuning may be enough
In many cases, you do not need an exotic experiment. More perimeters, a better orientation, improved infill overlap, a stronger filament, or thicker stress-bearing features may solve the problem. That is why infill injection is most compelling for edge cases: parts where traditional settings are close to good enough, but still not quite there. It could become a useful bridge between hobby-grade printing and more engineered performance.
What Makes This Experiment So Promising for the Future
The real beauty of the infill injection concept is not just that it can make some parts stronger. It is that it changes the design conversation. Instead of thinking of infill as a passive filler pattern chosen in the slicer, it treats the interior of a part as active engineering territory. That opens the door to smarter cavities, directional reinforcement, and hybrid manufacturing workflows where a printed object is not finished when the print stops.
That perspective aligns nicely with where additive manufacturing has been heading for years. Engineers already use lattices, hollowing, selective reinforcement, and advanced post-processing to tune properties. Autodesk highlights lattice structures as a way to maintain structural integrity while reducing material use. Protolabs discusses lattices as a tool for lightweighting and strength. Infill injection belongs in that same family of ideas: build less where less is needed, and reinforce more where more is needed.
For hobbyists and small shops, that is a very appealing thought. Industrial additive systems can do sophisticated reinforcement and material control, but most desktop users are still living in the world of slicer presets, test cubes, and stubborn optimism. An accessible method for targeted internal strengthening could push desktop printing a little closer to true performance engineering.
Hands-On Experiences With Stronger Prints: What Makers Usually Learn the Hard Way
One of the most relatable experiences in 3D printing is printing a part that feels amazing in your hand, only to discover that mechanical confidence and actual mechanical performance are two very different things. Many makers start with a simple assumption: more plastic equals more strength. So they raise the infill, maybe thicken the walls a little, and hit print again. The second version is heavier, slower to make, and somehow still fails in almost the same place. That is usually the moment when the workshop gets quiet and someone says, “Well, that is rude.”
The next lesson usually comes from orientation. A hook printed flat might survive repeated use, while the same hook printed upright can fail along layer lines much sooner. The part did not suddenly become weaker because the universe is cruel, although that does happen sometimes. It became weaker because the load moved across the layers in a less favorable direction. Once makers see this in real use, they stop treating print orientation like a minor slicer detail and start treating it like structural design.
Then comes the shell-versus-infill revelation. A surprising number of functional parts become more reliable when you add more perimeters rather than simply cranking infill density. Handles feel stiffer. Brackets resist flex better. Edges chip less. The part starts behaving less like a hollow snack container and more like a tool. That experience changes how people design. They start adding ribs, fillets, and thicker load paths instead of just buying another roll of filament and hoping for emotional support from plastic.
Experiments with reinforcement add another layer of learning. Coatings, resins, and filler strategies can improve finish, seal porosity, and in some cases improve durability, but they also introduce mess, cure times, and a fresh set of opportunities to ruin your shirt. That is part of why the infill injection idea feels so appealing. It promises reinforcement that is integrated with the print itself rather than painted on afterward like a panicked apology.
Makers who chase stronger parts also learn that testing matters. A part that survives one dramatic bend on camera is not necessarily a robust design. Real experience comes from repeated use: tightening the same clamp twenty times, flexing the same clip every day, bolting the same bracket onto a machine and forgetting about it until it either succeeds quietly or fails at the worst possible moment. The strongest prints are usually not born from a single heroic setting. They come from iteration, observation, and a willingness to admit that the first “final version” was absolutely not the final version.
That is why the infill injection experiment deserves attention. It is not merely a flashy hack. It reflects the lived experience of people trying to squeeze real performance from desktop machines. It asks a practical question: if the weak point is inside the part, why are we only changing the outside settings? That question is sharp, useful, and very maker-minded. And in the long run, those are often the ideas that end up changing how people print.
Final Thoughts
Infill injection is one of those experiments that feels obvious only after someone tries it well. It builds on established truths in additive manufacturing: printed parts are shaped by infill, shells, orientation, porosity, and reinforcement strategy. What makes it exciting is that it adds a new tool to that toolbox. Rather than choosing between lightweight infill and fully solid printing, it suggests a middle path where internal reinforcement can be applied more selectively and intelligently.
Will it replace better geometry, smarter orientation, stronger materials, or fiber-reinforced printing? No. And it should not. But as a targeted strategy for stronger parts, especially on machines that ordinary makers already use, it is genuinely compelling. The future of desktop 3D printing will not come from one magic setting. It will come from more thoughtful control over what happens inside the part. And this experiment points exactly in that direction.