Some wood furniture ages like fine wine. Other pieces age like a forgotten sandwich behind the toaster. If your table, chair, cabinet, or thrift-store treasure looks dry, dull, cloudy, or mildly neglected, you may not need to sprint to the hardware store with panic in your eyes. One of the simplest DIY wood restoration hacks uses two common kitchen staples: olive oil and vinegar.
This olive oil and vinegar wood polish is not magic, although it can feel a little magical when a tired coffee table suddenly remembers it used to be handsome. The vinegar helps cut through light grime and mineral residue, while the oil adds temporary richness and shine. Together, they can refresh finished wood, soften the look of minor surface scratches, and give dull furniture a warmer appearance.
But before you start polishing every wooden object in your house like a caffeinated museum curator, there is one important truth: this hack works best as a light cleaning-and-shine treatment, not a full professional restoration. It will not rebuild missing veneer, repair deep gouges, reverse water damage, or replace a worn-out finish. Think of it as a beauty filter for wood, not reconstructive surgery.
Why Olive Oil and Vinegar Work on Wood
The reason this homemade wood polish is so popular is simple: each ingredient does a different job. White vinegar is a mild acid, which means it can help loosen light grime, fingerprints, cloudy residue, and some mineral marks from water rings. Olive oil, meanwhile, coats the surface and gives wood a richer, slightly darker sheen. When buffed properly, it can make dry-looking furniture appear smoother and more alive.
The key phrase is “buffed properly.” Olive oil should not be left sitting on wood in a greasy layer. Too much oil can attract dust, feel sticky, and create a dull buildup over time. Vinegar also needs respect. It may be gentle compared with strong chemical cleaners, but it is still acidic and can harm waxed, raw, antique, chalk-painted, or delicate finishes. In other words, this mixture is useful, but it is not a license to clean your grandmother’s heirloom cabinet with the confidence of a raccoon washing snacks.
Best Recipe for a Simple Wood Restoration Hack
For most finished wood furniture, start with a small batch. Homemade polish does not need to be made by the gallon. Your dining table is not preparing for a salad bar.
Basic Olive Oil and Vinegar Wood Polish Recipe
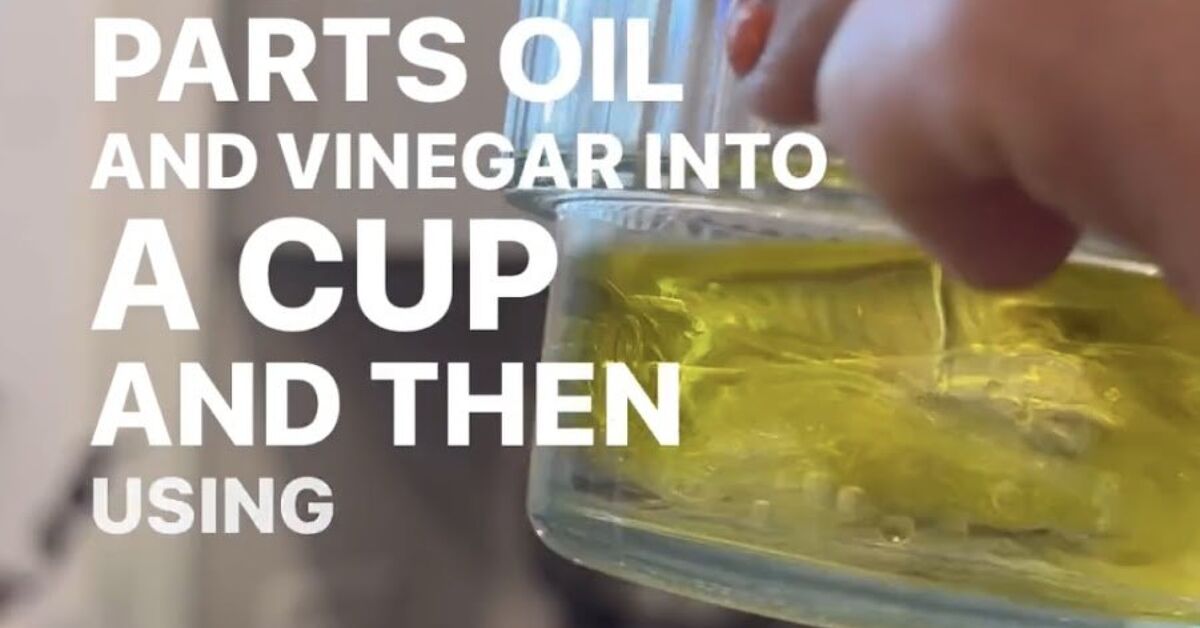
- 3 parts olive oil
- 1 part white vinegar
- 1 clean glass jar or small bowl
- 2 soft microfiber cloths
For example, mix three tablespoons of olive oil with one tablespoon of white vinegar. Shake or stir the mixture well before every use because oil and vinegar separate quickly. This is normal. They are basically roommates who tolerate each other for a useful purpose.
If you want a lighter cleaning blend, use less oil and more vinegar. If your furniture is mostly dry-looking and not very dirty, use more oil and less vinegar. Always start mild. You can add a little more polish, but removing an oily film after overenthusiastic application is much less fun.
How to Use Olive Oil and Vinegar on Wood Furniture
The best results come from a careful process. Wood restoration is not about drowning the furniture. It is about cleaning gently, applying a thin coat, and buffing until the surface looks refreshed instead of salad-dressed.
Step 1: Dust the Surface First
Before applying anything wet or oily, remove dust with a dry microfiber cloth. Dust can act like fine sandpaper when rubbed into a surface. If your furniture has carved details, use a soft brush or vacuum brush attachment to lift debris from grooves.
Step 2: Test in a Hidden Area
This is the step everyone wants to skip and later regrets with dramatic background music. Apply a tiny amount of the mixture to an underside, back corner, or hidden leg. Wait at least 10 to 15 minutes. If the finish becomes cloudy, sticky, discolored, or soft, stop immediately and use a gentler method such as a barely damp cloth or mild dish soap diluted in water.
Step 3: Apply a Small Amount
Dip a corner of a microfiber cloth into the mixture. The cloth should be lightly damp, not dripping. Rub with the grain of the wood using small circular motions or long strokes. Focus on dull patches, faint scuffs, and cloudy areas.
Step 4: Buff Away Excess
Use a second clean, dry microfiber cloth to buff the surface thoroughly. This step matters more than the mixture itself. Buffing removes extra oil, evens out the shine, and prevents residue from attracting dust. When you are done, the wood should feel smooth and dry to the touch, not slick.
Step 5: Let the Furniture Rest
Give the piece time to settle before placing objects back on top. For tables, wait at least an hour before adding books, lamps, trays, or that mysterious pile of mail that keeps multiplying like a paper-based life form.
What Kind of Wood Is Best for This Hack?
This DIY wood restoration hack is best for finished wood surfaces that are lightly worn but structurally sound. It can work well on coffee tables, side tables, wooden chairs, cabinets, dressers, bookshelves, and older furniture with a clear finish that has become dull from use.
It is especially helpful when the problem is surface-level: fingerprints, light grime, dullness, faint scuffs, or white water rings that sit in the finish rather than deep in the wood. If the piece still has a protective finish, the polish can refresh the appearance without soaking deeply into the wood fibers.
When Not to Use Olive Oil and Vinegar
As handy as this homemade wood polish can be, it is not suitable for every surface. Avoid using olive oil and vinegar on unfinished wood, raw wood, waxed furniture, chalk-painted furniture, milk-painted furniture, antique pieces with fragile finishes, hardwood floors, and valuable furniture that may need professional conservation.
You should also avoid it on cutting boards and food-prep surfaces. Olive oil can go rancid, especially when absorbed into porous wood. For cutting boards, food-grade mineral oil is usually the better choice because it is stable and designed for that type of use.
Do not use vinegar-heavy mixtures on surfaces with damaged finish, open cracks, peeling veneer, or water-swollen areas. Liquid can seep into weak spots and make problems worse. If your furniture has bubbling veneer, deep black water stains, sticky old finish, or major cracking, it is time for a real repair plan, not a kitchen-counter miracle potion.
Can This Hack Remove Scratches?
Olive oil and vinegar can make small scratches look less obvious, but it does not truly remove them. Light surface scratches often appear pale because they scatter light differently from the surrounding finish. A thin coat of oil can darken those pale lines temporarily, helping them blend in.
For deeper scratches, you may need a wax filler stick, wood marker, touch-up pen, or refinishing product matched to the wood tone. If the scratch catches your fingernail, this hack may soften its appearance, but it will not fill the missing finish. The scratch will still be there, just wearing a nicer outfit.
Can Olive Oil and Vinegar Fix Water Rings?
Sometimes, yes. White water rings often happen when moisture gets trapped in the finish. A careful application of vinegar can help reduce mineral residue or cloudiness, and the oil can restore some luster afterward. For mild rings, rub a small amount of the mixture with the grain, then buff dry.
Dark water stains are different. They usually mean moisture has penetrated deeper into the wood or finish. Olive oil and vinegar will not reliably fix those stains. Dark marks may require sanding, oxalic acid treatment, refinishing, or professional restoration.
Olive Oil vs. Mineral Oil: Which Is Better?
Olive oil is convenient because many people already have it in the kitchen. It gives wood a warm shine and can work as a quick cosmetic refresh. However, olive oil is a food oil, and food oils can eventually become sticky or develop an unpleasant smell, especially if overused or absorbed into unfinished wood.
Mineral oil is more stable and does not go rancid. For cutting boards, butcher blocks, and unfinished utility wood, food-grade mineral oil is usually the safer option. For sealed furniture, a tiny amount of olive oil in a polish blend can be acceptable when used sparingly and buffed well. The golden rule: if the wood is porous and used around food, choose the product made for that purpose.
Common Mistakes to Avoid
Using Too Much Polish
More polish does not mean more restoration. It often means more fingerprints, more dust, and more regret. Apply the mixture lightly and buff until the surface no longer feels oily.
Skipping the Patch Test
Wood finishes vary widely. A method that works beautifully on one table may cloud another. Always test first, especially on older furniture.
Using It on Floors
Do not use olive oil and vinegar on hardwood floors. Vinegar can dull some finishes, and oil can create a slippery surface. A shiny floor is lovely. A surprise indoor skating rink is less lovely.
Expecting Professional Restoration Results
This hack refreshes appearance. It does not replace sanding, staining, sealing, veneer repair, or finish stripping. If the piece is valuable, antique, or badly damaged, ask a furniture repair professional before experimenting.
Simple Examples of Where This Hack Helps
Imagine a walnut side table with faint cup rings and a dull finish. After dusting, testing, applying a small amount of olive oil and vinegar, and buffing dry, the surface may look warmer and more even. The rings may fade enough that you stop glaring at them every time you walk by.
Or picture a wooden dining chair with scuffed arms. The mixture may darken the pale scuffs and make the arms look less tired. It will not replace missing varnish, but it can improve the chair’s appearance before guests arrive and silently judge your housekeeping.
Another good candidate is a thrifted dresser that looks dusty, dry, and unloved but still has a stable finish. A gentle clean, followed by a light polish, can reveal color and grain that were hiding under years of neglect.
How Often Should You Use This Wood Polish?
Use this hack occasionally, not weekly. For most furniture, once every few months is plenty. Routine care should be much simpler: dust regularly, wipe spills quickly, use coasters, keep furniture away from extreme heat and sunlight, and avoid letting water sit on the surface.
If a table needs constant polishing to look good, the finish may be worn out. At that point, you are not maintaining the wood; you are negotiating with it. A proper refinishing project may give better long-term results.
Extra Experience: What I Learned From Using the Olive Oil and Vinegar Wood Hack
The first time I tried the olive oil and vinegar wood restoration hack, I used it on a small side table that had the personality of a rainy Tuesday. It was not broken, not antique, and not valuable enough to make me nervous. It was simply dull. The top had faint rings, a few pale scratches, and that tired grayish look wood gets when it has been dusted with good intentions but no real plan.
I mixed three parts olive oil with one part white vinegar in a small jar and immediately learned lesson number one: shake before using. Oil and vinegar separate fast. If you dip the cloth without mixing, you may get mostly oil in one swipe and mostly vinegar in the next. That is not furniture care; that is chaos in a jar.
After dusting the table, I tested the mixture underneath the top. Nothing strange happened, so I applied a tiny amount to the visible surface. The change was not dramatic like a home makeover show where everyone cries near a kitchen island. It was better than that: realistic. The wood looked warmer, the grain had more depth, and the scratches became less bossy. The water ring did not vanish completely, but it faded enough that it stopped being the first thing I noticed.
The biggest lesson was that buffing is everything. At first, I thought the table looked shiny because the oil was working. Then I touched it and realized it felt slightly greasy. A second dry cloth fixed the problem. After a few minutes of buffing with the grain, the surface looked polished but felt dry. That is the sweet spot.
I also learned that this hack is best for quick refreshes, not neglected disasters. I tried it later on an older shelf with a worn finish, and the results were uneven. Some areas absorbed more oil, while others stayed dull. That told me the finish was too damaged for a simple polish. It needed cleaning, light sanding, and a proper protective coat. The olive oil and vinegar helped a little, but it could not hide the fact that the shelf had been through emotional furniture warfare.
Another practical tip: do not use your best olive oil. Save the fancy extra-virgin bottle for pasta, salads, and pretending you are the kind of person who always has fresh basil. For furniture, a small amount of basic olive oil is enough. Even better, make only what you need for one session. Homemade polish is quick to mix, and storing it for months is unnecessary.
My favorite use for this method is pre-guest damage control. When a coffee table, console, or wooden chair looks a little tired before visitors arrive, this polish can make the piece look cared for without turning the afternoon into a refinishing project. It is affordable, fast, and oddly satisfying. Just remember the three rules: test first, apply lightly, and buff like your reputation depends on it.
Final Thoughts
The simple wood restoration hack with olive oil and vinegar is popular for a good reason. It is cheap, quick, natural, and surprisingly effective on the right kind of finished wood. It can restore shine, reduce the look of minor scratches, freshen dull furniture, and make old pieces feel more loved.
Still, the best results come from realistic expectations. Use it as a light polish and cleaning helper, not a permanent finish or deep repair solution. Avoid delicate, unfinished, waxed, antique, or floor surfaces. Test first, use a small amount, and buff away every bit of excess oil.
When used carefully, this humble kitchen mixture can turn “Should we replace this?” into “Actually, that looks pretty good.” And honestly, any cleaning trick that saves money, rescues furniture, and does not require wearing safety goggles in your living room deserves a polite little round of applause.
