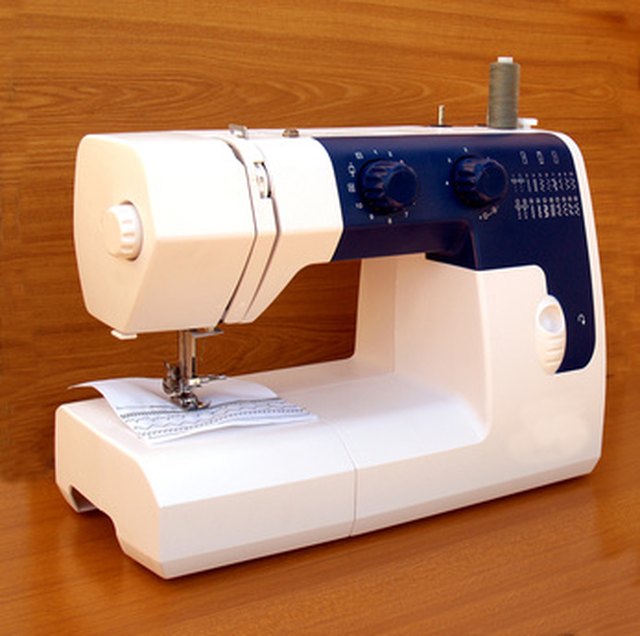
The Viking Husqvarna Classica 105 is one of those sturdy mechanical sewing machines that can make you feel like you inherited a tiny Swedish tractor built for fabric. It is reliable, practical, and wonderfully straightforward once you understand the thread path. But until then? It can stare back at you like a puzzle box with a foot pedal.
Learning how to thread a Viking Husqvarna Classica 105 is not just about getting thread through the needle. Proper threading controls stitch quality, tension balance, bobbin pickup, and whether your seam looks like neat tailoring or a bird built a nest under your fabric. The good news is that this machine follows a classic threading system: spool, upper guide, tension discs, take-up lever, needle guide, needle eye, then bobbin thread pickup.
This guide walks you through upper threading, bobbin winding, bobbin insertion, bringing up the bobbin thread, tension checks, and common fixes. Grab your thread, a sharp needle, a scrap of fabric, and a calm attitude. The machine can smell panic.
Before You Thread the Viking Husqvarna Classica 105
Turn the Machine Off First
Before threading, changing the needle, or handling the bobbin case, switch the machine off. This is not the glamorous part of sewing, but it is the part that keeps your fingers out of an accidental needle tap dance. Raise the needle to its highest position by turning the handwheel toward you. Then raise the presser foot. This one step matters more than beginners realize because lifting the presser foot opens the tension discs so the upper thread can slide properly between them.
Use the Right Needle and Thread
For most everyday sewing, use all-purpose polyester thread and a universal needle around size 80/12 or 90/14, depending on your fabric. Lightweight cottons prefer a finer needle. Denim, canvas, and heavier fabrics need a stronger needle. A dull or bent needle can cause skipped stitches, thread shredding, and language that should not be printed in a family sewing guide.
For the cleanest result, use the same type and weight of thread in the top and bobbin. Mixing heavy thread on top with fine thread below can work for specialty techniques, but it is not the best starting point when you are simply trying to thread the Classica 105 correctly.
How to Wind the Bobbin on a Viking Husqvarna Classica 105
Threading the machine begins with a properly wound bobbin. A messy bobbin is like a bad foundation under a house: everything above it may look fine for a minute, and then suddenly the basement is full of raccoons.
Step 1: Place the Thread on the Spool Pin
Place your spool of thread on the spool pin. Pull the thread smoothly from the spool and guide it through the bobbin-winding thread path. On the Classica-style machines, the bobbin winding area is located on the right side of the machine. Make sure the thread feeds evenly and does not snag on the spool edge.
Step 2: Put the Bobbin on the Winder
Place the empty bobbin on the bobbin winding spindle. If your bobbin has a small round marking on one side, position it as directed by your machine’s diagram or manual. Wind the thread around the bobbin a few times to anchor it. Start slowly with the foot control so the thread begins winding evenly.
Step 3: Stop When the Bobbin Is Evenly Filled
Do not overfill the bobbin. A bobbin should look smooth and firm, not swollen like it is preparing for a thread bodybuilding competition. Cut the thread, remove the bobbin, and check that it spins cleanly without loose loops.
How to Insert the Bobbin Case
The Viking Husqvarna Classica 105 uses a front bobbin case system. Open the shuttle door at the front of the machine. Hold the bobbin case by its latch and remove it carefully. Place the wound bobbin into the case so the thread follows the direction shown in the machine’s threading diagram. On Classica-style instructions, the bobbin thread is pulled into the slot on the edge of the bobbin case and under the tension spring.
Give the thread a gentle pull. You should feel light resistance. If the thread falls out freely, it may not be under the tension spring. If it feels locked in place, it may be jammed or threaded incorrectly. Insert the bobbin case back into the shuttle until it clicks. That click is the machine’s way of saying, “Fine, we may proceed.”
How to Thread the Upper Thread on the Viking Husqvarna Classica 105
Now for the main event: threading the upper path. The route is simple once you see the logic. The thread must pass through the guide, tension area, take-up lever, lower guide, and needle. Missing one guide can create loops, breakage, or stitches that look like they were designed by a nervous spider.
Step 1: Raise the Presser Foot and Needle
Raise the presser foot. Turn the handwheel toward you until the needle and take-up lever are at their highest point. This positions the machine for proper threading and helps you avoid skipping the take-up lever.
Step 2: Place the Spool on the Left Spool Pin
Place your thread on the spool pin. Pull several inches of thread toward the first upper thread guide. Keep the thread relaxed but controlled. You do not need to yank it like you are starting a lawn mower.
Step 3: Slide the Thread Into the Upper Thread Guide
Guide the thread into the upper arm thread guide. On the Classica 105, this is part of the path that directs thread from the spool toward the tension discs. Make sure it slips fully into the guide rather than merely brushing past it.
Step 4: Bring the Thread Into the Tension Discs
Draw the thread forward and down between the tension discs. This is the most common place for threading mistakes. If the presser foot is down, the discs are closed, and the thread may sit outside them instead of between them. That leads to loose stitches and thread bunching underneath the fabric.
Step 5: Go Around the Lower Thread Guide
After the tension discs, bring the thread down and around the lower thread guide. This turn helps the thread travel smoothly back upward toward the take-up lever. Keep the thread seated in the channel as you move.
Step 6: Thread the Take-Up Lever
Draw the thread upward and slip it into the slot of the take-up lever from the right. Then bring it back down toward the needle. The take-up lever is essential because it pulls the thread back after each stitch. If you miss it, the machine may still make noise, but the underside of your fabric will become a small thread disaster.
Step 7: Pass Through the Needle Thread Guide
Bring the thread down through the front guide and the small needle-area guide. This keeps the thread aligned with the needle and reduces twisting. Tiny guide, big responsibility.
Step 8: Thread the Needle From the Front
Thread the needle from front to back. Pull about six inches of thread through the needle and place the thread tail under the presser foot toward the rear of the machine. This tail gives the machine enough thread to form the first stitches without pulling the needle thread back out.
How to Bring Up the Bobbin Thread
Hold the upper thread lightly with your left hand. Turn the handwheel toward you one full cycle so the needle goes down and comes back up. As it rises, the upper thread should catch the bobbin thread and bring a small loop through the needle plate opening.
Use a pin, seam ripper tip, or your fingers to pull the bobbin loop up. Then place both the upper and lower thread tails under the presser foot and toward the back. Do not start sewing with short thread tails unless you enjoy rethreading as a lifestyle.
Testing the Threading Before Sewing
Before sewing your actual project, test on scrap fabric. Use the same fabric layers you plan to sew. Lower the presser foot, hold both thread tails behind the foot for the first few stitches, and sew a short straight line. Look at both sides of the fabric.
A balanced stitch has the upper and bobbin threads meeting inside the fabric layers. If loops appear underneath, the upper thread may not be seated in the tension discs, or the top tension may be too loose. If loops appear on top, check the bobbin insertion and lower thread path. If the seam puckers, the tension may be too tight, the needle may be wrong for the fabric, or the fabric may need a lighter touch.
Upper Thread Tension: What Setting Should You Use?
The Classica 105 tension dial is designed so higher numbers create tighter upper tension and lower numbers create looser upper tension. A normal starting point is usually the marked normal setting or the middle range. From there, test and adjust.
If the upper thread is pulled to the underside, increase upper tension slightly. If the bobbin thread is pulled to the top, reduce upper tension slightly. Make small changes, then test again. Do not spin the dial wildly like a game-show wheel. Sewing machines prefer diplomacy.
Common Threading Problems and Easy Fixes
Thread Bunching Under the Fabric
Thread nests under the fabric usually point to the upper thread path. Raise the presser foot, remove the thread completely, and rethread from the beginning. Make sure the thread is between the tension discs and through the take-up lever.
Needle Thread Keeps Breaking
Check for a dull needle, rough thread, incorrect needle size, or thread wrapped around the spool pin. Also inspect the needle eye. If the needle has a burr or is slightly bent, replace it. Needles are cheaper than ruined fabric and emotional recovery snacks.
Bobbin Thread Will Not Come Up
Make sure the bobbin case is clicked fully into place. Confirm the bobbin thread is under the tension spring and that the needle is inserted correctly. Turn the handwheel only toward you. Turning it backward can confuse the stitch formation and make the machine sulk.
Skipped Stitches
Skipped stitches often come from a damaged needle, wrong needle type, or fabric pulling. Replace the needle first. Use a stretch needle for knits, a denim needle for heavy woven fabric, and a universal needle for general projects.
Best Practices for Smooth Sewing on the Classica 105
Clean lint from the bobbin area regularly with a soft brush. Avoid blowing lint into the machine because that simply relocates the fuzz to a place you cannot see. Use good-quality thread, wind bobbins evenly, and change needles after every major project or sooner if the machine begins making dull punching sounds.
When starting a seam, hold both thread tails behind the presser foot for the first few stitches. This prevents tangles and keeps the thread from being pulled into the needle plate. Let the feed dogs move the fabric. Your hands should guide, not drag. Pulling fabric can bend the needle and throw off stitch formation.
Conclusion
Threading the Viking Husqvarna Classica 105 becomes easy once you follow the correct order: raise the presser foot, raise the needle, place the spool, guide the thread through the upper guide, seat it in the tension discs, pass it through the take-up lever, guide it down to the needle, thread from front to back, insert the bobbin correctly, and bring up the bobbin thread.
The secret is not speed. The secret is accuracy. A properly threaded Classica 105 rewards you with strong, even stitches and that satisfying mechanical hum vintage sewing fans love. Take your time, test on scrap fabric, and remember: when the machine acts dramatic, rethreading solves more problems than you would expect.
Experience Notes: What Threading the Viking Husqvarna Classica 105 Teaches You
The first experience many people have with a Viking Husqvarna Classica 105 is a mix of admiration and suspicion. It looks solid, it feels serious, and it does not have a modern screen cheerfully telling you what to do. That can be intimidating at first, but it is also part of the charm. The machine asks you to understand the basics, and once you do, it becomes refreshingly predictable.
One practical lesson is that the presser foot position changes everything. Many beginners rethread the machine with the presser foot down because it feels natural to keep everything still. Then they sew and get loops underneath the fabric. The problem is not bad luck. The thread simply never entered the tension discs correctly. After you experience this once or twice, you develop a new habit: presser foot up for threading, presser foot down for sewing. It becomes sewing muscle memory.
Another useful experience is learning to respect the take-up lever. On the Classica 105, missing the take-up lever can create impressive thread chaos. The machine may begin stitching, but within seconds the underside can fill with tangled loops. The fix is simple: raise the needle to the highest position before threading so the take-up lever is visible and easy to catch. It is a tiny checkpoint that saves a lot of frustration.
The bobbin case also teaches patience. When the bobbin thread is not under the tension spring, the machine may sound normal but sew poorly. A gentle tug on the bobbin thread tells you a lot. You want smooth resistance, not a free fall and not a stuck thread. After a while, you can feel when the bobbin is seated correctly before you even start sewing.
Testing on scrap fabric is another habit worth building. The Classica 105 can handle many everyday fabrics, but each fabric behaves differently. Cotton quilting fabric, denim, slippery lining, and knit jersey all ask for slightly different needle and tension choices. A ten-second test seam can prevent crooked stitches, puckers, or broken thread on the actual project. Scrap fabric is not waste; it is the machine’s rehearsal stage.
Finally, threading this machine teaches you that vintage mechanical sewing is wonderfully honest. If something goes wrong, the cause is usually visible: missed guide, dull needle, poor bobbin wind, lint buildup, or incorrect tension. There is no mysterious software menu hiding the answer. Once you slow down and follow the thread path carefully, the Classica 105 feels less like an old machine and more like a reliable sewing partner with excellent posture.
Note: Always turn off the machine before threading, changing the needle, or handling the bobbin case. Test your stitches on scrap fabric before sewing your final project.