If you’ve ever looked at a party backdrop, mantel, nursery wall, or dessert table and thought, “Cute, but probably annoying to make,” I have wonderful news: a DIY tassel garland is one of the easiest decorations you can create with your own two hands and a mildly heroic pair of scissors. It’s inexpensive, colorful, beginner-friendly, and forgiving enough that even if one tassel comes out a little wonky, the whole thing still looks charming. In fact, the slight imperfections are part of the appeal. That crooked tassel? That’s not a mistake. That’s character.
This tutorial walks you through the simplest way to make a tassel garland using tissue paper, string, and basic craft supplies. You’ll learn what materials work best, how to assemble tassels quickly, how to avoid common crafting disasters, and how to style your finished garland so it looks intentional instead of like your gift wrap drawer exploded. Whether you’re decorating for a birthday party, baby shower, holiday brunch, graduation, or just want your bookshelf to feel a little less serious, this easy tassel garland project delivers a lot of visual payoff for very little effort.
Why a DIY Tassel Garland Is the Ultimate Easy Decor
Let’s be honest: some crafts are secretly part-time jobs. This is not one of them. A tassel garland is popular for one very good reason: it looks festive and fancy without demanding advanced skills, expensive materials, or an emotional support glue gun.
Here’s why this project keeps earning its spot in the DIY hall of fame:
- It’s budget-friendly. Tissue paper, twine, ribbon, or fishing line cost very little compared to store-bought party decor.
- It’s beginner-approved. No sewing machine, Cricut, or mysterious crafting talent required.
- It’s customizable. You can switch colors, materials, tassel size, spacing, and string type depending on the event.
- It’s lightweight. That makes it easy to hang above a table, on a wall, across a shelf, or over a doorway.
- It works year-round. Pastels for spring, metallics for New Year’s, school colors for graduation, red-white-and-blue for summer holidays, and neutrals for everyday decor.
In other words, this is the kind of craft that makes people think you planned ahead, even if you started it while reheating coffee for the third time.
What You Need to Make a Tassel Garland
The beauty of the easiest DIY tassel garland is that the supply list is refreshingly short. You probably already own half of it.
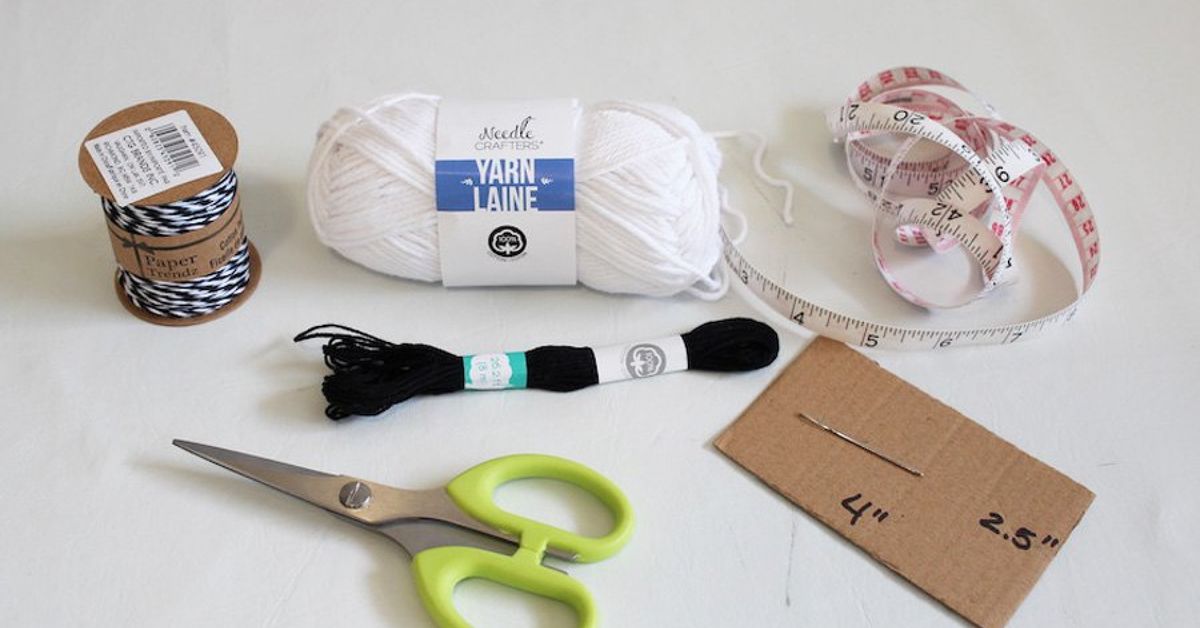
Basic Materials
- Tissue paper in 2 to 5 colors
- Sharp scissors
- Twine, baker’s twine, ribbon, yarn, or clear fishing line
- A ruler or measuring tape
- A flat surface for cutting and folding
Optional Extras
- Metallic tissue paper for shine
- Patterned tissue paper for a playful look
- Mini clothespins or adhesive hooks for hanging
- A paper cutter if you want super-clean edges
- Glue dots for adding stars, pom-poms, or paper shapes between tassels
If you want the absolute easiest version, stick with standard tissue paper and twine. Tissue paper creates a soft, fluffy tassel with lots of movement, while twine keeps the look casual and handmade. Clear fishing line gives a floating effect, which is great for backdrops and party tables.
How to Make the Easiest DIY Tassel Garland Ever
Now for the fun part. This method is simple, fast, and easy to repeat once you get into the rhythm. Put on music, clear off the table, and prepare to become emotionally attached to paper fringe.
Step 1: Stack and Fold Your Tissue Paper
Start with one sheet of tissue paper folded as it comes from the package. If the sheet is large, you can keep it folded to make fuller tassels. If you want smaller tassels, cut the sheet in half first. Smooth it out gently, but don’t wrestle it too hard. Tissue paper tears if you look at it with too much confidence.
Fold the tissue lengthwise if needed so you have a long rectangle. The folded edge will become the top of the tassel, and the open edges will become the fringe.
Step 2: Cut the Fringe
Using sharp scissors, cut narrow strips from the open edge upward, stopping about 1 to 1.5 inches before you reach the top. That uncut section is important because it holds the tassel together. If you cut all the way through, congratulations, you have confetti.
You don’t need perfect spacing. Tassels are forgiving. Aim for strips roughly 1/4 to 1/2 inch wide. Thin fringe looks airy and soft. Wider fringe looks bolder and more graphic.
Step 3: Open and Roll
Carefully unfold the fringed tissue paper. Lay it flat with the uncut center section running horizontally across the middle. You should now have fringe on both sides.
Roll the tissue from one end toward the other, keeping the fringe hanging outward. Once fully rolled, twist the center section tightly so it forms the neck of the tassel. Fold that twisted center in half so the two fringed ends hang downward. Twist the folded loop once to create a small hanging loop at the top.
That’s it. You’ve made a tassel. Please pause for a moment and enjoy how unnecessarily satisfying that is.
Step 4: Repeat Until You Have Enough Tassels
Continue making tassels in your chosen colors. A small garland might use 8 to 10 tassels. A fuller party garland usually looks best with 12 to 20, depending on length and spacing.
A good rule of thumb is to lay them out on the floor before stringing them together. If the arrangement looks skimpy, make two or three more tassels. No one has ever complained that a garland was too festive.
Step 5: String the Tassels Together
Cut your twine, ribbon, or fishing line to the desired length. Leave extra room on both ends for hanging. Slide each tassel onto the string through the top loop, then space them evenly. You can bunch them close together for a lush look or leave a few inches between tassels for a lighter, more modern style.
If you’re using baker’s twine or yarn, the tassels usually stay in place naturally. If you’re using smooth ribbon or fishing line, tie tiny knots between tassels or use a small piece of clear tape behind the loop to stop them from sliding around.
Best Color Combos for a Beautiful Tassel Garland
The fastest way to make your tassel garland look polished is to choose a thoughtful color palette. Random can be fun, but intentional usually photographs better.
Easy Color Ideas
- Baby shower: blush, cream, sage, and gold
- Birthday party: coral, pink, orange, and yellow
- Graduation: school colors with metallic accents
- Holiday decor: red, white, green, and kraft brown
- Modern home decor: ivory, beige, terracotta, and soft gray
- Kids’ room: aqua, lavender, peach, and mint
If you’re not sure where to start, use three colors: one main color, one soft neutral, and one accent. That combination almost always works.
Ways to Make Your Tassel Garland Look More Expensive
A simple tassel garland can look surprisingly high-end with a few smart tweaks. You do not need to spend more. You just need to style smarter.
Use Mixed Textures
Combine matte tissue paper with one metallic or glittery element. Too much shine can start to look like a New Year’s Eve emergency, but one reflective accent color adds depth.
Vary the Tassel Size
Mix larger and smaller tassels for dimension. This works especially well for photo backdrops and dessert tables where you want the garland to feel layered instead of flat.
Add Decorative Spacers
Insert paper stars, felt balls, pom-poms, beads, or mini paper fans between tassels. This helps break up the repetition and makes the whole garland look more custom.
Choose the Right String
Twine gives you a farmhouse or rustic party vibe. Satin ribbon feels a little dressier. Fishing line makes the tassels seem like they’re floating, which is especially pretty in front of windows or on a backdrop wall.
Common DIY Tassel Garland Mistakes to Avoid
Even an easy craft has a few traps. Luckily, these are all easy to dodge.
Using Dull Scissors
Dull scissors crumple tissue paper instead of slicing it cleanly. The result is ragged fringe and a rising sense of annoyance. Use the sharpest pair you own.
Cutting the Fringe Too Far
If you cut through the top section, your tassel won’t hold together. Leave a generous uncut band at the top every time.
Overhandling the Tissue Paper
Tissue paper likes a gentle touch. Too much folding, squeezing, flattening, or dramatic sighing can tear it. Work carefully and accept that perfection is not the goal.
Making Too Few Tassels
A garland with not enough volume can look unfinished. When in doubt, make extras. Spare tassels can always become gift toppers, napkin ties, or mini ornaments.
Hanging It in a Busy Spot
If people keep brushing past the garland, the tassels may crumple or twist. Hang it where it can be admired, not body-checked by every guest on the way to the snacks.
Where to Use a DIY Tassel Garland
This project is versatile enough to work almost anywhere. A tassel garland is basically the decorative equivalent of a great white T-shirt: casual, adaptable, and unexpectedly useful.
- Over a dessert table
- Across a fireplace mantel
- Along a bookshelf
- Above a bed or crib
- On a party backdrop wall
- Across a window frame
- Wrapped around a gift table
- Layered with balloons or paper fans
For damage-free hanging, lightweight hooks or removable adhesive hooks usually work well for paper garlands. If you’re styling a table, simply drape the garland instead of hanging it at all. Less hardware, less stress, same cute result.
How to Store and Reuse Your Tassel Garland
Yes, tissue paper is delicate, but a tassel garland can absolutely be reused if you treat it kindly. Roll it loosely around a piece of cardboard or wrap it in tissue paper before storing it flat in a box. Do not cram it into a drawer like a crumpled receipt from 2019.
If the tassels look wrinkled later, fluff them gently with your fingers. Small creases usually disappear once the garland is rehung.
Creative Variations to Try Next
Once you’ve made your first tassel garland, it becomes dangerously easy to imagine three more. Here are a few fun spins on the classic design:
Yarn Tassel Garland
Swap tissue paper for yarn if you want something softer and more durable. This version is great for year-round room decor.
Mylar Tassel Garland
Perfect for parties, New Year’s decor, and photo booths. It catches light beautifully and looks extra festive in pictures.
Mini Tassel Garland
Make tiny tassels for gift wrapping, cake tables, chair backs, or holiday trees. Small projects are excellent if you want the cute factor without taking over the dining room table.
Seasonal Tassel Garland
Change the palette by season: warm rust and mustard for fall, icy blue and silver for winter, fresh green and pink for spring, and bright tropical shades for summer.
What It’s Like to Make a Tassel Garland: Real-Life Experience and Little Lessons
The first time you make a DIY tassel garland, you might think it will be one of those crafts you try once and then politely forget about. Instead, it tends to sneak into your life. You make one for a birthday party. Then suddenly you’re making another for a brunch, then one for a baby shower, then a smaller version for a shelf because the shelf “needs something.” Before you know it, you’re the kind of person who has opinions about twine.
What surprises most people is how relaxing the process feels once you stop trying to make every tassel identical. There’s a rhythm to it: fold, fringe, open, roll, twist, repeat. After the second or third tassel, your hands figure it out and your brain gets to clock out for a while. It’s the sort of project that works well on a quiet evening, at a craft table with friends, or while catching up on a show you’re mostly listening to anyway.
There’s also a nice little confidence boost built into this craft. So many DIY projects have an awkward middle stage where everything looks like a mistake. A tassel garland is kinder than that. Even halfway through, it already looks promising. A pile of finished tassels on a table is weirdly satisfying, like you’re manufacturing joy in fringe form.
Another real-life advantage is that this project is flexible when life gets messy. If you’re short on time, make fewer tassels and space them farther apart. If one tears, use it anyway in the center where no one will inspect it like a museum object. If your colors don’t match as perfectly as you imagined, the movement and texture help blend everything together. Tassel garlands are very forgiving, which is more than I can say for fitted sheets or eyeliner.
In practical terms, the finished garland adds a lot of atmosphere with very little effort. A plain table suddenly feels party-ready. A blank wall gets personality. A child’s room looks more cheerful. A holiday setup feels layered instead of flat. It’s one of those decor pieces that makes a space look intentional, even when everything else was arranged five minutes before guests arrived.
And maybe the best part is this: people always assume it took longer than it did. They notice the color, the texture, the handmade feel. They ask where you bought it. You get to casually say, “Oh, I made it,” which is one of the most satisfying sentences in the English language.
So if you’re looking for a craft that is easy, affordable, stylish, and low on drama, the easiest DIY tassel garland ever really lives up to the name. It’s not just simple to make. It’s simple to enjoy, simple to customize, and simple to use again and again. That’s a rare craft win, and frankly, we should celebrate those more often.
Conclusion
If you want a decoration that is cheerful, inexpensive, and almost impossibly easy to pull off, a DIY tassel garland should be at the top of your list. With nothing more than tissue paper, string, and a few basic tools, you can create a lightweight party decoration or home accent that looks playful, stylish, and fully custom. Make it bright, make it neutral, make it tiny, make it dramatic. The point is not perfection. The point is making something delightful with minimal fuss and maximum charm.