
Northern pike have a reputation in some fishing circles that sounds suspiciously like a bad Yelp review:
“Too bony. Too slimy. Too much work.” And surepike can be slimy, and yes, they’ve got those infamous Y-bones.
But here’s the plot twist: pike are also delicious, mild, and wildly underrated once you learn the right cuts.
In other words, they’re not “trash fish.” They’re “high-potential fish with commitment issues.”
This guide walks you through cleaning and filleting a northern pike in a way that’s practical, repeatable,
and as bone-free as humanly possible. You’ll learn two proven approaches: the classic “fillet-then-debone”
method and the popular “five-fillet method” that skips the drama and goes straight for boneless pieces.
Let’s turn that toothy torpedo into dinner.
Why Pike Are Different (and Why People Freak Out About Y-Bones)
Northern pike have an extra set of pin bonesoften called “Y-bones”running along the thickest part of the fillet.
These bones are shaped like a Y (creative naming, anglers!) and they’re why a normal “one-pass” fillet can still
leave you chewing like you’re testing a set of dental implants.
The good news: the Y-bones sit in a predictable zone. Once you learn how to identify their tips and follow their
curve, you can remove them cleanlyeither by cutting them out as a strip or by avoiding them entirely with the
five-fillet approach.
Handle Your Pike Like You Want It to Taste Good
Filleting skills matter, but fish quality starts before you ever touch a knife. Pike flesh is mild and flaky
when treated wellsoft and fishy when it’s left warm too long. If you only remember one thing, remember this:
cold is your best seasoning.
Quick catch-care checklist
- Get it on ice fast. Pack the fish in crushed/flaked ice if you can, and keep it out of standing warm water.
- Keep it clean. Use a dedicated cooler and avoid tossing it in with muddy ropes, bait gunk, or last week’s mystery sandwich.
- Drain meltwater. Ice chills; warm slush soaks. If your cooler doesn’t drain, crack the lid occasionally and pour off water.
- Optional: bleed it. Some anglers like to bleed fish for cleaner-tasting fillets. It’s not mandatory, but it can help.
If you’re cleaning fish at camp, do your best to keep fillets shaded and cold. If you’re cleaning at home, do it soon.
Fish quality drops quickly with time and heatespecially in summer.
Tools You’ll Want (No, Not a Chainsaw)
- Sharp fillet knife (flexible helps; sharp matters more than fancy)
- Cut-resistant glove (optional, but great if you like keeping all 10 fingers)
- Non-slip cutting board (or a board on a damp towel so it doesn’t skate around)
- Pliers or fish tweezers (for pin bones you missed or for grabbing slippery skin)
- Paper towels (pike slime is basically nature’s prank)
- Clean water for a quick rinse and a trash bag for guts/skins
- Zip-top bags or vacuum sealer bags for storage
- Sanitation basics: soap, hot water, and a way to disinfect surfaces afterward
Step 1: Cleaning the Pike (Gutting)
You can fillet a pike without gutting first, but gutting makes the fish easier to handle, keeps your workspace cleaner,
and helps protect the meat during transport and storage. If you’re keeping the fish whole on ice for a while, gutting
is usually a smart move.
How to gut a northern pike
- Position the fish belly-up. Pat it dry with paper towels so it doesn’t slide like a cartoon banana peel.
-
Make a shallow belly cut. Insert the knife tip near the vent (anus) and cut toward the head.
Keep the blade shallow to avoid puncturing the intestines. -
Remove the entrails. Pull the guts free with your fingers or the tip of the knife.
If the fish is still warm, this is usually easy. If it’s cold, it may take a bit more gentle persuasion. -
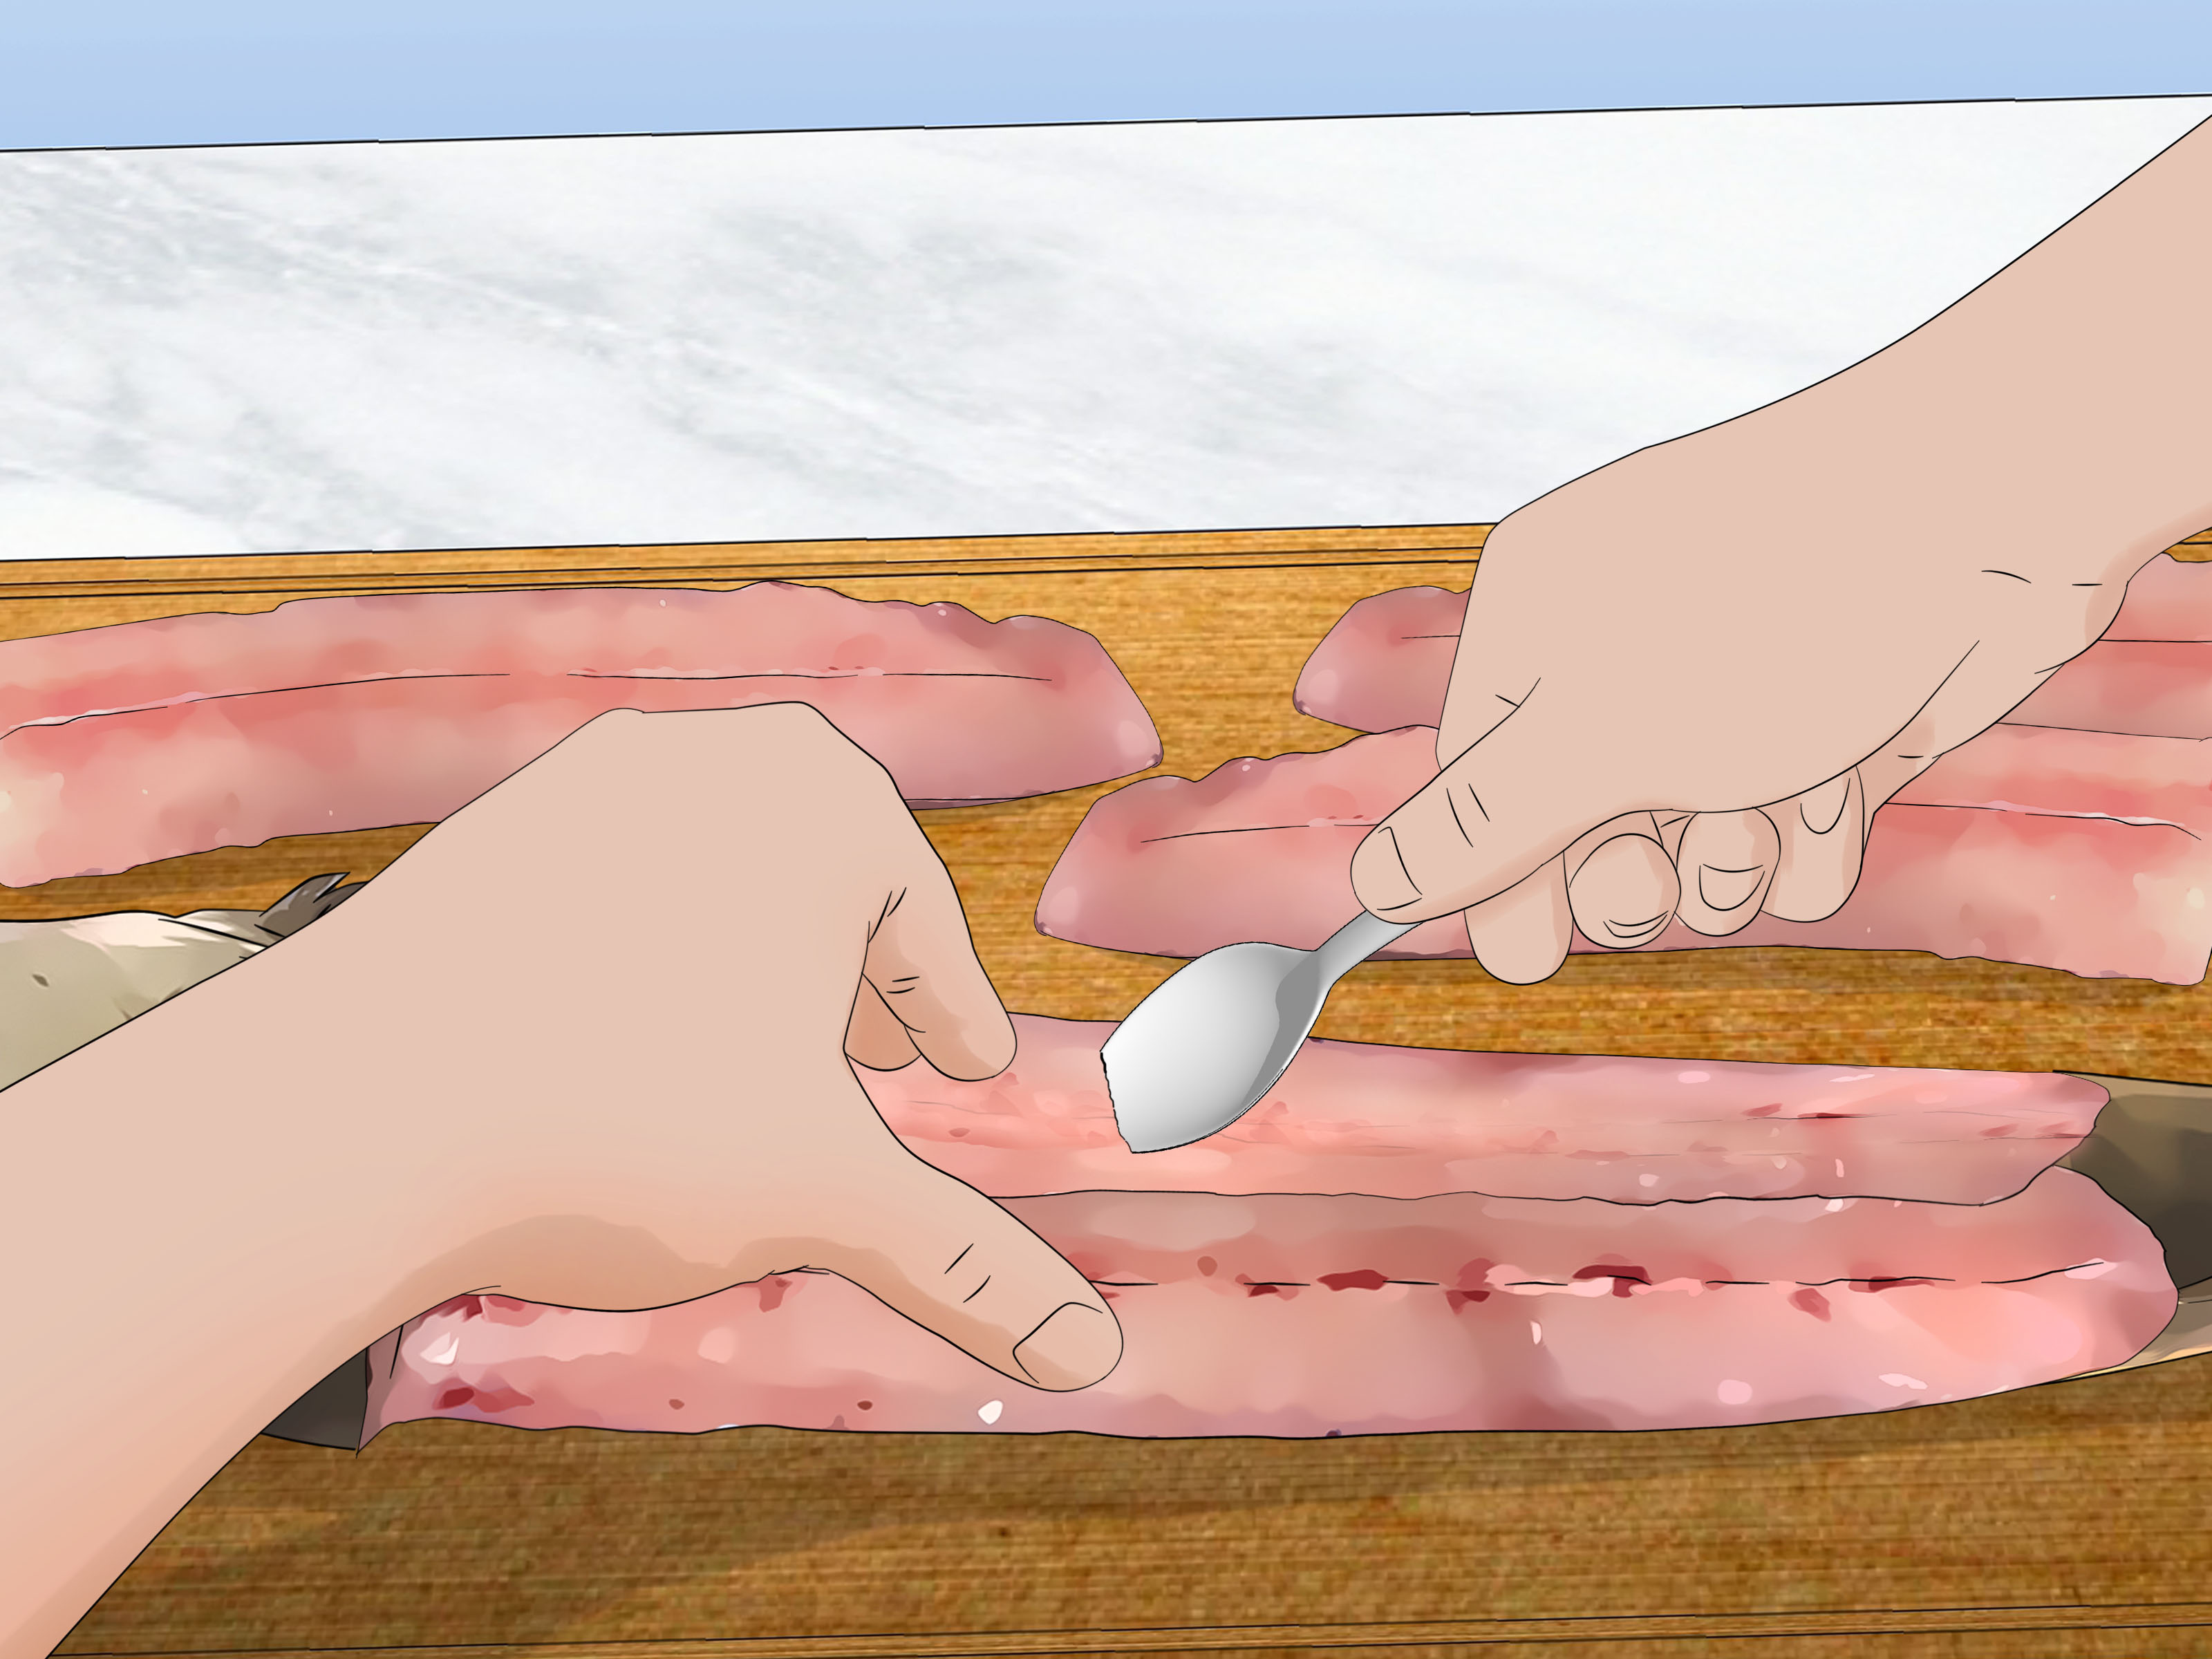
Scrape the “kidney” line. Along the backbone inside the cavity, you may see a darker strip.
Scrape it out with a spoon edge or thumbnail. -
Quick rinse, then pat dry. Rinse just enough to remove blood and debris, then dry the cavity.
(Long soaking can waterlog the flesh and dull flavor.)
Step 2: Choose Your Filleting Strategy
You’ve got two main paths to boneless pike. Both work. Pick the one that matches your patience level and your dinner plan.
Strategy A: Classic side fillets + remove Y-bones
Best when you want larger pieces (for grilling, baking, nice “real fillet” vibes) and you don’t mind making a few extra precise cuts.
Strategy B: The five-fillet method
Best when you want boneless pieces fast (fish tacos, frying, nuggets, chowder), and you’d rather sacrifice a little yield than
play “Operation” with rib bones and Y-bones.
Strategy A: Fillet the Pike, Then Remove the Y-Bones
A1) Remove the side fillets
-
Lay the fish on its side. With the head to your non-knife hand side, make a cut just behind the gill plate down to the backbone.
(Avoid slicing through the gill rakersthose can be sharp and messy.) -
Turn the blade and ride the backbone. Keeping the knife tight to the bones, slice from that first cut toward the tail in smooth strokes.
Let the backbone guide you. - Free the fillet at the tail. Once you reach the tail, cut through the skin to release the fillet.
- Repeat on the other side. Congratulations, you now have two slippery trophies and a fish that looks offended.
A2) Remove the rib bones
Pike rib bones usually don’t plunge as deep as some other fish, but they still need to go. Lay the fillet skin-side down.
Start your cut at the top edge of the rib section and slide the blade under the ribs with a shallow angle.
Keep the knife nearly parallel to the board so you shave ribs away without digging into meat.
A3) Skin the fillet (recommended)
Pike skin can be tough, and skinning makes it easier to see and feel the Y-bone zone.
Start at the tail end: grip the tail skin (paper towel helps), slide your knife between skin and meat,
and keep the blade angled slightly toward the skin as you work forward.
A4) Remove the Y-bones (the “two-cut strip” technique)
This is the moment pike skeptics either become believers or start googling “boneless chicken recipes.”
Don’t panicthe bones are predictable. You’re going to remove a narrow strip of meat that contains the Y-bones,
leaving boneless sections above and below.
-
Find the Y-bone tips. In the thick center portion of the fillet, look for tiny white dots or feel a faint “zipper”
with your fingertip. That’s the top of the Y-bone line. -
Make the first cut above the bones. Slice straight down (about 90 degrees to the board) along the top side of the Y-bone tips
until you touch bone. Don’t cut through the bonesuse them as your guide. -
Turn the knife and “follow” the bones. Rotate the blade so it’s nearly parallel to the board and glide along the bone line
toward the top of the fillet, separating the boneless top loin. -
Make the second cut below the bones. Start about a quarter-inch below the first cut and repeat: slice down to the bones,
then turn the blade and glide along them. This frees a strip containing the Y-bones. -
Lift out the Y-bone strip. Remove that strip and set it aside for later (more on “bonus meat” in a second).
You should now have boneless pieces: a top loin and a lower section. -
Bonus trick: tail section is easier. The farther back toward the tail you go, the less the Y-bone issue matters.
Many people cut the tail section into chunks because it’s naturally less bony and great for frying.
What about the strip you removed? Don’t throw it away automatically. You can:
(1) carefully trim meat off the bones for fish cakes, chowder, or patties,
(2) grind it (bones will be sifted/removed depending on your method),
or (3) pickle itacid can soften small bones over time.
Strategy B: The Five-Fillet Method (Boneless Pieces with Less Fuss)
The five-fillet method is popular because it targets boneless zones and sidesteps the Y-bone strip problem.
You’ll get smaller pieces, but they’re clean, convenient, and perfect for frying, tacos, sandwiches, and “shore lunch” energy.
What “five fillets” means
- Two backstrap/loin fillets (one from each side along the top of the back)
- Two flank fillets (boneless sections below the Y-bone zone, trimmed over the ribs)
- One tail section (often split into two small tail fillets, depending on how you cut it)
How to do it
-
Start with the “top loin” cut. With the fish on its side, make a long cut down the back just off the dorsal line
to lift the top loin. This cut stays above the Y-bone zone. -
Remove the side/flank meat. From the remaining side, cut along the outside edge of the protruding bone line,
working down and over the ribs to free the flank fillet. Keep your blade shallow over ribs. - Repeat on the other side. You should now have four boneless pieces (two loins, two flanks).
- Take the tail meat. The tail area has fewer “surprise bones.” Cut the tail section into strips or small fillets.
- Skin and trim. Skin the pieces, then trim away any leftover rib bits or dark tissue.
If you’re feeding a group, this method shines because you can portion pieces quickly and cook them fast.
Example: a 26–30 inch pike can yield enough boneless pieces for a solid family mealespecially if you bread and fry
(because frying has a way of making everyone happy and temporarily silent).
Final Trim: Dark Meat, Fat, and “Fishy” Flavor
Pike are generally mild, but any fish can develop stronger flavor from bloodline tissue and fatty areas.
If you see a darker strip along the fillet, trim it if you prefer a cleaner taste. Many cooks also trim excess belly fat.
(If you’re in waters with fish consumption advisories, trimming fatty tissue can also be a practical habitalways follow local guidance.)
Rinse, Dry, Store: Keep Texture Firm and Flavor Clean
A quick rinse is fine, especially to remove blood and debris. Then pat the fillets dry. Dry fillets freeze better, fry better,
and don’t turn your cutting board into a slip-n-slide.
Short-term storage
- Refrigerator: Keep fillets cold (ideally near 40°F or lower) and use within 1–2 days for best quality.
- On ice: Keep fillets in a sealed bag on ice, not sitting in meltwater.
Freezing (for best results)
- Portion first. Freeze meal-size packs so you aren’t thawing and refreezing.
- Wrap airtight. Vacuum sealing is excellent; otherwise use freezer bags with as much air removed as possible.
- Label and date. “Mystery fish” is not a fun freezer game.
Cooking Northern Pike: Simple Wins
Once the fillets are boneless, pike cooks like other mild freshwater fish. It’s lean, so it can dry out if overcooked.
Aim for juicy, quick methods.
Easy, reliable ideas
- Classic fried pike: Cut into strips, season, bread, and pan-fry until golden.
- Fish tacos: Blackened or lightly breaded pieces with slaw and a bright sauce.
- Pike nuggets for kids: Bite-size chunks, simple breading, quick frysuddenly everyone loves “that bony fish.”
- Pickled pike: A traditional option where acid can soften small bones over time (great use for odds and ends).
- Fish cakes/patties: Perfect for trimmed bitsmix with egg, crumbs, seasoning, and pan-fry.
For food safety, cook fish to a safe internal temperature and avoid leaving it unrefrigerated too long.
If you don’t have a thermometer, cook until the flesh turns opaque and flakes easily with a fork.
Troubleshooting: Common Pike-Filleting Problems
“My knife keeps tearing the meat.”
That’s usually a dull blade or too much sawing. Pike meat responds best to smooth, confident strokes.
Sharpen your knife and let the bones guide you instead of forcing it.
“I can’t find the Y-bones.”
Dry the fillet and use your fingertips. The tips often feel like a faint row of raised bumps.
If you’re still struggling, cut your fillet into three sections (tail/middle/front). The tail section is easiest,
and handling smaller pieces helps you “see” the pattern.
“I wasted a lot of meat.”
Everyone does at first. Pike filleting is a skill, not a personality trait. The five-fillet method can reduce waste from
“over-correcting,” and trimming scraps into patties makes the learning curve taste a lot better.
“The fillets taste fishy.”
Usually that’s handling and temperature, not the species. Keep fish cold early, remove bloodline/dark tissue if you want,
and avoid soaking fillets in water. Mild fish stays mild when treated like food, not luggage.
Conclusion: Pike Are Worth It (Yes, Even With the Y-Bones)
Cleaning and filleting a northern pike is a little more involved than panfish or walleye, but it’s absolutely doable.
If you want larger fillets, use the classic fillet-and-debone approach and remove the Y-bone strip carefully.
If you want quick boneless pieces, the five-fillet method is your best friend.
Either way, keep the fish cold, keep your knife sharp, and give yourself a few fish to learn the pattern.
Once it clicks, pike goes from “problem fish” to “why aren’t we keeping these more often?”
Field Notes: Real-World Pike Filleting Experiences (and Lessons)
Ask a group of anglers about northern pike and you’ll hear the same three-story trilogy: (1) “They’re too bony,”
(2) “They’re actually delicious,” and (3) “I learned that after I stopped attacking the fillet like it owed me money.”
Most people don’t dislike pikewhat they dislike is their first pike.
The most common beginner experience goes like this: you get home proud, you lay the fish on the board, you make a few bold cuts,
and then you realize pike slime has the grip strength of a greased watermelon. Your knife slips, the fillet tears, and suddenly
you’re bargaining with yourself: “If I can just get something edible out of this, I’ll never speak ill of panfish again.”
That’s normal. Pike will humble you. But pike will also teach you faster than almost any fishbecause the feedback is immediate.
When your knife is sharp and your angle is right, the meat separates cleanly and you can feel the bones like a built-in roadmap.
When your knife is dull, the fish feels like it’s made of wet carpet.
Another pattern shows up when people try to “remove Y-bones” by brute force. They’ll cut straight through the Y-bones thinking
they can pick them out later like a few stray pin bones. That usually ends in frustration, because the Y-bones are connected in a way
that makes “picking” them more annoying than removing them as a guided strip. The breakthrough moment for many filleters is learning
to stop cutting through the bones and start cutting to them. Once you touch bone, you pivot your blade and let that hard
surface guide your pathjust like riding a backbone when filleting any other fish.
The five-fillet method tends to convert skeptics faster, especially at camp. It’s the “get to dinner” approach.
People who cook for groups love it because it produces uniform pieces that fry evenly. And there’s a psychological bonus:
if you hand someone a basket of golden pike bites, nobody asks about Y-bones. They just ask if there’s tartar sauce.
That said, the method can leave meat behind on the frame, which is why experienced folks often keep a “scrap bowl” for chowder,
fish cakes, or a quick grind-and-patty night. Waste becomes strategy instead of tragedy.
One more real-world lesson: size and timing matter. Mid-size pike are often easier to work with because the fillets are thick enough
to see the bone pattern, but not so huge that the meat gets coarse or the trimming becomes a major event. And filleting soonerwhile the
fish is cold and firmusually makes cleaner cuts than waiting until it’s soft and warm. Many anglers also swear by drying the fillet surface
with paper towels before deboning, because seeing and feeling those bone tips is much easier when everything isn’t slick.
If you want a practical “practice plan,” try this: the next time you keep a pike, do one side with the classic Y-bone strip technique,
and do the other side with the five-fillet method. Cook them side by side. Compare texture, yield, and effort.
After two or three fish, you’ll know which method matches your styleand you’ll stop viewing pike as a chore and start viewing them as a
very large, very tasty excuse to sharpen your knife and show off.