Wool is basically a miracle fiber that decided to become an art supply. One minute it’s fluffy and chaotic (like a tiny cloud
with commitment issues), and the next it’s a solid little sculpture you can hold in your palm. That transformationmess to
masterpieceis what keeps me felting. Also: it’s wildly satisfying to stab something thousands of times and end up with
something cute instead of a criminal record. (Use finger guards. Please.)
This guide is part “how felting works,” part studio cheat-sheet, and part portfolio: 48 handmade wool creations
that show the range of what you can do with needle felting, wet felting, and a little stubborn optimism. If you’re here for
inspiration, you’ll get it. If you’re here for technique, you’ll get it. If you’re here because you bought a felting kit at
midnight and now you’re anxious… welcome home.
What Felting Actually Is (and Why It Feels Like Magic)
Felting is the process of making loose fibers lock together into a dense fabric or form. Wool fibers have tiny scales along
the shaft, and when you add friction, moisture, heat, or a barbed needle, those fibers tangle and tighten into a stable
structure. The trick is that you’re not “gluing” anythingyou’re persuading thousands of fibers to hold hands and never let go.
There are a few common routes:
needle felting (barbed needle entanglement),
wet felting (soap + water + agitation),
and fulling (felting knit/crochet fabric on purpose so it shrinks and thickens).
Different roads, same destination: wool that behaves.
Needle Felting vs. Wet Felting: Choose Your Adventure
Needle felting (AKA “soft sculpture with tiny spears”)
Needle felting uses a special needle with barbs that catch fibers and push them into each other. Repeated pokes compress the
wool into a firm shape. It’s perfect for 3D animals, dolls, mini food,
and 2D “painting with wool”.
Quick needle tip: use a coarser needle to build structure fast, then switch to finer needles for a smoother surface. Many
fiber artists rely on a strong “core” wool inside (cheaper, felts quickly), and save the pretty dyed wool for the outer layer
where it actually shows.
Wet felting (AKA “a spa day for wool that turns into a workout”)
Wet felting relies on warm/hot water, soap, and agitation to interlock fibers. It’s the go-to for flat sheets of felt, bowls,
vessels, hats, slippers, and textured wall hangings. Expect shrinkagesometimes a lotso most wet-felt designs start oversized
and “finish” down to the final shape.
If you want predictable results, make test samples. Track how your layout, fiber type, and agitation affect shrinkage so your
final piece doesn’t come out doll-sized when you wanted human-sized.
My Studio Setup: The Small Pile of Stuff That Makes the Big Difference
- Wool: core wool (batts/roving) for structure, softer merino for color layers, and a few “effect” fibers for shine.
- Needles: a few gauges (coarse for sculpting, medium for shaping, fine for finishing).
- Felting surface: foam pad or wool mat (your table deserves better).
- Finger guards: because creativity is great, but band-aids are boring.
- Wet-felt basics: warm water, mild soap, bubble wrap or a rolling mat, towels, and patience.
- Optional but delightful: a multi-needle tool for faster flat work, and a few cookie cutters for clean 2D shapes.
Design Moves That Make Felt Work Look “Finished”
Build a strong core, then “skin” it
When a sculpture looks lumpy, it’s usually because the core was lumpy. I compress the base shape until it’s firm, then add thin
outer layers of colored wool like I’m frosting a cake that absolutely cannot be eaten.
Think in layers, not blobs
Fur, feathers, petals, and clothing look better when added in small directional tufts. For realism, align fibers the way the
subject actually growsdown the back, around cheeks, along leaf veins, and so on.
Edges matter (especially in 2D “wool painting”)
Crisp outlines come from compressing borders early. I “tack” the edges first, then fill the middle. It’s like coloring inside
the linesexcept the lines are fluffy and you’re holding a needle.
Plan for shrinkage in wet felting
Wet felt is dramatic. It shrinks, it firms, it changes its mind mid-process. Make small samples so you can scale your resist
and layout intentionally rather than guessing and hoping the universe is feeling generous.
The Art Of Felting: 48 Of My Best Handmade Works From Wool
Below are 48 pieces that represent my favorite styles: tiny creatures, cozy decor, wearable art, and storybook weirdness.
Each one includes the “why it works” detail I wish someone had told me earlier.
Gallery 1: Tiny Wildlife & Pets (1–8)
1. Tufted Titmouse on a Twig
A needle-felted bird with a crisp little crestbuilt on a firm core, finished with directional feather tufts for realism.
2. Pocket Fox with a Mischief Face
Short wool layers for a smooth snout, then tiny surface tufts on the cheeks to keep it expressive without getting shaggy.
3. Mini Black Cat (a.k.a. “Shadow Loaf”)
Simple silhouette, strong shape controlproof that clean lines beat extra details when the subject is basically a void.
4. Corgi Butt Magnet
A comedic, high-impact form: compressed base + tiny wool “buns” for dimension + a firm finish so it survives daily fridge life.
5. Sleepy Hedgehog Pebble
A smooth oval core with short “spine” tufts layered from back to front so the texture stacks naturally.
6. Sea Otter Holding a Shell
Armature-free but stable: tight core, then tiny paws needle-felted separately and attached for cleaner edges.
7. Little Bunny with Blush Cheeks
Soft merino on the outside for a velvety look, with facial features felted lightly so it stays cute, not intense.
8. Goldfish That Looks Slightly Concerned
Thin translucent-looking layers (achieved by sparse wool) and a smooth surface finish so it reads “wet” without being wet.
Gallery 2: Mini Food & Kitchen Whimsy (9–16)
9. Blueberry Pancake Stack
Flat disks needle-felted firm, then “syrup” highlights added with glossy effect fibers for that just-poured illusion.
10. Avocado Half with a Perfect Pit
Gradient greens laid in rings, then compressedlike topographic maps, but tastier-looking and less useful for hiking.
11. Tiny Ramen Bowl
Noodles made from thin wool ropes, tacked down gently; toppings added last so they sit on top instead of sinking in.
12. Strawberry Tart Charm
Firm crust base + glossy “fruit” texture using tight finishing and tiny seed marks for believable detail.
13. Felted Soap Cozy (Functional Art)
Wet-felted wool wrapped around a bar of soapscrubby texture, cute look, and it helps the soap last longer.
14. Cinnamon Roll with Swirl Drama
The trick: build a plain cylinder, then needle in the swirl with thin lines so it stays graphic instead of muddy.
15. Sushi Set (Nigiri + Maki)
Rice texture made by lightly stabbing the surface with a fine needle, then adding fish layers as thin “skins.”
16. Garlic Bulb (Surprisingly Adorable)
Segment lines felted shallowly first; deep lines come later, otherwise the whole thing collapses into a sad onion.
Gallery 3: Mushrooms, Botanicals & Cozy Nature (17–24)
17. Fantasy Mushroom Brooch
Needle-felted cap and stem, then a hidden pin backing; bright colors pop best when the base is neutral and firm.
18. Mini Monstera Leaf
2D felting with clean cutoutsedges compressed early so the “holes” stay crisp instead of fuzzy.
19. Lavender Sprig Bouquet
Multiple tiny buds felted on a stem core; repeating shapes look polished when the spacing is intentionally uneven.
20. Sunflower Wall Mini
Petals layered in two rings for depth; center packed tightly so it reads “seeded” without needing extra materials.
21. Pinecone Ornament
Built from overlapping “scales” of wool: lots of repetition, surprisingly therapeutic, mildly time-consuming (worth it).
22. Tiny Succulent in a Pot
Leaves felted individually and attachedcleaner than trying to sculpt the whole plant as one piece.
23. Autumn Acorn Trio
Caps get texture; bodies stay smoothcontrast sells realism faster than piling on detail everywhere.
24. Mini Rainbow Cloud (Because Joy)
Wet-felted base cloud for firmness, needle-felted rainbow arcs on top so the color edges stay sharp.
Gallery 4: Wearables & Accessories (25–32)
25. Wool Pom Earrings That Don’t Itch
Super-firm felt balls with a smooth finishif they’re not dense, they fuzz out and look tired fast.
26. Felt Ball Trivet
Classic felted balls stitched together; the secret is consistent ball size so the final circle sits flat and stable.
27. Cozy Wrist Warmers
Fulling/felting a knit piece creates a dense fabric that blocks windpractical magic you can actually wear.
28. Nuno-Felt Scarf with Floating Color
Wool bonded onto a lightweight fabric base for drape; thin layers create painterly blends without bulky thickness.
29. Little Heart Patch for Denim Jackets
2D needle felting on fabrictack edges, then fill center; it holds best when you felt through the fabric evenly.
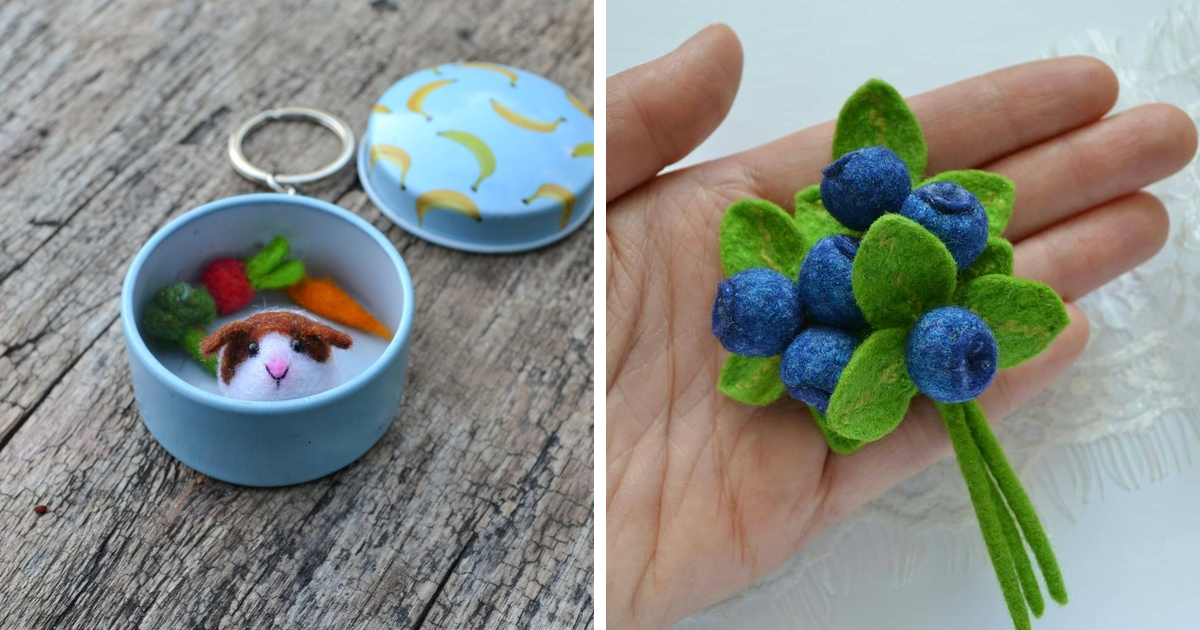
30. Mushroom Keychain
A firm core prevents squish over time; finish with a fine needle so the surface stays smooth in a pocket.
31. Wool Flower Hair Clip
Petals made separately and layeredclean silhouettes look more “boutique” than one big blended blob.
32. Felted Ornament Set (Gift-Ready)
Simple shapes, great color palettes, and neat seams: the kind of project that looks expensive even when it isn’t.
Gallery 5: Home Decor & Seasonal Pieces (33–40)
33. Mini Gnome Trio
Needle-felted bodies with tiny clothing details; beards are best as thin tufts, not a single fuzzy slab.
34. Halloween Ghost That’s More Cute Than Spooky
Smooth outer layer over a tight core, plus shallow eye socketsjust enough shadow to read, not enough to haunt you.
35. Snowball Ornament Cluster
Wet-felted balls finished extra firm; they keep their roundness and don’t pill as quickly on the tree.
36. Felted Garland with Color Pops
Stringing felt balls is simplewhat makes it special is intentional color spacing so it looks designed, not random.
37. Little Houseplant Coasters
Flat wet-felted rounds with needle-felted leaf designs on topdurable base, crisp graphics.
38. Needle-Felt “Wool Painting” Landscape
Layered sky, then mid-ground, then foreground: treat it like painting, but use fiber direction for brushstroke energy.
39. Bowl/Vessel with a Clean Rim
Wet-felted over a resistrim finished last with extra rolling so it stays smooth and doesn’t flare out.
40. Holiday Stars with Subtle Texture
Simple shapes look premium when the surface is evenfine needles and patience are the luxury ingredients here.
Gallery 6: Fantasy, Storybook & “Why Did I Make This?” (41–48)
41. Tiny Dragon with an Attitude
Armature-free but stable: thick core, then wings added as separate flat pieces so they stay crisp.
42. Forest Sprite Doll
Small doll with a wire armature for pose; wrap wool smoothly before felting so the surface doesn’t look bumpy.
43. Mushroom Wizard (Yes, Really)
A classic gnome shape upgraded with fantasy colorsyour design can be silly and still be technically clean.
44. Mini “Book” with a Wool Cover
2D cover felted firm, then stitched to a tiny formmixed techniques keep edges tidy.
45. Teeny Owl with Big Opinions
Facial disks felted separately and attached; it makes the eyes symmetrical without endless poking and regret.
46. Constellation Wall Panel
Dark felt base + needle-felt “stars” and linesgreat example of using negative space as a design tool.
47. Tiny Robot with Wool “Metal” Highlights
Gray wool can look flat; add subtle highlight fibers and clean edges so it reads as shiny, not dusty.
48. “Emotion Cloud” Series (Happy, Grumpy, Sleepy)
Same base shape, different facesan exercise in how tiny changes in eyebrows and mouth curves change the whole vibe.
Care & Storage: Keep Your Wool Art Looking Fresh
Felted pieces are sturdy, but they’re not invincible. For wearables and decor, gentle handling wins. If you ever wash a felted
item, go with cool water and minimal agitation to avoid additional shrinking or distortion. Let pieces air-dry fully. For
sculptures, dust gently and store away from crushing pressurewool remembers.
Troubleshooting: The Most Common Felting Problems (and Fixes)
- Fuzzies everywhere: Switch to a finer needle and “polish” the surface with shallow pokes.
- Lumpy body shape: Your core isn’t firm enough. Compress it more before adding color layers.
- Cracks or holes: Add thin wisps to patch, then felt them in graduallydon’t slam a thick clump on top.
- Wet felt shrinking too much: Less agitation early; test samples; scale your resist more intentionally.
- Details sinking in: Finish the base surface first, then add small details with a lighter touch.
How I Photograph Felt Work So It Looks Good Online
Wool texture can look either luxurious or… like a dust bunny you found under the couch. Lighting matters. I use soft natural
light, neutral backgrounds, and close-ups that show the surface finish. For small pieces, a simple “scale cue” (a hand, a mug,
a notebook) helps people instantly understand size. And if you’re posting for search traffic, descriptive filenames and
alt text like “needle felted fox figurine” beat “IMG_4839_FINAL_FINAL2” every time.
My Felting Diary: of Real-World Experience
My early felting phase was basically: buy wool, poke wool, wonder why wool looks like a stressed-out potato. I thought talent
would show up first and technique would follow, like a polite guest. Felting taught me the opposite. Technique is the guest.
It arrives early, eats all the snacks, and thenif you treat it welltalent finally wanders in later.
The biggest breakthrough was learning to respect the core. I used to rush the base shape because the pretty
colors were calling my name. But when the core is soft, every detail you add becomes a negotiation. Eyes drift. Ears sag.
Snouts become abstract. Now I compress the core until it feels like a firm stress ball. When the base is solid, details become
a joy instead of a rescue mission.
I also learned that less wool per layer is almost always better. Thin layers felt faster, blend cleaner, and
produce smoother surfaces. Thick clumps don’t “hide mistakes”they create new ones. If I need a richer color, I build it in
passes like watercolor: layer, compress, layer again. It’s slower in the moment and faster in the long run because you don’t
spend an hour trying to tame one giant fiber blob.
Wet felting taught me humility. On paper, it’s simple: soap, water, friction. In practice, it’s like working with a tiny
woolen weather system. One day, a scarf shrinks beautifully and drapes like a dream. The next day, the same layout decides to
become a thick, determined placemat. The fix was testing: small sample squares, notes on layout direction, and paying attention
to how different fibers behave. Once I accepted that shrinkage is part of the designnot a betrayalI started getting
consistent results.
My favorite pieces now come from combining patience with play. I’ll make a “serious” bird, then reward myself with something
ridiculous like a grumpy cloud. That mix keeps the craft fun and keeps me practicing the fundamentals. And honestly, felting is
one of the rare hobbies where you can hold the proof of your progress in your hand. Your first animal might look like a timid
bean. Your fiftieth animal might look like it has a personality and rent payments. That evolution is addictivein the best way.