If your bedroom nightstand looks more “college dorm castoff” than “Pinterest-worthy treasure,” don’t send it to the curb just yet. With a little Annie Sloan Chalk Paint®, a good cleaning, and a bold pink color, you can turn that sad little table into a Pretty In Pink showstopper that looks like it came straight from a Hometalk feature.
Chalk paint has become a go-to for furniture makeovers because it’s beginner-friendly, low mess, and gives that dreamy, velvety matte finish you see all over Instagram. Annie Sloan’s original Chalk Paint line is especially loved for sticking to most surfaces with minimal prep, drying fast, and layering beautifully for vintage or modern looks alike.
In this guide, we’ll walk through a full Pretty In Pink nightstand makeover with Annie Sloan Chalk Paintfrom choosing the right piece and prepping it properly to painting, sealing, and styling it so it looks intentional, not like you lost a paint fight with a flamingo. We’ll also finish with some real-life lessons and experiences from similar projects so you know what to expect before you pop that paint lid.
Why Chalk Paint Is Perfect for a Nightstand Makeover
Before we dive into the makeover steps, it helps to know why chalk paint is such a cult favorite for DIY furniture renewals:
- Minimal prep work: On most previously finished wood pieces, you can get away with thorough cleaning and light scuff sanding instead of hours of stripping and priming.
- Great adhesion: Chalk-style paints are designed to grip wood, veneer, and many previously finished surfaces, especially when properly cleaned.
- Beautiful matte finish: The soft, chalky finish is ideal for vintage, shabby chic, cottage, or French country looksbut also reads modern with clean lines and no distressing.
- Easy to distress: If you like a worn, romantic style, chalk paint sands back nicely along edges and details.
- Indoor-friendly: Annie Sloan Chalk Paint has low odor, so you can paint indoors with reasonable ventilation.
In short, if you want a nightstand makeover that looks custom but doesn’t require pro-level tools or skills, chalk paint is your best friend.
Step 1: Choose the Right Nightstand for a Pretty In Pink Makeover
Not every nightstand is a good candidate for a pink chalk paint transformation. Before you grab a brush, take a close look at your piece:
- Check the structure: Wobbly legs, sagging shelves, or drawers that barely open can be fixedbut they add time. For your first makeover, pick something with “good bones” that’s solid and stable.
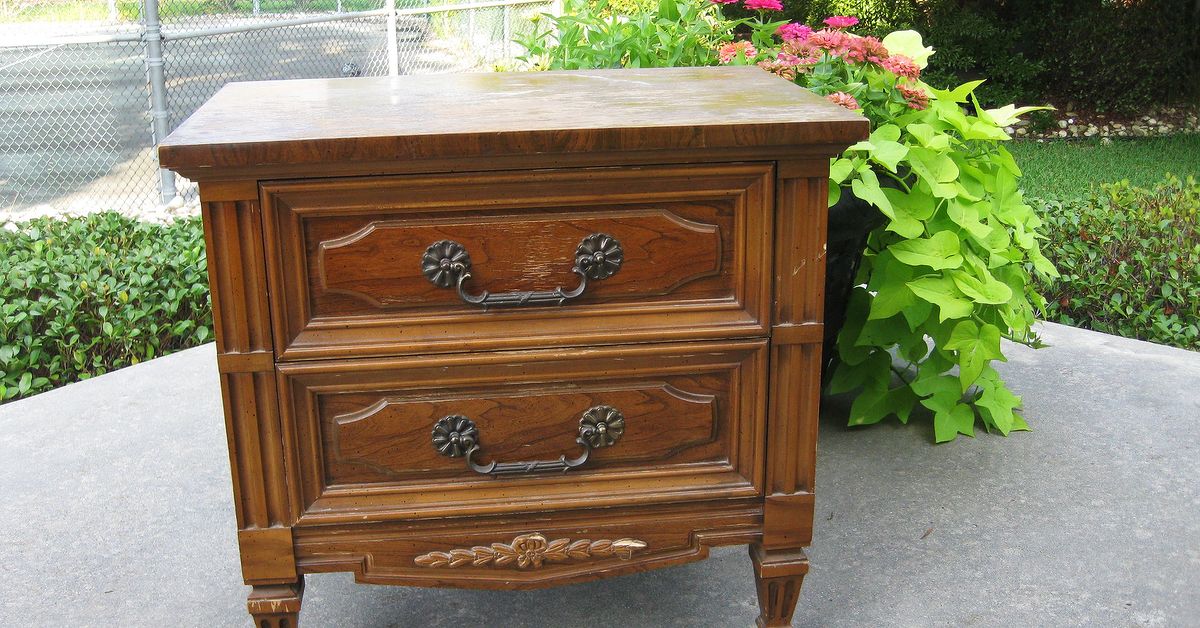
- Look for interesting details: Turned legs, curved edges, carved drawer fronts, or paneling really shine with chalk paint and light distressing.
- Avoid severe damage: Pieces with major water damage, rot, or warped tops may not be worth the effort unless you’re very attached to them.
Thrift stores, flea markets, Facebook Marketplace, and even your own garage are perfect hunting grounds. Look beyond the old finish and focus on shape, scale, and storage.
Step 2: Prep Like a Pro (Without Losing Your Weekend)
One of the biggest myths about chalk paint is that there’s no prep at all. Technically, it can stick with very little prep, but if you want a durable finish that doesn’t chip every time you set down your coffee, you’ll want to prep smartly.
Remove Hardware and Empty Drawers
Take off knobs, pulls, and any removable hinges. Pull out the drawers completely so you can reach the frame easily. Toss the random receipts, lip balm, and orphaned socks you find insidethis is your fresh start moment.
Clean the Surface Thoroughly
Use warm water with a mild dish soap or a dedicated furniture cleaner/degreaser to remove dust, oils, and old furniture polish. Pay extra attention to drawer pulls, corners, and decorative grooves where grime likes to hide.
After cleaning, wipe with plain water to remove residue and let the piece dry completely. This step alone often determines whether your chalk paint sticks like a dream or peels off in sheets.
Light Scuff Sanding (When Needed)
If your nightstand has a shiny varnish or slick laminate, do a quick scuff sand with 120–220 grit sandpaper. You’re not trying to strip the finishjust dull the gloss so the paint can grip better. Wipe away dust with a tack cloth or a slightly damp rag.
Deal with Stains and Bleed-Through
Old wood, especially red-toned woods like mahogany or cherry, can “bleed” tannins through light-colored paint, leaving yellow or pink stains. If your piece has water rings, dark knots, or is an older stained wood, apply a shellac-based stain-blocking primer to problem areas before painting.
Is it fun? Not particularly. But it’s still faster than repainting the entire piece because of surprise stains.
Step 3: Pick the Perfect Pink Annie Sloan Color
Now for the fun part: choosing the pink! Annie Sloan has several shades that work beautifully for a Pretty In Pink nightstand makeover, and you can also mix custom shades.
- Soft blush or dusty rose: Ideal if you want a romantic, grown-up pink that doesn’t scream “candy store.” These pair beautifully with neutrals and brass hardware.
- Warm, peachy pink: Great for boho or cottage rooms where you mix warm wood tones, woven baskets, and plants.
- Bold, bubblegum pink: Perfect for kids’ rooms, eclectic spaces, or if your personality is “human confetti.”
You can customize by mixing pink with white for a softer shade, or with a tiny bit of gray to mute it down for a more sophisticated look. Always test your color on the back or underside of the nightstand before committing.
Step 4: Painting Your Nightstand Pretty In Pink
Once your nightstand is clean, dry, and lightly sanded where needed, it’s time to paint.
Stir, Don’t Shake
Open your can of Annie Sloan Chalk Paint and stir gently from the bottom up. Shaking introduces bubbles that can show in the finish, and nobody wants a bubbly nightstand.
First Coat: Don’t Panic If It Looks Streaky
Use a good-quality synthetic or natural bristle brush. Dip your brush lightly and apply the paint in relatively random, crisscross strokes. Chalk paint is forgivingyou don’t need perfect, factory-style brush lines.
The first coat will likely look streaky or patchy, especially with lighter pinks over a dark stain. That’s normal. Let the paint dry fullyusually about 1–2 hours depending on temperature and humidity.
Second Coat: The Magic Layer
Apply a second coat, this time paying more attention to coverage and smoothness. You can use slightly longer strokes in one direction if you want a cleaner, more modern finish.
For very dark wood or a dramatic color change, you may want a third thin coat. Thin coats dry faster and cure better than one heavy, gloopy coat.
Optional: Smooth Sanding Between Coats
If you’re going for a silky smooth, almost sprayed-on look, lightly sand with 320–400 grit sandpaper between coats once the paint is fully dry, then wipe away dust. This extra step can make your pink nightstand look boutique-level polished.
Step 5: Distress, Detail, or Keep It Crisp
Here’s where you decide the personality of your Pretty In Pink nightstand. Do you want it to look like a chic antique, or something straight out of a modern design studio?
Light Distressing for a Romantic Look
If you love the shabby chic vibe, grab a fine-grit sanding sponge and gently sand along edges, corners, and raised details. Let the original wood or under-color peek through.
- Focus distressing where natural wear would happen: drawer edges, legs, corners.
- Step back often so you don’t overdo itdistressing is very easy to add and hard to take away.
Adding Contrast with Two Colors
For extra character, you can layer a second color under or over your pink:
- Paint a neutral gray or white first, then pink on top, and lightly distress so the under-color shows.
- Keep the body pink and paint the drawer fronts or top in white or a warm neutral for a color-blocked look.
Modern, No-Distress Finish
If you prefer a cleaner, modern style, skip distressing entirely and focus on a flawless paint job and sleek hardware. Pink can look very contemporary when paired with sharp lines and minimal ornamentation.
Step 6: Seal the Finish so It Survives Real Life
Paint alone isn’t enough for a hardworking nightstand that sees cell phones, water glasses, and the occasional midnight snack. You’ll want a protective topcoat.
Clear Wax for a Classic Chalk Paint Look
Clear wax is the most traditional finish for chalk paint. It deepens the color slightly and gives a soft, hand-rubbed sheen.
- Use a wax brush or lint-free cloth to apply a thin coat of clear wax in a circular motion.
- Work it into the paint, then wipe off excess with a clean cloth.
- Buff after 15–30 minutes for a gentle sheen.
Waxed finishes need a few weeks to fully cure, so go easy on the surface during that time. Once cured, you can refresh the wax every year or so if needed.
Poly Topcoat for Heavy Use
If your nightstand will be heavily used (kids’ room, rental, or you’re just very attached to nighttime snacks), consider a water-based polyurethane or polycrylic designed for furniture instead of wax. Many DIYers love a matte or satin poly over chalk paint for easier long-term maintenance.
Always test your topcoat on a hidden area firstsome poly finishes can slightly alter the color, especially over lighter pinks.
Step 7: Update the Hardware for a Finished Look
Fresh paint plus old, dated hardware is like wearing a ballgown with gym sneakersit can work, but it usually doesn’t. Swap or update the hardware to complete the transformation:
- Brushed brass or gold: Gorgeous with blush or dusty pink for a glam vibe.
- Matte black: Adds a modern, graphic touch and keeps pink from feeling too sweet.
- Ceramic or glass knobs: Perfect for cottage, vintage, or French country looks.
If you love the shape of your existing hardware but not the finish, you can spray paint it in a metallic or matte tone that fits your new color scheme.
Styling Your Pretty In Pink Nightstand
Now that your nightstand is perfectly pink and beautifully sealed, it’s time to style it like a Hometalk feature.
- Layer heights: Add a lamp, a small stack of books, and a tiny plant or candle to keep the top balanced and interesting.
- Repeat colors: Bring in a pillow, throw, or wall art that echoes your pink tone so the nightstand feels intentional, not random.
- Texture mix: Pair the matte chalk paint with metal, glass, woven baskets, or linen to keep things visually rich.
Even a small nightstand can completely change the energy of your bedroom when styled thoughtfully.
Troubleshooting: Common Chalk Paint Nightstand Problems
Problem: Paint Scratches Off Easily
This usually means the surface was too slick or dirty. Make sure you’ve cleaned thoroughly and lightly sanded shiny finishes. If needed, use a stain-blocking or bonding primer on super glossy or laminate surfaces before repainting.
Problem: Yellow or Brown Stains Bleeding Through
That’s tannin bleed from the wood. Spot-prime stained areas with a shellac-based primer and repaint with your pink chalk paint once dry.
Problem: Brush Strokes You Don’t Love
Try slightly thinning your chalk paint with a bit of water and using a softer brush. Lightly sand between coats with fine-grit sandpaper and wipe away dust before repainting.
Problem: Cloudy or Sticky Wax
You may have applied too much wax. Buff more firmly with a clean cloth, or gently remove excess with a bit of clear wax on a cloth and then rebuff. Always apply wax in very thin layers.
Real-Life Experience: What a Pretty In Pink Nightstand Makeover Is Really Like
On paper, a pink nightstand makeover sounds like a quick afternoon project. In real life, it’s more like a fun mini-adventure that fits into a weekendand teaches you far more about patience, prep, and paint than you expect.
Most DIYers who’ve tackled a similar Annie Sloan Chalk Paint nightstand makeover share a few common experiences.
You Start Out Nervous About the Color
The moment you brush the first streak of pink over a dark-stained nightstand, your brain might go, “What have I done?” That’s normal. The first coat rarely looks pretty, and bold colors are extra shocking against bare or dark wood. By the second coat, though, the color starts to make sense, and you can finally see the vision you had in your head.
Prep Always Takes Longer Than You Thinkbut It’s Worth It
Almost everyone underestimates prep time the first go-round. Cleaning thoroughly, removing sticky residue, tightening wobbly legs, and lightly sanding edges feels tedious. But the nightstands that look the best and last the longest are always the ones that were prepped with care.
If you’ve ever rushed through prep and then watched your beautiful paint job chip off the first time you set down a mug, you already know: skipping prep is like skipping sunscreen. The regret always comes later.
The “Chalk Paint Is Magic, No-Prep Ever” Myth Fades Fast
When you actually work with chalk paint, you realize that while it’s forgiving, it’s not sorcery. It’s amazing at gripping many surfaces, but it still benefits from a clean, slightly roughened baseespecially on glossy or heavily polished furniture. You’ll come away with a more realistic appreciation: chalk paint is easier, but not effortless.
Waxing Feels Weird the First Time
The first time you apply clear wax, you might worry you’re doing it wrong. The surface looks a little cloudy at first, your arms get a mini workout, and you might wonder if you’ve ruined your perfectly matte finish. Then, as it soaks in and you buff it, the color deepens slightly, the surface gets silky, and you suddenly understand why people swear by waxed chalk paint.
You’ll likely also learn that less wax is more. A thin, well-buffed coat looks and performs better than thick, gummy layers.
You Start Seeing Future Projects Everywhere
After one successful nightstand makeover, it becomes very hard to walk past a thrift store or yard sale without mentally repainting every piece of furniture you see. That scratched dresser? Chalk paint. The outdated side table? Chalk paint. Your friend’s boring TV console? You guessed itchalk paint.
Many people find that their first pink nightstand makeover opens the door to a whole series of small, satisfying furniture projects. It’s a low-risk, relatively low-cost way to transform your home and experiment with color without remodeling anything permanent.
Your Bedroom Feels DifferentIn a Good Way
One of the best parts of a Pretty In Pink nightstand makeover is how much it changes the mood of your room. Pink, especially softer blush tones, can feel cozy, calm, and inviting. Bolder pinks add fun and energy, especially when paired with neutral walls and bedding.
Even if you’re not “a pink person,” adding just one accent piece in a carefully chosen shade can make the space feel curated and personal. It’s a small project with a surprisingly big emotional payoff every time you walk into the room and see something you transformed yourself.
Final Thoughts: A Little Pink Paint, A Big Transformation
A Pretty In Pink nightstand makeover with Annie Sloan Chalk Paint is more than just a paint jobit’s a fast, approachable way to refresh your bedroom, learn new DIY skills, and give an old piece of furniture a second life. With thoughtful prep, a well-chosen pink, careful layering, and a durable topcoat, you’ll have a custom piece that looks right at home on Hometalk or your favorite design feed.
Whether you lean romantic and vintage or modern and bold, a pink chalk-painted nightstand proves that even small furniture can make a strong style statement. And once you’ve finished one, don’t be surprised if your dresser, headboard, and random thrift-store finds start eyeing you nervously from across the room.