Outdoor lighting is the easiest home upgrade that makes you feel like you’ve got your life together.
You walk outside, the path glows, the patio looks inviting, and suddenly your house has “movie-night-at-the-nice-neighbor’s” energy.
Done well, it’s safer, prettier, and (bonus) far less likely to annoy your neighbors, your wallet, or the local moth population.
This guide breaks down outdoor lighting the way real people shop and install it: what to light, how bright it should be,
which fixtures actually matter, and how to avoid the classic mistake of turning your front yard into a prison-yard spotlight scene.
Quick Jump (because you’re busy)
- Why Outdoor Lighting Matters
- The “Layer Cake” Method: Ambient, Task, Accent
- Outdoor Lighting Fixtures (and what they’re good for)
- Brightness, Color Temperature, and Comfort
- Solar vs. Low Voltage vs. Hardwired
- Simple Layout Examples
- Smart Outdoor Lighting That’s Actually Smart
- Mistakes to Avoid
- FAQ
- Real-World Outdoor Lighting Experiences
Why Outdoor Lighting Matters
Great outdoor lighting does three jobs at once:
- Safety: You can see steps, edges, and obstacles before your ankle files a complaint.
- Security: The right light in the right place (often motion-based) reduces hiding spots without creating glare and shadows.
- Style: It adds depth and “curb appeal,” turning flat darkness into a scene with highlights and shadows.
The secret isn’t “more light.” It’s purposeful light: aimed where needed, as bright as needed, and no brighter.
That’s how you get a welcoming home instead of a beacon visible from low Earth orbit.
The “Layer Cake” Method: Ambient, Task, Accent
If outdoor lighting feels chaotic, it’s usually because everything is trying to do the same job.
Use layers instead:
1) Ambient lighting (the gentle baseline)
This is the overall glow that makes a patio or porch feel usable. Think wall lanterns, soffit lights, or soft string lights.
You’re not trying to “light the yard.” You’re creating a comfortable background level.
2) Task lighting (where you actually need to see)
Steps, walkways, grilling zones, gates, and house numbers deserve task lighting. This is the “don’t trip, don’t fumble keys” layer:
step lights, path lights, downlights, and targeted sconces.
3) Accent lighting (the “wow” layer)
Accent lighting is where landscape lighting shinesliterally. A spotlight on a tree canopy, a soft wash on stonework,
or a subtle uplight on a feature plant adds drama without shouting.
Outdoor Lighting Fixtures (and what they’re good for)
Path lights
Pathway lights guide movement and define edges. The goal is visibility and rhythm, not runway brightness.
Space them so the light overlaps gently; too far apart creates “bright spot / dark spot” whiplash.
Spotlights and uplights
Spotlights highlight focal points: specimen trees, architectural details, signage, or that one planter you keep alive out of pure stubbornness.
Uplighting adds drama but can cause glare if aimed too high or too brightuse shielding and careful angles.
Floodlights (especially with motion sensors)
Floodlights are your broad coverage option for driveways and large zones.
For security, motion-activated floods are often more effective (and less obnoxious) than leaving bright lights on all night.
Make sure the fixture is positioned to avoid shining into bedroomsyours or anyone else’s.
Wall lanterns and sconces
Perfect for entries, garages, and side doors. Choose fixtures that control glare (frosted lenses and downward direction help).
Two lanterns flanking a door usually looks balanced and provides usable face-level light.
Step, riser, and deck lights
These are underrated heroes. Low, controlled light on steps and edges prevents falls and looks high-end.
If you have a deck, lighting the perimeter and stairs is both practical and classy.
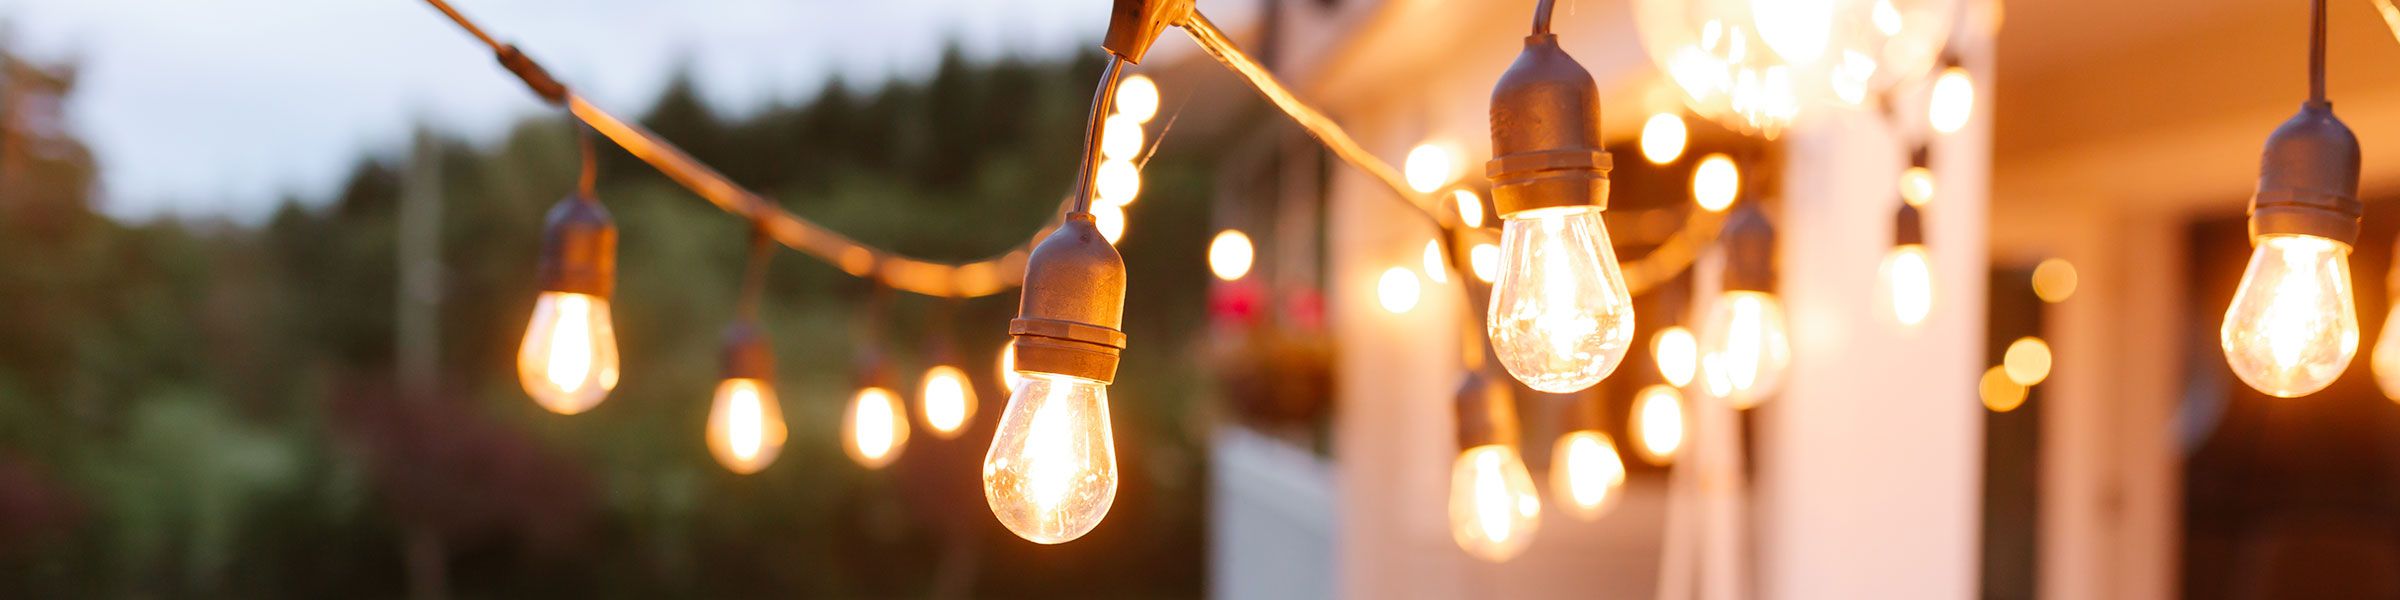
String lights (a.k.a. instant atmosphere)
String lights can turn a plain patio into a cozy outdoor room. Keep them warm in tone and avoid blasting brightness.
Think “soft café glow,” not “interrogation scene, but make it cute.”
In-ground well lights
These can look sleek for uplighting trees or washing walls, but placement matters.
They’re also more exposed to water, dirt, and lawn equipmentso choose durable, outdoor-rated options and keep them accessible for cleaning.
Brightness, Color Temperature, and Comfort
Lumens: the number you actually care about
Watts tell you energy use; lumens tell you brightness. For a practical starting point:
- Path lights: modest brightness is typically enough for visibility (often around the low hundreds of lumens per fixture).
- Entries and porches: bright enough to recognize faces and read a package label, not so bright you squint.
- Security zones: use higher-output fixtures, but aim and shield them to avoid glare and harsh shadows.
Tip: If you’re unsure, start slightly lower. It’s easier to add a fixture or increase output than to un-blind your guests.
Color temperature: warm light usually wins outdoors
Outdoor lighting looks best (and feels friendlier) in warmer tones. Warm-white light also tends to reduce harshness and glare,
and it’s generally more “night-friendly” than blue-heavy light. If you’re choosing LEDs, look for warm color temperatures
rather than cool, icy white.
Shielding and glare control: the quality upgrade
Glare is the reason some outdoor lighting feels awful even when it’s “bright.”
Fixtures that direct light downward and shield the source help keep light where you want iton the ground, on steps, on a wallrather than in eyeballs.
This also reduces light trespass (the polite term for “your porch light is in my bedroom”).
Solar vs. Low Voltage vs. Hardwired (Line Voltage)
Solar outdoor lights
Solar lights are the easiest entry point: no wiring runs, no transformer, minimal tools.
They’re great for simple pathway markers and quick ambiance, especially if the area gets strong sun.
The tradeoff is performance variabilityshade, winter days, dirty panels, and battery aging can reduce runtime and brightness.
Best use: easy walkway definition, decorative accents, renters, and “I need light by tonight” situations.
Low voltage lighting (typically 12V)
Low voltage landscape lighting is the sweet spot for many homeowners: flexible, safer to DIY than line voltage,
and powerful enough for real design. A transformer steps household power down to low voltage, and you run landscape cable to fixtures.
- Pros: versatile layouts, reliable brightness, easy fixture additions later.
- Cons: you must plan wire runs, manage voltage drop, and use watertight connections.
Hardwired (line voltage) outdoor lighting
Line-voltage fixtures are common for wall lanterns, garage lights, and some permanent landscape installations.
Because it’s higher voltage, installation is more code-sensitive and often best handled by a licensed electrician,
especially for new circuits, buried conduit, or major changes.
Best use: primary entry lights, permanent exterior fixtures, and any project where you want “set it and forget it” durability.
Simple Layout Examples You Can Steal
Example 1: A welcoming front walk
- Goal: safe steps + curb appeal, not blinding brightness.
- Plan: path lights staggered along the walk; a warm wall lantern at the door; step lights if there are risers.
- Pro detail: aim path lights downward and slightly outward, so you see edges without glare.
Example 2: Patio “outdoor room” vibe
- Goal: cozy ambiance with enough visibility to eat, talk, and not spill salsa.
- Plan: string lights overhead; a couple of low-glare wall sconces; optional small accent uplights for plants.
- Pro detail: put the ambient layer on a dimmer or smart control so you can shift from dinner to lounging.
- Goal: visibility when needed, darkness when not.
- Plan: motion-activated floodlights aimed down and across the area; add a low path light near gates or steps.
- Pro detail: avoid placing the light where it shines straight into eyes when you walk out of the door.
- Timers and schedules: lights turn on at dusk and off at a reasonable time (like when humans sleep).
- Motion sensors: great for side yards, garages, and drivewayslight when needed, less energy waste.
- Dusk-to-dawn photocells: reliable automation without needing an app.
- Zones: separate controls for entry, landscape accents, and patio ambiance so everything isn’t “on or off” together.
- Over-lighting: brighter isn’t safer if it creates glare and deep shadows.
- Unshielded uplights: they can blast light into windows and the sky instead of highlighting the tree.
- Random spacing: path lights look best with consistent rhythm and overlapping pools of light.
- Ignoring wet-location ratings: outdoor fixtures should be rated for the conditions they’ll face.
- Sloppy connections: water + electricity = a bad time. Use weatherproof connectors and protect splices.
- No plan for maintenance: leaves, dirt, and sprinklers happen. Make fixtures accessible for cleaning and bulb replacement.
- Plan at night: place temporary lights or use a flashlight to see what deserves emphasis.
- Start with the “must-have” zones: steps, entries, and paths first; accents second.
- Account for growth: shrubs and trees will change the beam path over time.
- Be kind to future-you: leave slack in wiring and document where lines run.
Example 3: Driveway and side-yard security without spotlight drama
Smart Outdoor Lighting That’s Actually Smart
“Smart” is only smart if it reduces hassle. The best upgrades are simple:
One more smart tip: keep outdoor controls simple for guests. Nobody wants to download an app to find the bathroom.
Outdoor Lighting Mistakes to Avoid
Choosing Outdoor LED Lights for Efficiency and Longevity
LEDs dominate outdoor lighting for good reason: they provide plenty of light while using less energy than older technologies,
and they last a long timemeaning fewer ladder trips and fewer “why is this bulb out again?” moments.
Look for quality drivers, outdoor-rated construction, and consistent color temperature across the system so your yard doesn’t look patchy.
If you’re mixing fixture types (path + spot + sconces), aim for a cohesive warm tone.
Matching color temperature is one of the fastest ways to make the whole setup feel intentional.
Installation Notes (without pretending every yard is the same)
A few practical principles help almost any outdoor lighting project:
If you’re installing low voltage landscape lighting, pay attention to voltage drop on long runs.
Using heavier-gauge cable, shorter runs, and thoughtful placement can keep brightness consistent.
And if you’re touching line voltage circuits or trenching for new wiring, local codes matterthis is where a pro can save you headaches.
FAQ
Should I leave outdoor lights on all night?
Often, no. Many setups work better with schedules, dimming, or motion sensorsespecially for security.
Constant high brightness can create glare and reduce visibility (your eyes adjust, and shadows get deeper).
A balanced approach is usually: modest entry lighting + motion lighting for activity zones.
What’s the best outdoor lighting for a small yard?
Small yards benefit from restraint. Use a few well-placed fixtures: one warm entry lantern, a short run of path lights,
and one accent spotlight on a focal plant or texture. It’ll feel bigger and more curated than a floodlit rectangle.
Solar vs. low voltage landscape lightingwhat should I choose?
Choose solar for quick, simple installs and light-duty marking.
Choose low voltage when you want dependable brightness, expandable design, and better control over where light lands.
Many homes use both: solar for “nice-to-have” zones and low voltage for the main visual backbone.
Conclusion
Outdoor lighting works best when it has a job description. Light the places you walk, highlight what you love,
and keep brightness comfortable and controlled. When you layer ambient, task, and accent lightingusing warm, shielded fixtures
and sensible controlsyou get a home exterior that feels inviting, safe, and beautifully “finished.”
Real-World Outdoor Lighting Experiences (about )
The first time I helped a friend “upgrade” their outdoor lighting, we made every rookie mistake in one glorious weekend.
We started with excitement, a cart full of fixtures, and the confidence of people who had watched exactly one how-to video.
By sundown, we had path lights spaced like a toddler’s teeth: close-close-far-close-far-far, and one spotlight aimed so high
it could’ve guided ships to shore. The yard looked less like “welcoming home” and more like “theme park queue line.”
The fix was surprisingly simple: we turned everything off, then rebuilt the plan from the ground upliterally.
First, we walked the property the way guests do: driveway to door, door to patio, patio to the side gate.
Every place someone could trip got attention: steps, uneven pavers, the “mystery bump” in the lawn that no one remembers installing.
We used step lighting and a couple of downward-facing fixtures instead of blasting the whole area.
Instantly, the yard felt calmer, and you could actually see where you were going.
Next came the “wow” layer. Instead of lighting every shrub (which is a fast track to “overdone”),
we picked two features: a textured stone wall and a mature tree with a canopy that deserved applause.
One well-aimed uplight on the tree created depth and drama, but we learned to keep it shielded and low-glare.
When the beam was too bright, it flattened the view and made the shadows harsher; when we dialed it back,
it looked like intentional design.
The biggest lesson was control. We added a simple dusk schedule for entry lights and motion for the driveway.
Suddenly, the house looked welcoming all evening, but it wasn’t wasting energy at 3 a.m.
And the motion lighting had a surprising side benefit: it stopped raccoons from treating the side yard like their personal after-hours buffet.
(They still visited. They just did it with more caution, like tiny masked burglars who had seen the security upgrades.)
Maintenance became the unglamorous hero of the story. A few weeks later, leaves and sprinklers dulled the lenses,
and one fixture got bumped by a garden hose. We added “wipe lenses occasionally” to the seasonal to-do list,
checked connections, and adjusted angles as plants grew. Outdoor lighting isn’t a one-and-done; it’s a living part of the landscape.
The payoff is huge, thoughevery night the yard looks finished, the walk feels safer, and the patio has that warm,
“stay for one more drink” glow that makes people linger.