If your walls are begging for a beach vacation but your budget says, “Let’s maybe calm down,” nautical string art is the perfect compromise. It’s affordable, beginner-friendly, and just crafty enough to make you feel like you host a very charming DIY show in your kitchen. Even better, it blends beautifully with modern coastal decor when you do it with a little intention (read: fewer cheesy signs, more texture and personality).
In this guide, you’ll learn how to make nautical string art from scratch, how to choose the right beach-inspired design, what materials actually matter, and how to style the finished piece so it looks elevated instead of “gift shop exploded in my living room.” We’ll also cover common mistakes, budget tips, and a longer experience section at the end with real-world lessons from making and displaying nautical string art.
Why Nautical String Art Works So Well for Beach Decor
Nautical string art checks a lot of boxes at once: it adds texture, brings in handcrafted charm, and works with the natural materials that coastal spaces love (think wood, jute, linen, and rattan). It also gives you an easy way to nod to the ocean without going full “anchor wallpaper and six decorative lobsters.”
The best coastal rooms usually feel layered, airy, and a little personal. String art fits that vibe because you can customize the wood tone, thread color, scale, and motif to match your space. A white-and-navy anchor on warm stained wood feels classic. A sandy-beige wave design on a pale painted board feels soft and modern. A compass rose done in indigo and brass-toned nails looks surprisingly upscale for something you made with thread and a hammer.
What You Need for Nautical String Art
Basic Supplies
- Wood board or wood plaque (pre-cut is easiest)
- Fine-grit sandpaper
- Paint or stain (optional but recommended)
- Small nails (linoleum nails or similar craft nails work well)
- Hammer
- Embroidery floss, crochet thread, or thin craft string
- Printed pattern or hand-drawn template
- Tape
- Scissors
- Tweezers (helpful for removing paper bits)
Optional but Very Useful
- Pliers (great for holding tiny nails if your fingers value their safety)
- Sawtooth hanger or picture-hanging strips
- Glue gun (for securing loose thread ends or adding a back hanger)
- Clear protective topcoat for indoor wood projects
For string, embroidery floss gives a crisp, clean line and a polished look. Crochet thread is also great if you want a slightly more traditional finish. If you want a softer, chunkier coastal feel, use a thin cotton cord for larger designs.
Step-by-Step DIY: How to Make Nautical String Art
1) Pick a Nautical Design That Matches Your Skill Level
Start simple. String art looks impressive even when the shape is basic, so resist the urge to begin with a 47-point octopus. Good beginner-friendly nautical string art ideas include:
- Anchor
- Wave outline
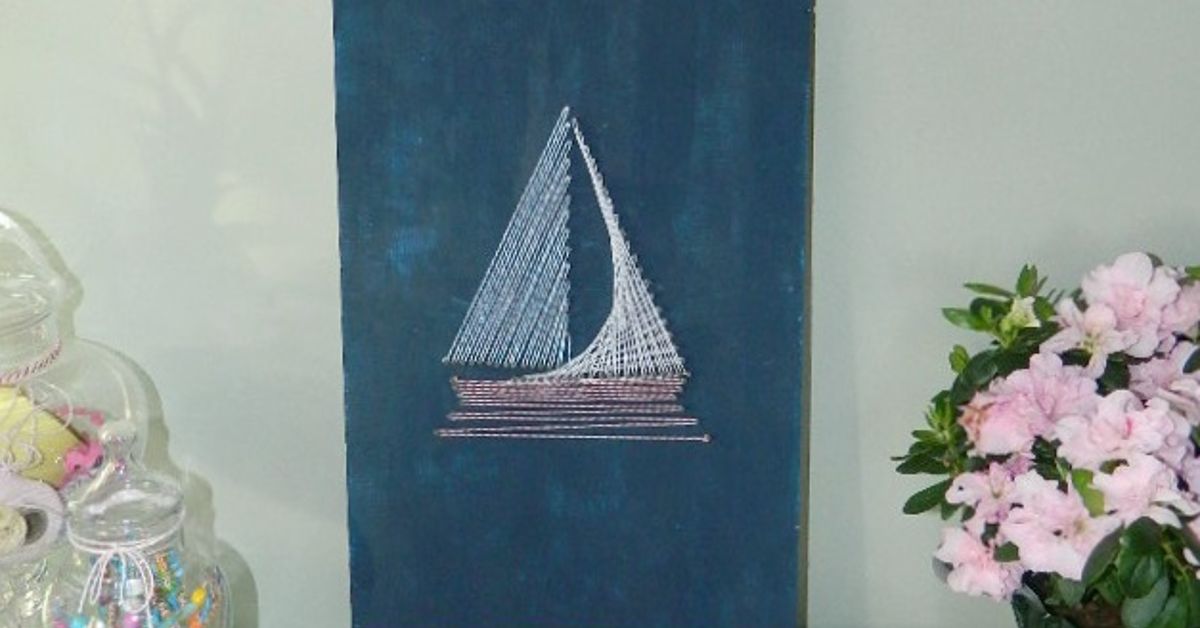
- Sailboat silhouette
- Starfish
- Seashell
- Compass arrow
- Simple lighthouse
Designs with cleaner outlines are easier to nail and string. If your image has too many tiny details, the nails get crowded fast and your thread lines can turn into a spaghetti mystery. A good rule: if you can clearly trace it with a marker, you can probably build it as string art.
2) Prep the Board
Sand the edges and surface lightly so you don’t end up with splinters in the middle of your creative moment. Then paint or stain the board if you want a finished look. A single thin coat often looks better than a heavy one because the wood grain still shows through, which is perfect for coastal style.
Great beachy board finishes include:
- Whitewash for a driftwood look
- Soft gray stain for weathered coastal vibes
- Natural wood with a clear coat
- Deep navy paint for high contrast with white thread
- Sand-tone paint for a subtle, neutral palette
If you use stain or a strong finish, work in a well-ventilated area and let everything dry fully before adding paper and nails. This is not the phase to rush unless you enjoy sticky fingerprints becoming part of the final design.
3) Print and Position Your Template
Tape your printed nautical template onto the board. Center it carefully and step back for a quick look before committing. Tiny alignment issues can look huge once the piece is on the wall (and your eye will somehow spot them every single time).
Pro move: print two copies of your designone for the board and one as a visual reference while you string. It makes life easier once the paper comes off.
4) Hammer in the Nails
Place nails along the outline of the shape, keeping spacing fairly even. Depending on the design, spacing often falls around 1/4 inch to 1/2 inch. Curves and corners usually need nails placed a little closer together so the shape reads clearly.
Keep the nail height consistent and make sure the nails do not poke through the back of the board. If you’re using small nails, pliers can help hold them steady while you tap. Your thumbs will send thank-you notes later.
5) Remove the Paper Template
Once the outline is fully nailed, tear away the paper gently. Use tweezers to remove any tiny paper pieces trapped near the nail holes. Don’t skip this cleanup steplittle scraps are surprisingly visible once the thread goes on.
6) Outline with Thread First
Tie your thread to one nail with a secure knot. Then wrap the thread around each nail head along the outline. This first pass creates the shape and gives the final piece structure. If you skip the outline and go straight to crisscrossing, the design can look fuzzy and lose definition.
For bigger shapes like anchors or sailboats, do two outline passes. It sharpens the silhouette and makes the finished art pop from across the room.
7) Fill the Shape
Now for the fun part: crisscross the thread inside the shape. Go back and forth at different angles to fill the space. You can follow a pattern, but random crisscrossing often looks fantastic and gives that classic string-art texture.
Want a more polished look? Use a strategy:
- Radiating fill: great for compasses and sunburst-style motifs
- Horizontal/vertical layering: great for lighthouses and sailboats
- Random fill: great for anchors, shells, and wave shapes
- Gradient fill: switch thread colors halfway through for an ocean ombré effect
8) Finish and Secure
Once you like the coverage, tie off the thread around a nail and trim the end close to the knot. If a tail keeps popping up, use a tiny dot of glue to secure it. If your board is raw or lightly painted, you can add a clear protective coat (after the design is complete and if the product is suitable for your project setup) to help the wood hold up over time indoors.
9) Add Hanging Hardware
For lightweight string art, a sawtooth hanger is a classic choice. For renters, damage-free picture hanging strips can work well if you follow the product instructions exactly (surface prep matters a lot more than people think). If you use adhesive strips, avoid hanging valuable or irreplaceable pieces and pay attention to surface and weight guidance.
Best Nautical String Art Ideas for #BeachIdeas
Anchor String Art
The anchor is the MVP of nautical decor, but the trick is making it feel fresh. Use a warm wood board, white thread, and brass-toned or black nails. Skip giant “WELCOME ABOARD” lettering unless that truly sparks joy in your soul.
Wave Line Art
A simple rolling wave is perfect for modern coastal homes. Use two thread colorsdeep navy and sea-glass bluefor subtle dimension. This design looks especially good in bedrooms, bathrooms, or entryways.
Compass Rose
If you want a piece that looks custom and expensive, this is it. Use a symmetrical template and keep your nail spacing consistent. A compass design also works beautifully with layered thread directions, which creates a clean geometric effect.
Lighthouse Silhouette
Great for a taller board. Use a two-tone fill: light gray for the tower and a tiny pop of red or navy for the cap. Bonus points if you keep the background simple and let the silhouette do the talking.
Starfish or Shell Outline
These are ideal if you want a softer, more decorative beach look. Pair with driftwood-toned boards and neutral thread for a subtle coastal style that doesn’t feel too themed.
Nautical Coordinates or Beach Name
This is the sentimental version of string art and it’s perfect for gifts. You can create the outline of your favorite beach town, add coordinates, or spell out a short word like “TIDE,” “SURF,” or your family name. Personalized pieces often end up being the most loved.
Coastal Design Tips So Your DIY Looks Stylish
Coastal decor has evolved. The best rooms now lean more into natural texture, layered materials, and a connection to place rather than obvious beach props everywhere. That’s good news for your string art because it means your piece can be the nautical detailwithout needing 14 backup anchors.
Use a Coastal Color Palette (But Not Only Blue)
Blue and white is timeless, but coastal palettes also include sandy beige, soft grays, sea-glass green, sun-faded coral, and warm wood tones. Pull colors from actual beach landscapes: dune grass, driftwood, cloudy skies, deep water, and shells.
Layer Texture Around the Piece
String art already brings texture, so build around it with materials like jute, sisal, wicker, linen, rattan, or woven baskets. This makes the wall decor feel integrated into the room instead of floating there like it forgot where it lives.
Keep the Nautical Touches Subtle
A rope-wrapped object, sea-glass vase, shell bowl, or a single model boat can complement your artwork beautifully. The keyword is complement. Let the string art be the focal point and keep supporting decor simple.
Choose the Right Wood Tone
Richer wood tones and visible grain can make nautical decor feel more grounded and less “theme room.” If you love a weathered look, go for a soft driftwood finishbut don’t feel trapped into only pale wood. Contrast can look sophisticated.
Where to Hang Nautical String Art
Entryway
A medium-size anchor or compass piece works beautifully in an entryway. Hang the center of the piece near eye level (the classic 57-inch rule is a helpful starting point), then adjust slightly for your space.
Living Room Gallery Wall
Mix your string art with framed beach photos, abstract prints, or woven wall pieces. Use paper templates on the wall first to test spacing before hammering anything in place. Your future self will appreciate the extra 10 minutes.
Bathroom or Hallway
Smaller wave, shell, or starfish designs are great here. If the area gets humid, make sure your wood and finish are appropriate for indoor use and avoid placing the piece where it gets splashed or steamed constantly.
Kids’ Room or Beach House Rental
Use playful motifs like sailboats or whales and keep thread colors cheerful. Personalized string art (name + wave, initials + anchor) is a crowd-pleaser and feels more unique than store-bought wall signs.
Common Mistakes and Easy Fixes
Mistake 1: Uneven Nail Spacing
Fix: Mark key corners and curves first, then fill in between. Curves usually need tighter spacing than straight lines.
Mistake 2: Loose Thread
Fix: Keep gentle, steady tension while wrapping. Outline the shape first and wrap each nail head securely so the structure holds.
Mistake 3: Overcomplicated Template
Fix: Simplify the shape before printing. Bold silhouettes almost always look better in string art than hyper-detailed drawings.
Mistake 4: Wrong Hanging Method
Fix: Use a sawtooth hanger for lightweight wood boards or the correct adhesive strips for the wall surface and weight. Don’t guess on hanging hardware when five extra minutes can save the wall (and the art).
Mistake 5: “Too Much Beach” Styling
Fix: Pair your string art with neutral textures and one or two supporting nautical accents. Think curated coastal, not souvenir shop speedrun.
Budget, Time, and Difficulty
Estimated Cost
- Budget version: $10–$20 (scrap wood + basic thread + nails)
- Mid-range version: $20–$40 (pre-cut plaque + paint/stain + nicer thread + hardware)
- Gift-ready version: $40+ (custom board, specialty finish, premium hanger, layered thread colors)
Time Needed
- Simple design: 1–2 hours
- Detailed design: 2–4 hours
- Add drying time if painting or staining the board
Skill Level
Beginner to intermediate. If you can use a hammer, tie a knot, and commit to not rushing the outline, you can do this. Perfection is not requiredstring art still looks charming with a little handmade personality.
Experience Notes: 500+ Words of Real-Life Nautical String Art Lessons
The first time I made nautical string art, I chose an anchor because I thought, “How hard can an anchor be?” The answer was: not hard, but surprisingly humbling if you don’t plan the curves. I spaced the nails too far apart around the rounded parts and the anchor looked more like a confused pitchfork. Lesson learnedcurves need tighter nail spacing than straight lines. On my second try, I placed the nails closer together on the bends, and the shape instantly looked cleaner. That small change made the whole project feel more professional.
Another thing I learned quickly is that the board finish changes everything. I tried one anchor on plain unfinished wood and another on a lightly whitewashed board. Same template, same thread color, completely different mood. The unfinished wood version felt rustic and cottage-like. The whitewashed one felt airy and modern, almost like something you’d see in a beach condo that somehow always smells like sunscreen and expensive candles. If you’re aiming for a specific coastal style, spend extra time choosing the board finish before you start hammering.
The most successful project I made was a wave design for a hallway. I used three thread colors: navy, medium blue, and a pale sea-glass green. I outlined the wave in navy, filled the bottom half with navy and medium blue, and then blended in the sea-glass green toward the crest. It wasn’t a true gradient in the technical sense, but from a distance it looked layered and ocean-like. That project taught me that string color matters more than people expect. Even a simple shape can look custom if the color palette is thoughtful.
I also learned that hanging the piece is part of the project, not an afterthought. One time I finished a beautiful lighthouse design, held it up on the wall, and realized it was hung too high. It made the room feel awkward, like the art was trying to escape. I re-hung it lower, closer to eye level, and suddenly it looked intentional. Since then, I always test placement first with painter’s tape or a paper template. It sounds fussy, but it saves holes, patching, and dramatic sighing.
Humidity is another real-world issue if you’re decorating near a bathroom or in a beach house. I once placed a string art shell piece near a steamy bathroom wall and noticed the thread relaxed a bit over time. The fix was easy: I re-tensioned a few lines and moved the piece farther from direct steam. For future projects, I started using better thread and paying more attention to where the art would live. Nautical decor belongs near water in spirit, not necessarily in the splash zone.
My favorite experience, though, was making a personalized string art piece with beach coordinates as a gift. I used a darker stained board and cream thread, then added a tiny compass arrow in one corner. It was simple, meaningful, and didn’t scream “themed decor.” The person who received it immediately recognized the location and got emotional in the best way. That’s when nautical string art really clicked for me: it’s not just wall decor, it’s memory decor. It can represent a favorite trip, a family beach town, a honeymoon spot, or just the feeling of being by the water after a stressful week.
So if you’re making your first nautical string art project, don’t worry about getting it flawless. Focus on a clear shape, good spacing, and colors that feel like the coast to you. The tiny imperfections are part of the charm. And honestly, once you finish one, you’ll probably start planning the next three before the first one even makes it onto the wall. That’s the magic of this craft: it’s simple enough to start in an afternoon, but customizable enough to keep you coming back.
Conclusion
Nautical string art is one of the easiest ways to add beach-inspired personality to your home without spending a fortune. It combines the warmth of wood, the texture of thread, and the charm of handmade decor in a way that feels timeless when styled well. Start with a simple design, use a coastal color palette, and let the piece do the talking. Keep the surrounding decor natural and layered, and your DIY will look right at home in a relaxed, modern coastal space.
Whether you choose a classic anchor, a soft wave, or a custom coordinates piece, the result is more than a craft projectit’s a personal coastal statement. In short: a little thread, a handful of nails, and suddenly your wall is on vacation.