You know that moment when you’re doing something wildly glamorouslike waiting for your coffee to brewand you stare at a sponge long enough
that it becomes a mossy cliffside in your mind? Yeah. That’s how this hobby starts.
Turning ordinary household stuff into tiny, believable “worlds” is part craft project, part photography trick, and part “I swear I’m an adult with
responsibilities.” The best part: you don’t need a fancy studio. You need curiosity, a few mini figures (or clever substitutes), and the willingness
to pick lint out of fake snow like it’s a high-stakes rescue mission.
Why Everyday Objects Make Surprisingly Good Miniature Sets
Miniature photography works because our brains love shortcuts. If a surface has the right texture, a believable scale cue, and lighting that
feels “real,” we’ll accept it as a landscape. A kitchen sponge becomes a forested mountain. Coffee grounds become rugged terrain. Aluminum foil becomes
a craggy ridge. You’re basically giving your eyes a magic showand charging them zero dollars for admission.
The secret is not “how tiny can I make this,” but “how consistent can I make the illusion.” Consistency beats complexity every time.
The Tiny-World Toolkit (Mostly Stuff You Already Own)
Mini characters (or “Who lives in this world?”)
Tiny people instantly sell scale. You can use model railroad figures, dollhouse miniatures, LEGO-style figures, action figure accessories, or even
paper cutouts. If you don’t have figurines yet, start with silhouettes: a small printed person taped to a toothpick can look surprisingly legit from the right angle.
Textures and “nature” on a budget
- Sand/sugar/salt: beaches, snowfields, desert dunes
- Coffee grounds/tea leaves: rocky soil, hiking paths, volcanic slopes
- Cotton balls/tissues: clouds, fog, waterfalls (yes, really)
- Cardboard/foam core: walls, streets, building shells, backdrops
- Aluminum foil/bubble wrap: mountains, ice, weird sci-fi terrain
Lighting that doesn’t scream “desk lamp”
Soft light is your best friend. Window light is fantastic, but a desk lamp can work if you diffuse it (tissue paper, parchment paper, or a thin white cloth).
Use a second white surface (paper, a wall, a notebook) to bounce light back in and soften shadows. Your goal is natural-looking highlights, not “interrogation room chic.”
Camera basics for miniature photography
Phones can absolutely do thisespecially with portrait mode used carefully or a cheap clip-on macro lens. If you’re using a camera, macro or close-up settings help,
but the real game is depth of field. The closer you get, the thinner your in-focus slice becomes, which is why miniature scenes can look “toy-ish”
if only one eyelash is sharp.
To keep more of the scene sharp, you can use a smaller aperture (higher f-number) or try focus stackingtaking multiple shots focused at different points
and combining them into one sharp image. (Yes, this is the photography equivalent of “I refuse to choose.”)
My 20-Minute Process for Building a Believable Miniature World
1) Pick a “hero object”
Choose one everyday object that already has interesting texture: a sponge, a cookie, a dish towel, a scrub brush, a stack of books, a colander. That’s your landscape.
Everything else is supporting cast.
2) Decide the story in one sentence
“Climbers reach the summit.” “Construction crew repairs the bridge.” “Explorers cross the ice.” When your story is clear, your props stop multiplying like gremlins.
3) Build big shapes first, then sprinkle details
Start with the horizon/backdrop (a curved sheet of paper works wonders), then place your terrain, then your characters, and only then add tiny details like
“snow,” “debris,” or “tools.”
4) Hide the scale-killers
The fastest way to ruin the illusion is to leave a giant giveaway in frame: a coin, a fork, a brand logo, a crumb the size of a boulder (unless you want it to be a boulder).
Crop tight, shoot low, and use simple backgrounds.
5) Shoot at “tiny eye level”
If you photograph from above, everything looks like a tabletop. If you shoot lowlike you’re the size of the charactersthe scene becomes a world.
Get your camera close to the “ground,” angle it slightly upward, and suddenly your sponge cliff has dignity.
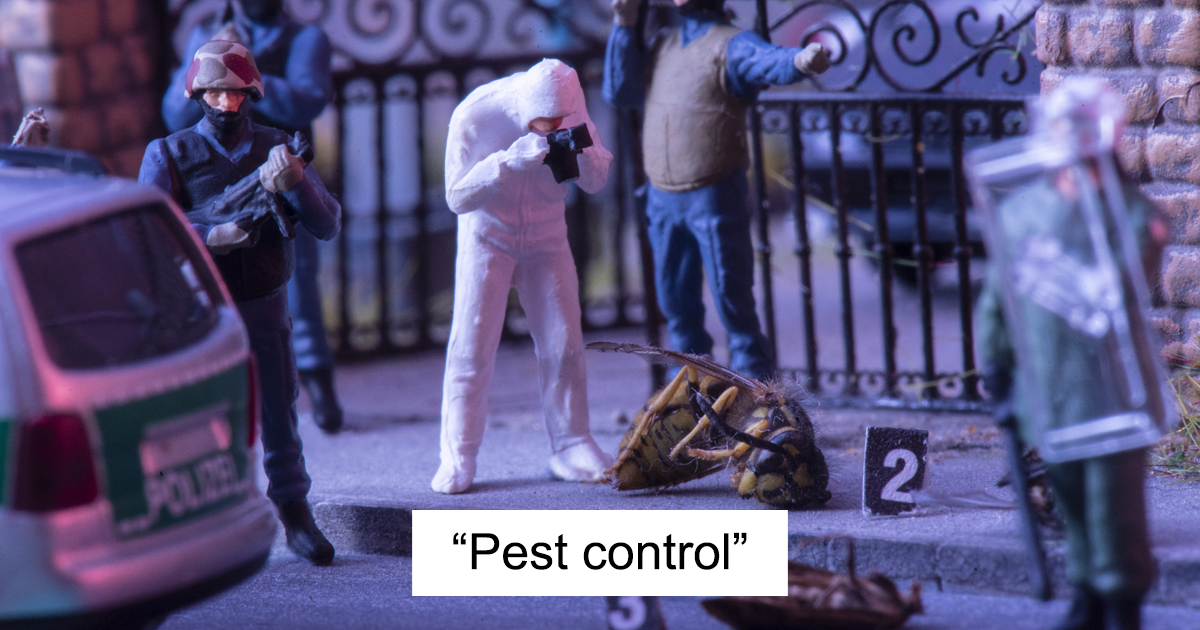
15 Pics: Everyday Objects Turned Into Miniature Worlds
Below are 15 scene concepts you can recreate at home. Swap in what you havethe point is the illusion, not the shopping trip.

Everyday objects: green sponge, toothpicks, a pinch of oregano “trees.”
Sell the illusion: shoot low so the sponge pores read like rugged rock. Add a paper backdrop to remove the kitchen context.

Everyday objects: notebook crease as canyon, ruler as bridge, binder clips as “support beams.”
Sell the illusion: light from the side to create canyon shadows; keep the notebook lines out of focus or out of frame.

Everyday objects: crumpled foil, coarse salt, a dab of white paper as “ski lodge roof.”
Sell the illusion: diffuse your light to avoid harsh metallic glare; angle the foil to create believable ridges.

Everyday objects: used coffee grounds, bottle cap with a tiny water “oasis,” cinnamon dust as warm haze.
Sell the illusion: use a warm light; add a curved paper background so the “desert” feels endless.

Everyday objects: Q-tips, pepper flakes as fallen leaves, a strip of tissue as fog.
Sell the illusion: stagger the “trees” in depth; blur the far background for a real woodland feel.

Everyday objects: dish soap bubbles on a plate, foil scraps as “tech,” a dark cloth backdrop.
Sell the illusion: side-light the bubbles for highlights; keep the plate edge out of frame so it reads as “ground.”

Everyday objects: textured towel, string or yarn as road, tiny cyclists or paper cutouts.
Sell the illusion: choose a towel with subtle pattern; big prints scream “linen” instead of “landscape.”

Everyday objects: cereal pieces as rocks, cocoa powder as dirt, toothpicks as trekking poles.
Sell the illusion: pick one cereal type so the “geology” matches; mixed cereal looks like breakfast, not nature.

Everyday objects: bubble wrap, white paper underlay, a light blue backdrop.
Sell the illusion: low angle + cool lighting makes bubbles feel like ice texture instead of packing material.

Everyday objects: torn paper edge, thread as rope, paper clips as “carabiners.”
Sell the illusion: use directional light to enhance the paper fibers; they read like rock strata up close.

Everyday objects: scrub brush bristles as grass, mini “sheep” from cotton or pom-poms, a cardboard fence.
Sell the illusion: keep bristle shine controlled with soft light; add a simple sky backdrop.

Everyday objects: books as skyscrapers, sticky notes as billboards, paper strips as roads.
Sell the illusion: shoot from street level between the spines; add tiny cars (or paper ones) for scale.

Everyday objects: dry tea leaves, a tea bag “dune,” a warm LED or phone flashlight as camp lantern.
Sell the illusion: use warm light and long shadows; keep the background dark to feel like night in the desert.

Everyday objects: keyboard as city grid, thin paper as crosswalks, a bottle cap as a “roundabout.”
Sell the illusion: crop out letters; dramatic lighting makes keys read like architecture, not typing.

Everyday objects: orange peel as canyon walls, bottle cap “river,” blue paper beneath for depth.
Sell the illusion: side-light the peel texture so it looks like weathered rock; add a tiny boat for scale.
How to Make the Illusion Look “Real,” Not “Toy on a Table”
Use depth of field on purpose
A little blur is naturalreal landscapes have atmospheric haze. But if only the front character is sharp and everything else melts away,
the scene can look like a close-up of toys. Try stepping back slightly (so the camera isn’t inches away), use more light so you can keep ISO lower,
and experiment with smaller apertures if you’re on a camera.
If you want a crisp, “cinematic miniature” look, focus stacking is a cheat code: shoot multiple frames with different focus points and blend them.
Even simple stacks can dramatically increase how much of the scene feels sharp and believable.
Try forced perspective (the movie magic move)
Forced perspective is all about distance: put a small object closer to the camera and a larger object farther away so they appear the same size.
For miniature worlds, you can fake massive backdrops by placing larger “background props” farther away, then aligning them carefully from one camera angle.
It’s a one-angle illusionwhich is fine, because photos are also one-angle illusions. Convenient!
Create a horizon with a simple paper “sweep”
Museums use curved backgrounds in dioramas to hide corners and create depth. You can do a tiny version with a sheet of paper gently curved
from tabletop up to a wall or a box. No horizon line = no “this is on my desk” giveaway.
Match the “grain size” to the story
Big salt crystals next to a tiny person look like boulders, not snow. Coffee grounds might look like rocks or like… coffee grounds,
depending on scale. If your “sand” pieces are bigger than your character’s head, you’ve made a boulder field. Own it, or swap materials.
Common Mistakes (and Fast Fixes)
- Shiny plastic glare: diffuse the light; change angle; use a little paper flag to block hotspots.
- Messy background: add a paper sweep or shoot inside a box to control the scene edges.
- Too many props: simplify. One strong story beats twelve random accessories.
- “Floating” figures: press feet into soft material (coffee grounds, sugar) or hide the base behind a rock/grass clump.
- Scale confusion: keep objects in the same “world logic.” Don’t mix a 2-inch figure with a 1-inch ladder unless the story is “giant ladder festival.”
Mini-World Cleanup and Safety
Use a tray or baking sheet under your scene so you can pour materials back into containers. Avoid liquids near electronics (keyboard city planners, please hear me).
If you’re using small LEDs, don’t cover them with flammable materials. And if you’re working with powders (cocoa, flour), keep it gentleyour lungs did not sign up
for “Dessert Dust Storm: Director’s Cut.”
Conclusion
Making miniature worlds out of everyday objects is a surprisingly satisfying way to turn “ordinary” into “wait, how is that not real?”
It’s creative storytelling with a practical twist: you learn lighting, composition, and patienceplus you start seeing your home like a prop warehouse.
(The sponge will never know peace again.)
Extra: of Real-World Experience From Building Tiny Worlds
The first time I tried building a miniature scene, I thought the hard part would be the “building.” Turns out the hard part was everything I didn’t notice at normal size:
dust, fingerprints, frayed paper edges, and that one rebellious hair that appears in photos like it’s trying to win an Oscar for Best Supporting Thread.
Miniature world photography trains your eyes to spot tiny distractionsand then solve them without turning the whole project into a weekend-long production.
I’ve learned to start with the simplest possible setup and earn my way to complexity. When I jump straight into a big scene, I end up with a cluttered frame that
looks like a craft store aisle exploded. But when I begin with a single “hero object,” everything becomes easier: a sponge tells me what kind of landscape it wants to be,
aluminum foil suggests mountains, coffee grounds beg for hikers. The object drives the story, and the story tells me which props are actually necessary.
Lighting has been the biggest upgrade in my results. Early on, I’d blast a scene with a harsh lamp and wonder why it looked fake. Softening the lightbouncing it off a wall,
diffusing it through tissue, or moving the lamp farther awayimmediately made things feel more natural. Even when the scene is silly (like tiny campers on a tea-bag dune),
the lighting can make it feel cinematic. If the shadows behave, the brain believes.
Composition matters more in miniature scenes than I expected. Shooting from above almost always ruins the illusion, because it reminds you you’re looking at a tabletop.
As soon as I lowered the camera to “tiny person height,” the same props looked ten times more believable. I also started using backdrops constantly: a curved piece of paper
is the unsung hero of miniature worlds. It hides the corner where reality lives.
I’ve also learned to embrace happy accidents. Sometimes the “snow” looks too chunkyso the scene becomes a boulder field. Sometimes the bubbles collapse mid-shootso the
alien dome city becomes an “after the storm” story. The best miniature photos usually aren’t about perfection; they’re about commitment to the illusion. If you commit,
the audience comes with you.
Finally, building 15 different scenes taught me that miniature worlds are basically storytelling exercises with props. The more specific the story prompt, the easier the build:
“Bridge repair crew at dawn” instantly suggests a warm light, tools, and a focused composition. “Tiny people doing stuff” suggests… chaos. So now I write a one-sentence
plot before I place anything, and it keeps the whole process fun instead of frustrating. Plus, it makes every photo feel like a moment from a bigger worldone that just
happens to fit on a baking tray in my kitchen.