If you’ve ever caught a whiff of that “old wet towel” smell in your house and thought, “Hmm, that’s… suspicious,” you’re not alone. Mold can be sneaky, stubborn, and a little dramatic. The good news? You don’t always need to panic, buy every home mold test kit on the shelf, or call a hazmat team. With a smart DIY approach, you can often figure out whether you really have a mold problem, where it’s coming from, and what to do next.
This guide walks you through how to test for mold in your home using simple DIY techniquesplus when it’s actually worth getting professional help. We’ll cover visual inspections, “sniff tests,” basic DIY sampling, and how to use mold test kits without wasting money or getting fooled by scary-looking results.
Before You Start: Do You Even Need to Test for Mold?
Here’s the twist: many health and environmental agencies in the United States don’t recommend routine mold testing in homes. Instead, they say if you see mold or smell a musty odor, you already have enough information to act. The main questions are:
- Where is the moisture coming from?
- How much mold is there?
- How do you clean it up safely and fix the moisture problem?
When Mold Testing Is Usually Not Necessary
In a lot of cases, formal testing is overkill. You probably don’t need mold testing if:
- You can clearly see mold on walls, ceilings, or around windows.
- You notice obvious water damage or past leaks plus visible mold growth.
- You’re just curious about the type of mold (“Is it black mold?”) but you already know it needs to be cleaned up.
There are no universally accepted “safe” or “unsafe” indoor mold levels. Even if a lab report gives you spore counts and Latin names, it often doesn’t change what you need to do: dry things out, remove moldy materials, and fix the source of moisture.
When Mold Testing Can Make Sense
DIY mold testing or professional testing might be worth considering when:
- You smell a strong moldy odor but can’t find the source.
- Family members have persistent symptoms (coughing, congestion, headaches) that improve when they leave the house.
- You’re dealing with a real estate transaction and need documentation about moisture or mold issues.
- You’ve already done a basic cleanup but want to verify whether a specific surface is still contaminated.
In these cases, some simple DIY steps can help you gather more information before deciding whether to hire a professional mold inspector.
Step 1: DIY Mold Inspection with Your Eyes and Nose
Before you buy a single test kit, do what the pros do first: a thorough visual and odor inspection. Think of it as detective work for your house.
Look for Visual Signs of Mold and Moisture
Grab a flashlight, notepad, and maybe your favorite “I’m on a mission” playlist. Check these common mold hot spots:
- Bathrooms: Around the tub, shower, caulk lines, tile grout, under sinks, and behind toilets.
- Kitchens: Under sinks, behind the fridge, around dishwashers, and near any leaky plumbing.
- Basements and crawl spaces: Foundation walls, joists, subfloors, around sump pumps, and near stored cardboard boxes.
- Bedrooms and living areas: Around windows, under window sills, on exterior walls, behind furniture pushed against the wall.
- Attics: Roof leaks, around chimneys or vents, and on the underside of roof decking or rafters.
Watch for:
- Black, green, white, or orange patches or fuzz.
- Bubbled, peeling, or discolored paint or drywall.
- Warped wood, soft drywall, or stained ceilings.
Use the “Sniff Test”
Mold has a telltale scent: musty, earthy, or like old wet socks hiding somewhere they shouldn’t be. If a room, closet, or cabinet smells moldy even when it looks clean, that’s a big clue. It might be hidden inside walls, under flooring, or behind cabinets.
Make notes of any rooms where the odor is stronger. Those become priority areas for closer inspection or DIY mold testing.
Option 1: Simple DIY Mold Checks (No Fancy Kits Required)
If you can see suspicious spots, you can do a very basic, low-tech “test” by gently investigating the surface.
Check If a Stain Is Mold or Just Dirt
Sometimes stains are just dust, soot, or old water marks. To figure out what you’re dealing with:
- Put on disposable gloves and a simple dust mask or respirator.
- Dampen a paper towel with a bit of mild detergent and water.
- Gently wipe a small area of the stain.
If it smears or wipes off easily like dirt, it may not be active mold growth. If it smears but leaves a “shadow” or if there’s a fuzzy or slimy texture, mold is more likely involved. Either way, if the area has been damp, it deserves attention.
Monitor Humidity and Moisture
You can’t have mold without moisture. A cheap digital hygrometer can tell you if your indoor humidity is regularly above about 60%. You can also use a moisture meter on walls and floors around past leaks or suspected problem areas. High readings mean conditions are ripe for mold, even if you can’t see it yet.
Option 2: DIY Mold Test Kits – Pros, Cons, and Reality Check
Walk into a home improvement store and you’ll see mold test kits promising easy answers. The problem? Many of these kits collect mold spores on a little petri dish, and then of course mold growsbecause mold spores are practically everywhere, indoors and out.
What DIY Mold Test Kits Usually Do
Most over-the-counter mold test kits work like this:
- You open a petri dish containing a growth medium.
- You leave it out in a room or wave it around near a vent.
- You seal it up and wait for mold to grow.
- Optionally, you mail it to a lab for identification.
It sounds scientific, but here’s the catch: you’ll almost always grow something because mold spores are floating in normal indoor air. Without proper controls, sampling strategy, or outdoor comparison, the results are hard to interpret.
The Limitations of Cheap Mold Test Kits
Common issues with DIY mold test kits include:
- No standardized comparison to outdoor mold levels.
- No clear “safe vs. unsafe” threshold for your results.
- Poor instructions that can lead to contaminated or misleading samples.
- Scary-looking lab reports that don’t actually tell you what to fix.
If you do use a DIY mold test kit, treat it as one piece of the puzzlenot the final verdict. Combine any results with what you see, smell, and know about leaks, flooding, or condensation in your home.
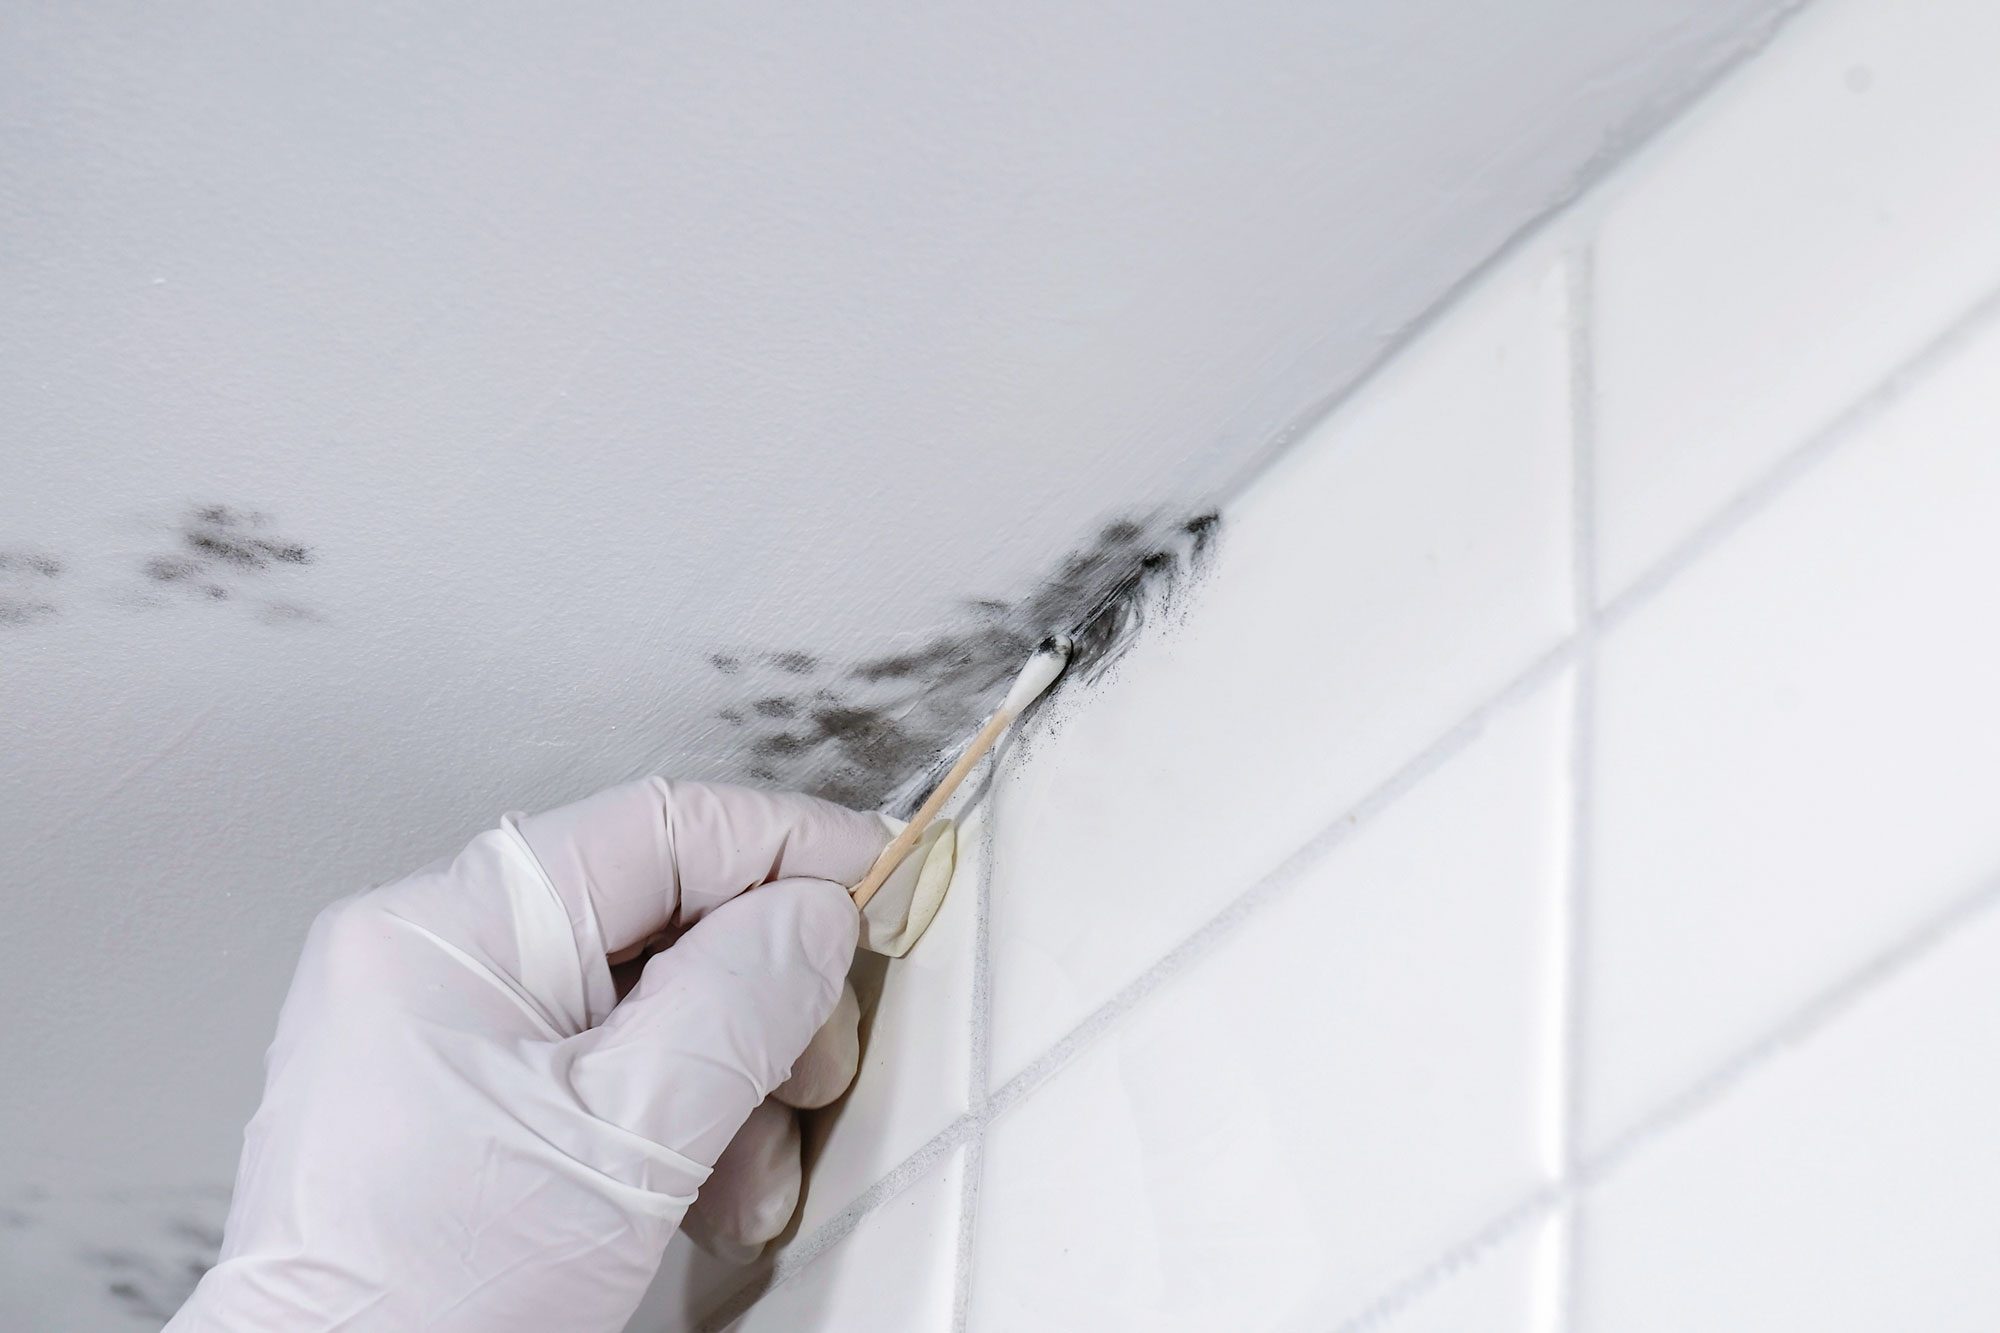
Option 3: DIY Tape-Lift or Swab Samples for Lab Analysis
If you have visible mold and want to know more about it (for example, for documentation or to confirm the type), a more focused approach is a tape-lift or swab sample that you send to a qualified lab.
How a Tape-Lift Surface Sample Works
A tape-lift sample collects mold directly from a surface. Many specialty labs or DIY mold testing services provide kits, but the basic idea is similar:
- Use clear, transparent tape (not frosted or packing tape).
- Press the sticky side gently on the suspicious area of mold growth.
- Lift the tape and stick it onto a clean glass slide or the lab’s provided card.
- Label the sample clearly (location, date, room), then mail it to the lab following their instructions.
The lab can identify common mold types present on that surface and sometimes comment on whether the growth looks heavy, moderate, or light.
When DIY Surface Sampling Makes Sense
Consider tape-lift or swab testing when:
- You’re documenting mold for a landlord, buyer, or insurance claim.
- You have multiple areas and want to know if they’re all the same type of mold.
- A healthcare provider has asked whether there is visible mold in your environment and you want a bit more detail.
Even with lab analysis, remember that the big-picture decisions are the same: dry things out, remove contaminated materials, and fix leaks or humidity problems.
What About Air Testing for Mold?
Air sampling is one of those things that sounds impressive“We’ll test your air!”but it’s trickier than it looks. Proper air sampling requires specialized pumps, carefully timed samples, and professional interpretation. Short-term DIY air tests can give a snapshot that may or may not reflect actual long-term exposure.
For most homeowners, investing in a thorough visual inspection and moisture control is a better first step than spending big money on air testing that might raise more questions than answers. If you truly need air samplingfor example, for a complicated building issue or legal caseit’s usually best handled by a qualified mold or indoor air quality professional.
When to Skip DIY and Call a Professional
DIY testing is great for basic fact-finding, but there are times when you should bring in the pros instead of going full “science fair” in your living room:
- Large affected areas: Visible mold covering more than about 10 square feet (roughly a 3 ft. by 3 ft. area) should be evaluated professionally.
- History of flooding: If your basement or first floor has been flooded, especially with sewer water, professional cleanup is highly recommended.
- Hidden mold concerns: Strong odors but no visible mold, sagging walls or ceilings, or condensation inside wall cavities.
- Health concerns: If anyone at home has asthma, severe allergies, a weakened immune system, or unexplained persistent symptoms, talk to a healthcare provider and consider a professional inspection.
A good mold inspector doesn’t just collect samples. They should walk through the home, ask questions about leaks and humidity, use moisture meters, and explain what they’re seeing in plain language.
Safety Tips for Any DIY Mold Testing
Whenever you’re dealing with suspected mold, even just for testing, keep safety in mind:
- Wear gloves and at least a basic mask or respirator when you disturb moldy areas.
- Avoid aggressive scraping or brushing just to “get a good sample”you don’t want to spread more spores around.
- Keep kids, pets, and anyone with breathing issues away from the testing area.
- Wash your hands and change clothes after working around moldy spots.
Testing is helpful, but it’s not worth making yourself sick over a tape sample.
Putting It All Together: A Simple DIY Mold Testing Game Plan
If you suspect mold in your home, here’s a practical, step-by-step summary you can follow:
- Do a full walkthrough: Inspect bathrooms, kitchen, basement, attic, and exterior walls. Use your eyes and nose.
- Map moisture: Identify leaks, condensation, or past water damage. Consider a hygrometer and moisture meter.
- Document what you find: Take photos, write notes, and mark the locations of any suspicious areas.
- Decide if testing adds value: If mold is clearly visible, focus on cleanup and fixing moisture. If the situation is confusing or hidden, consider a targeted DIY test.
- Use kits wisely: If you choose a DIY kit, follow instructions carefully and don’t panic when something grows in the dish.
- Know your limits: For large, complex, or health-sensitive situations, bring in a professional inspector or remediation company.
Remember, the goal isn’t just to “test for mold.” The real win is a cleaner, drier, healthier home where mold doesn’t get a chance to move in and redecorate.
Real-Life Lessons and Experiences from DIY Mold Testing
Ask a handful of homeowners about mold, and you’ll get a mix of cautionary tales, DIY victories, and the occasional “I wish I’d called for help sooner.” Here are some experience-based insights that can help you approach mold testing with realistic expectations and fewer headaches.
The “I Bought the Kit, Now I’m Terrified” Story
One common scenario goes like this: a homeowner smells something musty in the basement, buys a mold test kit, leaves the dish out overnight, and sends it to a lab. A week later, they get a report filled with unfamiliar names like Aspergillus and Penicillium. Panic mode: activated.
In reality, those mold types are extremely common indoors and outdoors. Without clear guidance, the report feels scarier than it needs to be. The homeowner ends up spending more time worrying about the numbers than looking for the actual moisture problem behind a bookshelf or under a window. The big lesson: data without context can be more stressful than helpful.
The “Follow the Water” Epiphany
Plenty of people can tell you that the breakthrough moment wasn’t a lab resultit was when they finally connected the dots between mold and moisture. Maybe it was a tiny drip under a kitchen sink that had been quietly soaking the cabinet floor for months. Or a bathroom fan that vented into the attic instead of outside, slowly loading the wood with moisture.
Once they started thinking like a detective“Where is water getting in or not drying out?”the mold story made a lot more sense. Their DIY testing shifted from “What kind of mold is this?” to “How do I stop giving mold such a cozy place to live?”
The Tape-Lift Success Story
On the more positive side, some homeowners have great experiences with simple tape-lift samples when they’re used thoughtfully. For example, a landlord and tenant might disagree on whether a dark patch in a corner is just an old stain or active mold. A small surface sample sent to a professional lab can provide neutral, written documentation.
In that case, the tape-lift isn’t about diagnosing health risksno lab can do that from a slidebut about confirming, “Yes, this really is mold growth,” so that repairs and cleanup can move forward without endless arguments.
The “DIY vs. Professional” Reality Check
Another common experience: people start with DIY testing and realize pretty quickly that the problem is bigger than they expected. Maybe they open a small section of drywall and discover widespread mold in an entire wall cavity. Or a musty odor on one side of the basement turns out to be related to drainage issues around the whole foundation.
The smart move here is to treat the DIY phase as reconnaissance. You’re not failing if you decide to call a pro; you’re making a well-informed choice. Your initial inspection and any simple tests you’ve done can actually help a professional inspector target the worst areas faster, saving time and sometimes money.
Mindset Tips from People Who’ve Been There
Homeowners who’ve successfully navigated mold issues often share a few mindset tips:
- Don’t ignore musty smells. If something smells off, it probably is. Trust your nose.
- Act early. The smaller the mold problem, the easier (and cheaper) it is to fix.
- Focus on moisture control. Testing is useful, but moisture is the real boss. Fix leaks, improve ventilation, and manage humidity.
- Stay calm. Mold is common and manageable in most cases. With a clear plan, you can tackle it without losing sleepor your security deposit.
In the end, your best “test” for mold is a combination of common sense, careful observation, and a willingness to ask for professional help when the situation is beyond DIY. You don’t have to become a microbiologist. You just need to understand what mold needs to grow and how to stop giving it such a warm welcome in your home.
If you approach mold testing like a Family Handyman projectpractical, stepwise, and a little bit curiousyou’ll be in a great position to protect your home, your wallet, and your peace of mind.