If your idea of “holiday fragrance” is a mysterious blend of burnt cookies and artificial pine spray, it’s time for an upgrade. A holiday herb wreath is like a tiny kitchen garden and a festive decoration had a very good-looking baby. It smells fantastic, looks gorgeous, and you can even snip from it while you cook. Win, win, win.
Inspired by creative makers on Hometalk and classic DIY projects from home and garden sites, this guide walks you through how to make a holiday herb wreath step by step. You’ll learn which herbs work best, how to wire everything together so it doesn’t fall apart the minute the door closes, and smart ways to keep your wreath looking (and smelling) great all season long.
Why an Herb Wreath Is Perfect for the Holidays
A traditional evergreen wreath is lovely, but an herb wreath has a few extra tricks up its sleeve:
- Incredible fragrance: Rosemary, thyme, sage, and bay make your entryway or kitchen smell like the best holiday dinner ever.
- Doubles as décor and pantry: As the herbs dry, you can snip sprigs for roasts, soups, and cocktails.
- Budget-friendly: You can use clippings from your garden, a friend’s yard, or inexpensive grocery-store bundles.
- Eco-conscious: Everything is natural, compostable, and easy to repurpose after the holidays.
- Fully customizable: Go minimal and green, or add ribbons, dried citrus, and berries for a more traditional holiday vibe.
And honestly? There’s just something satisfying about greeting guests with a wreath that quietly whispers, “Yes, I do cook with fresh herbs, thanks for noticing.”
Best Herbs and Greenery for a Holiday Herb Wreath
You can design your wreath around what you already have, but some herbs perform much better than others when it comes to structure, color, and scent.
Woody, Sturdy Herbs (The Structural Stars)
These herbs have thicker stems that hold their shape and dry beautifully:
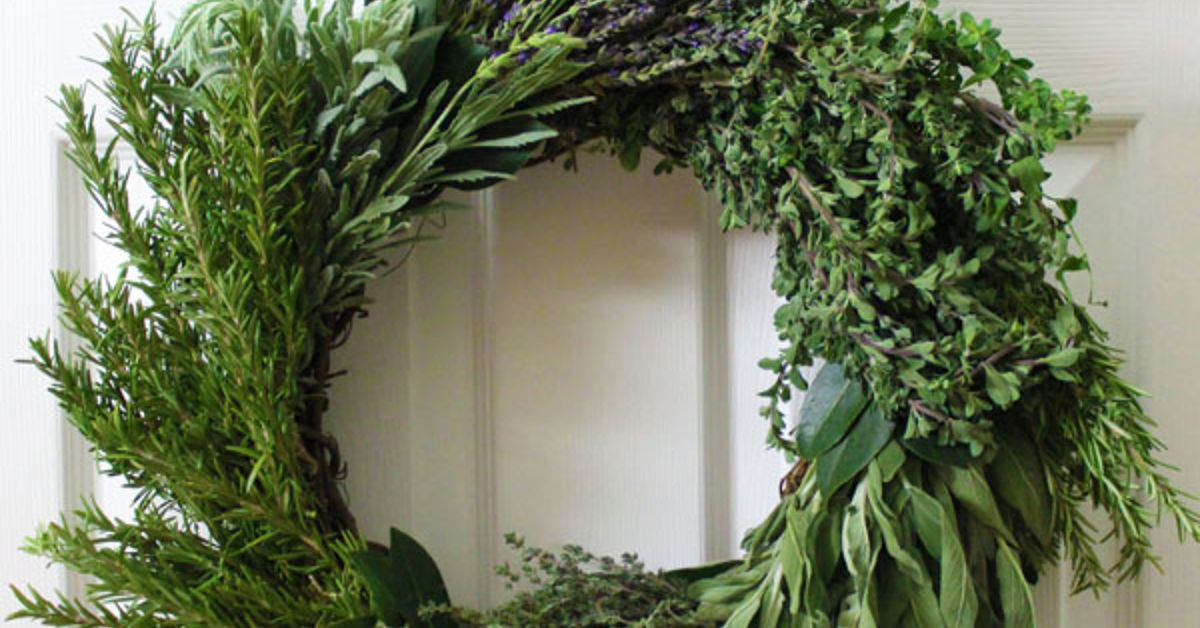
- Rosemary: Evergreen, aromatic, and naturally curved stems that hug a wreath form. Perfect as the main “greenery.”
- Thyme: Small leaves add fine texture and fill gaps between larger sprigs.
- Sage: Broad, velvety leaves bring a soft, silvery green tone that looks especially pretty in candlelight.
- Oregano and marjoram: Great fillers with a slightly wild, gardeny look.
- Bay leaves: Glossy and classic. They dry well and hold their elegant shape.
Soft Leafy Herbs (Use Sparingly)
These can be used as accents but may wilt faster:
- Parsley: Curly parsley adds playful texture, but dries more quickly.
- Dill and fennel fronds: Airy and whimsical, better tucked into a base of sturdier herbs.
- Mint: Smells amazing, but can droop quickly. Best added in smaller clusters.
Festive Add-Ins for Holiday Style
- Evergreen clippings: Cedar, pine, or fir mixed with herbs make the wreath feel extra wintery.
- Dried citrus slices: Orange or lemon slices add color and a subtle fruity scent.
- Seed heads and pods: Dill, fennel, or allium seed heads look like little starbursts.
- Berries (real or faux): Rose hips, holly, or faux red berries bring classic Christmas color.
Think of rosemary, bay, and thyme as your main cast, with citrus slices, berries, and ribbons as the fun, festive supporting characters.
Tools and Supplies You’ll Need
You don’t need florist-level skills or fancy equipment. A basic wreath kit looks something like this:
- Wreath base: Grapevine, wire, or a moss/living wreath ring. A 10–14 inch form is ideal for a standard door.
- Fresh herbs: Enough to create many small bundlestypically several large bunches of rosemary plus accent herbs.
- Floral wire: Thin, flexible green wire for tying bundles and attaching them to the frame.
- Pruners or sharp scissors: For trimming stems to a consistent length (about 4–6 inches).
- Twine or ribbon: To hide the mechanics, create a bow, and add a loop for hanging.
- Optional: Dried citrus, berries, small ornaments, or a wooden tag for personalization.
Step-by-Step: How to Make an Herb Wreath for the Holidays
Step 1: Plan Your Color and Scent Palette
Before you start wiring, decide on a feeling: Do you want a simple, all-green wreath with just rosemary and bay? Or something more cottage-core with lavender, thyme, and dried orange slices? Lay your herbs out on a tray or cutting board and play with combinations until you like the overall look.
Step 2: Prep the Wreath Form
If you’re using a wire form, wrap it with twine or ribbon first. This:
- Helps hide the metal frame.
- Gives the wire something to grip, so your herb bundles don’t slide around.
For grapevine or moss forms, you can usually skip this step. Just make sure any loose bits are trimmed and the ring feels sturdy.
Step 3: Cut and Sort Your Herbs
Trim stems into 4–6 inch pieces. This length is long enough to secure with wire but short enough to curve around the wreath without awkward sticking out. Group similar herbs togetherlittle bunches of rosemary, thyme, or sageso you can assemble bundles quickly.
Pro tip: Start with more herbs than you think you’ll need. A full wreath uses a surprising amount of greenery, and a sparse wreath looks more “January” than “joyful.”
Step 4: Make Small Herb Bundles
Take 3–6 stems and arrange them into a mini bouquet with all the stem ends aligned. Mix shapes and texturessay, one thick rosemary stem, a sprig of bay, and a couple of thyme stems. Wrap floral wire tightly around the stem ends several times to hold the bundle together.
Make a whole tray of bundles before attaching them. It’s easier to keep your design consistent when you can just reach for the next ready-made cluster.
Step 5: Attach Bundles Around the Wreath
Choose a starting point (often the bottom or slightly off-center for a more modern feel). Lay your first bundle on the wreath form so the leafy top points in the direction you want the wreath to flowusually clockwise.
- Use floral wire to secure the bundle to the frame, wrapping the wire around both stems and wreath base.
- Place the next bundle so it slightly overlaps the stems of the first, hiding the mechanics as you go.
- Continue around the wreath, keeping all the bundles angled the same way.
Don’t cut the wire after each bundlekeep one long piece running behind the wreath, looping it around with each new cluster. It’s faster and more secure.
Step 6: Fill Gaps and Add Accents
Once the frame is fully covered, step back and look at your wreath from a distance (or take a quick photoit’s easier to spot bald spots in pictures). Tuck in extra sprigs of thyme, sage, or small evergreen pieces where you see gaps.
Now for the fun: add your holiday details. Wire in dried orange slices, cinnamon sticks, pinecones, or a big bow on one side. Keep accents slightly asymmetricalit feels more natural and modern than a perfectly centered cluster.
Step 7: Hang and Enjoy
Attach a loop of ribbon or sturdy twine to the back of the wreath, then hang it on a door, cupboard, or kitchen wall hook. Indoors, place it where air can circulate to help the herbs dry evenly. Outdoors, choose a sheltered spot out of direct sun and harsh wind.
Over the next few days, the wreath will slowly dry and deepen in color. The scent will mellow but remain lovelyespecially if you gently crush a leaf or two now and then.
How to Keep Your Herb Wreath Fresh Longer
Herb wreaths are technically perishable, but you can stretch their good looks for weeks with a little care:
- Avoid direct heat: Don’t hang your wreath directly above a radiator, heater, or very sunny window.
- Light misting (for fresh wreaths): If you live in a dry climate, lightly mist the back of the wreath occasionally to slow down drying. Avoid soaking it or spraying bows and ribbons.
- Use a living or moss wreath for longer life: If your herbs are planted into a moss ring, you can soak the form in water every few days to keep roots hydrated.
- Choose sturdy herbs: Rosemary, bay, and thyme maintain their shape and color longer than delicate leafy herbs.
Even after it’s fully dry, your wreath will still be beautifuljust treat it more as décor than a produce aisle at that point.
Can You Cook with Herbs from Your Wreath?
Short answer: yes, if you’ve kept things simple and safe.
- Only use culinary-safe herbs you recognize (rosemary, sage, thyme, bay, oregano, etc.).
- Make sure the herbs were not sprayed with pesticides that aren’t food-safe.
- Avoid snipping herbs that are heavily coated in dust, glitter, spray paint, or artificial snow.
- Skip anything that’s been near heavily scented candles or aerosols if you’re sensitive to fragrances.
If you plan to cook from your wreath often, keep the design simple and skip the artificial décor. Tie a tiny pair of scissors to the wreath with a ribbonit looks cute and encourages people to snip and use the herbs.
Decorating Ideas: Beyond the Front Door
Your herb wreath doesn’t have to live on the front door forever. Here are a few creative ways to use it:
- Kitchen focal point: Hang above a stove backsplash (well away from open flame) or on a pantry door.
- Table centerpiece: Lay the wreath flat on a table and place a pillar candle or a cluster of small jars in the center.
- Mini wreath place cards: Use small wire rings and rosemary sprigs to create tiny wreaths for each place setting, with name tags tied on.
- Hostess gift: Bring a fresh herb wreath instead of flowers or wineit’s unexpected and incredibly thoughtful.
Common Mistakes to Avoid
A few simple tweaks can take your wreath from “I tried” to “I should really start an Etsy shop”:
- Using herbs that are too short: Tiny stems are hard to secure and tend to fall out.
- Bundles that are too big: Oversized bundles make the wreath lumpy and heavy. Smaller, more frequent bundles look fuller and more refined.
- Skipping the overlap: If you don’t overlap bundles enough, you’ll end up with visible stems and gaps.
- Ignoring the back: Loose wire or sharp ends can scratch doors or walls. Tuck in and twist any stray bits.
- Overloading with décor: Too many ornaments, berries, or bows can bury the herbs and make the wreath look cluttered.
Extra Experiences & Creative Tips for Making Herb Wreaths
After you’ve made one herb wreath, you start to notice what really works in real lifenot just in pretty photos. Here are some experience-based tips and stories that can help you get even better results.
Start with One Herb, Then Layer
Many people try to use every herb they own in one wreath, and the result can look a little chaotic. A more successful approach is to pick one “hero herb” and use it for 60–70% of the wreathfor example, rosemary or bay. Then layer in smaller amounts of thyme, sage, or decorative elements like citrus slices.
This not only looks more polished, it also makes the wreath easier to maintain. When the main structure is made of sturdy herbs, the wreath holds together well as it dries, and the smaller accent herbs can come and go without changing the overall look.
Use the End of the Garden Season Wisely
Late fall and early winter are prime times to turn your herb garden into décor. Instead of letting rosemary, oregano, and thyme get zapped by frost, you can harvest armfuls and turn them into wreaths and garlands. One large rosemary plant can often provide enough clippings for a full 12-inch wreath and a set of mini wreaths for gifts.
If you don’t have your own garden, check local farmers markets or grocery stores just before major holidays. Bunches of herbs are often discounted when stores overstock for big cooking weekends, and those “extra” bundles are perfect for crafting.
Match Your Wreath to Your Cooking Style
Think about what you actually cook during the holidays. If your menu leans Italianroasts, tomato sauces, savory breadsload your wreath with rosemary, oregano, thyme, and bay. If you love roasted poultry and classic stuffing, emphasize sage and thyme, with a little rosemary for backbone.
This approach turns your wreath into a practical pantry item, not just a decoration. When you need herbs, you know the ones hanging by the door are your go-to flavors.
Kid- and Pet-Friendly Adjustments
If you have curious kids or pets, there are a few ways to make your wreath safer:
- Hang the wreath higher or on a door they can’t easily reach.
- Avoid using small detachable items (like tiny ornaments) that could be pulled off and swallowed.
- Stick to well-known culinary herbs and skip anything potentially irritating.
On the flip side, letting older kids help create bundles is a great sensory activity. They can smell and feel the different herbs and help decide where each cluster goes. Just hand them pre-cut stems and let them be the “official bundle maker.”
Turn Leftover Herbs into Bonus Projects
You’ll almost always have a few extra stems after finishing a wreath. Don’t toss themturn leftovers into mini projects:
- Tie small bundles with twine and hang them upside down to dry for cooking.
- Tuck sprigs into napkin rings for the holiday table.
- Float rosemary or thyme in a pot of simmering water with a cinnamon stick for natural stovetop “potpourri.”
By the time you’ve used every scrap, it feels like your herb wreath project has spread coziness throughout the whole house.
Don’t Aim for PerfectAim for Lively
The charm of an herb wreath is that it looks alive, even as it dries. A few uneven sprigs, a wandering thyme stem, or a slightly off-center bow just make it feel more organic and welcoming. If you find yourself obsessing over every millimeter, step back, take a breath, and do the “door test”hang it up and walk toward it like a guest would.
From that distance, you’ll see exactly what everyone else will: a warm, fragrant, handmade holiday welcome. And that’s the whole point.