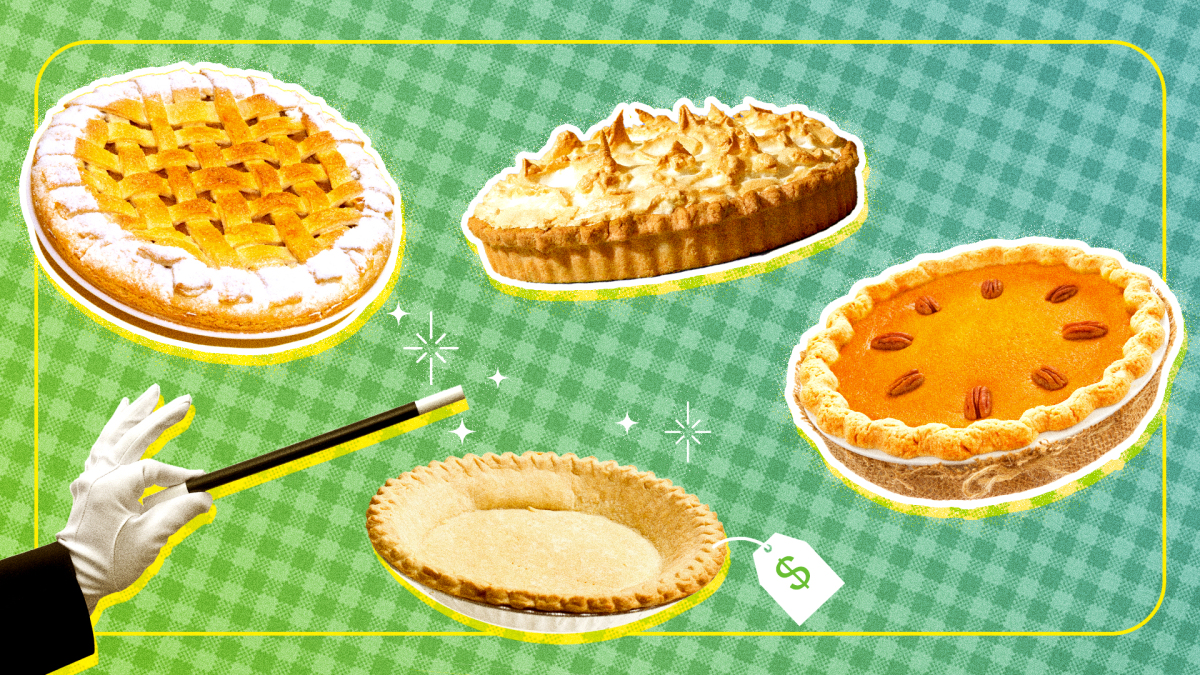
You know that moment when you pull a pie out of the oven and everyone says,
“Did you make the crust too?” That’s the dream. The reality, however,
often involves a cardboard box, a roll of dough, and a silent promise not to tell
anyone that the crust started life in the freezer aisle.
The good news: a store-bought pie crust doesn’t have to look or
taste store-bought. With a few hacks that professional bakers and food editors
actually use, you can turn that premade crust into something that passes for
homemade in looks, flavor, and texture. No one has to know it came from the
grocery storeunless you decide to brag about your efficiency.
Why Bother Upgrading a Store-Bought Pie Crust?
Store-bought crusts exist for a reason: they save time, dishes, and your sanity.
The trade-off is that they can bake up a little bland, a little pale, or
suspiciously uniformeverything a real homemade pie crust is not.
A few simple tweaks can:
- Improve flavor with butter, cream, sugar, or spices.
- Upgrade texture so it bakes flaky and crisp instead of soggy and tough.
- Make the pie look rustic and handmade with pretty edges and decorations.
- Help the crust stand up better to juicy fillings.
Think of your store-bought crust as a shortcut dough that’s only 80% finished.
Your job is to add that last 20% of personality.
Step-by-Step: How to Make a Store-Bought Pie Crust Look Homemade
Step 1: Start with the Right Crust
Not all premade crusts are created equal. When you’re standing in the
refrigerated or frozen section, flip the box over and read the label. Look for:
- Butter or real fat: Crusts with butter (even if mixed with shortening) usually have better flavor and browning.
- Minimal additives: Fewer stabilizers and mystery ingredients often mean a more natural texture.
- Roll-out dough vs. pre-formed shells: Rolled dough gives you more freedom to shape, patch, and customize.
If the crust is already in an aluminum pan, you can still level it upbut if you have the option, choose the kind you roll out yourself. It gives you instant “I totally made this” energy.
Step 2: Use Your Own Pie Dish
Nothing screams “store-bought” like serving your masterpiece in that thin,
crinkly aluminum pan it came with. Slide the dough into one of your own
pie dishesceramic, glass, or metal. It instantly looks more homemade.
To transfer:
- Let refrigerated crust sit out for a few minutes until it’s pliable but still cool.
- Unroll it gently on the counter or onto a lightly floured surface.
- Lay your pie dish upside down over the dough to make sure it’s big enough, with about an inch of extra dough all around.
- Flip the dish right-side up and carefully lift or roll the dough into it, easing it into the corners instead of stretching.
Press the dough lightly into the bottom and sides so it hugs the dish.
Any tears? Don’t panicthat’s actually a very homemade problem. Patch
with extra dough scraps and press them in firmly. Imperfections read as “rustic,” not “oops.”
Step 3: Roll, Patch, and Thicken the Dough
Many store-bought crusts are rolled thin so they bake faster and are easier
to mass-produce. You can improve the texture by gently re-rolling and
layering:
- If you have two crusts, stack them and roll them together for a slightly thicker, sturdier base.
- Lightly dust with flour and roll just enough to smooth cracks and even out thickness.
- Use trimmings to reinforce weak spots along the sides or patch cracks.
This extra step makes the crust feel closer to a homemade dough that’s been handled and shaped, not just unrolled straight from the box.
Step 4: Crimp, Flute, or Braid the Edges
If you do nothing else, decorate the edges. That’s what people see first,
and it’s where store-bought crusts usually give themselves away.
A few easy, homemade-looking finishes:
- Classic pinch crimp: Use your thumb and index finger of one hand to form a “V” on the outside of the crust and push dough from the inside out with a finger from the other hand. Repeat all the way around.
- Fork edge: Press the tines of a fork gently into the rim all the way around. Simple, quick, and very “made this myself at 11 p.m.”
- Rope or ripple edge: Use your knuckle to push the dough between two fingers, creating a wavy pattern that looks surprisingly pro.
- Braided trim: If you have extra dough, cut thin strips, braid them, and press the braid along the rim. Instant showpiece.
Don’t aim for perfectionaim for charm. Slightly uneven crimps are exactly what make a crust look handmade.
Step 5: Blind-Bake Like a Pro (If Needed)
If your filling is very wet (think custard, cream pies, or super juicy fruit),
pre-baking the crustcalled blind bakinghelps you avoid the dreaded soggy bottom.
Here’s the basic process:
- Line the fitted crust with parchment paper or foil, making sure it covers the bottom and up the sides.
- Fill it with pie weights, dried beans, rice, or even sugar.
- Bake until the edges are just starting to brown and the bottom looks set.
- Carefully remove the weights and parchment, then bake a little longer if your recipe calls for a fully baked crust.
- Use a fork to gently prick (dock) the bottom if it’s puffing up.
This step alone can transform a store-bought crust from pale and damp to crisp, golden, and confident enough to hold a creamy filling without disintegrating.
Step 6: Brush, Sprinkle, and Add Flavor
The finish on the crust is where the magic happens. Professional bakers rely
on simple coatings to give pie crust that deep color and subtle sheen.
Try one of these:
- Egg wash: Whisk one egg with a splash of water or milk. Brush it lightly over the exposed crust before baking for a glossy, deep golden finish.
- Cream wash: Brush heavy cream over the edges instead of egg for a softer sheen and rich dairy flavor. A sprinkle of turbinado sugar on top adds crunch.
- Butter and sugar: Melt butter and brush it over the crust. Sprinkle with granulated or coarse sugar for a sweet, crackly texture.
You can also flavor the crust itself:
- Sprinkle cinnamon sugar or pumpkin spice over the edges for fruit pies.
- Add a dusting of finely crushed graham crackers or cookies along the bottom to soak up extra juices and add flavor.
- For savory pies, brush with olive oil or butter and sprinkle with flaky salt, pepper, or grated Parmesan.
These little touches make your crust taste like you fussed with it for hourseven if you only spent an extra five minutes.
Step 7: Finish with a Stellar Filling and Smart Baking
No matter how good your crust is, the filling and bake can still betray you.
For a truly homemade vibe:
- Use a homemade or semi-homemade filling (fresh fruit, real spices, or from-scratch custard).
- Bake your pie on a preheated baking sheet to help the bottom brown and crisp.
- Rotate the pie halfway through baking for even color.
- Shield the edges with foil or a pie shield if they’re browning too quickly.
When it comes out of the oven bubbling around the edges and deeply golden,
with a slightly uneven, crimped crust, it will look like something that came out of your grandma’s ovennot the frozen section.
Bonus Tricks to Make a Store-Bought Crust Taste Truly Homemade
Once you’ve mastered the basics, you can keep layering on the “homemade”
details. None of these are required, but they each add a little extra magic.
- Infuse the butter or cream: If you’re brushing the crust with butter, warm it with a bit of vanilla, citrus zest, or a cinnamon stick, then cool before brushing.
- Use flavored sugar: Rub sugar with lemon or orange zest and sprinkle it over the edges before baking.
- Add texture to the bottom: Sprinkle finely chopped nuts or graham cracker crumbs onto the crust before adding filling to help absorb moisture and add crunch.
- Decorate with cutouts: Use extra dough to cut leaves, stars, or hearts. Arrange them on top of a double-crust pie or around the rim for extra flair.
- Vent artistically: Instead of basic slits, cut small shapes in the top crust for steam vents. It looks cute and serves an actual purpose.
All of these tweaks send one strong signal: a human clearly touched this pie.
That’s what people mean when they say something tastes homemade.
Common Pie Crust Mistakes (and How to Fix Them)
Even with a store-bought crust, things can go sideways. The good news:
almost every crust disaster has a fix or at least a disguise strategy.
Problem: Soggy Bottom
If the bottom of your pie is pale and damp, try these upgrades next time:
- Blind-bake the crust before adding very wet fillings.
- Brush the bottom with a beaten egg and bake briefly to “seal” it.
- Sprinkle a thin layer of crushed graham crackers, cookies, or nuts before adding the filling to absorb moisture.
- Bake on the lowest oven rack, directly over a preheated baking sheet or stone.
Problem: Shrinking Crust
Premade crusts can shrink down the sides of the pan as they bake, especially
when blind-baking. To reduce shrinkage:
- Don’t stretch the dough when you fit it into the dish; lift and ease it in instead.
- Chill the fitted crust for at least 20–30 minutes before baking.
- Fill with plenty of pie weights up the sides before blind-baking.
Problem: Pale, Bland Crust
If your crust looks washed-out and tastes like “meh,” lean on:
- Egg or cream wash for deeper color and shine.
- Butter brushed over the crust for flavor.
- A sprinkle of sugar or flaky salt (depending on sweet or savory).
Don’t be afraid to let the crust get properly goldenjust shield the edges
if they’re browning faster than the rest of the pie.
Problem: Cracked Crust
Cracks are not a tragedy; they’re an opportunity for more dough art.
Patch from the inside with extra scraps and press them in firmly. Once
the filling goes in and the pie bakes, most cracks disappear into the background.
Real-Life Pie Crust Glow-Up Experiences
Let’s talk about what this looks like in real life, beyond the perfect
world of food photos and edited recipes.
Imagine you promised to bring a “homemade pie” to a holiday dinner. It’s 4 p.m.
You work the next day. The dough-from-scratch fantasy died three group chats ago.
You grab a refrigerated crust, a bag of apples, some sugar, and butter on the way home.
At home, you unroll the dough and immediately spot a giant crack down the center.
Old you might have panicked. New you shrugs, presses the crack together, and patches
it with a scrap. You transfer it into your own deep ceramic dish, letting extra dough
hang over the edge.
You loosely follow your favorite apple pie formula: sliced apples, sugar, cinnamon,
pinch of salt, squeeze of lemon. Before spooning the filling into the crust, you remember
your “no soggy bottom” mission. You sprinkle in a handful of crushed graham crackers
over the dough. It doesn’t look fancy, but it smells like you know what you’re doing.
You pile in the apples, dot them with butter, and top the whole thing with a second
sheet of store-bought crust. Instead of leaving it as a plain dome, you cut a few small leaf
shapes out of the middle to act as steam vents, then stick those cutouts decoratively
around the top like you actually planned this design.
Around the rim, you pinch the dough into a rough crimp. It’s not symmetrical. Some crimps
are deeper than others. Honestly, it’s a bit chaoticbut in a charming, “a human made this,
not a machine” kind of way. You brush the top and edges with heavy cream, shower it with
coarse sugar, and carefully slide the pie onto a preheated baking sheet in the oven.
Halfway through baking, the kitchen smells like a bakery. You peek in and see bubbling juices
thickening around the edges and a crust that is actually, gloriously, turning golden.
The sugar sparkles. The cutout leaves puff just enough to catch the light.
When you arrive at dinner, someone inevitably asks, “Did you make the crust too?”
You give them the most honest answer possible: “I made it look like this.”
People slice into the pie and the crust shatters gently under the knife. The bottom is crisp,
not raw. The edges are flaky and sweet. No one is analyzing the ingredient list from the
supermarket; they’re too busy eating.
That’s the whole point of hacking a store-bought crust. It’s not about faking perfection.
It’s about using your time and energy where it actually mattersadding flavor, texture,
and personalityso that the final pie feels like your pie, not something mass-produced.
Over time, you might develop a signature move: maybe you always sprinkle the edges with
cinnamon sugar, or you always decorate with tiny stars cut out of extra dough, or your
pies are known for their ridiculously glossy crusts. Friends and family start associating
those details with “your” pies, not the box you quietly recycle before anyone arrives.
And if you ever decide to graduate to fully homemade dough? All of these skills transfer.
Crimping, blind-baking, patching, decorating, flavoringthose are the hands-on techniques
that make pies memorable. For now, though, the store-bought shortcut plus a handful of smart
upgrades is more than enough to get you all the compliments with a fraction of the stress.
Final Thoughts
Making a store-bought pie crust look and taste homemade is less about
baking perfection and more about strategic upgrades. Swap the aluminum pan
for your own dish, decorate the edges, blind-bake when it makes sense, brush
on a flavorful wash, and bake it confidently until it’s deeply golden.
In the end, the people eating your pie care far more about how it tastes
and feels than whether you cut cold butter into flour yourself. If the crust
is flaky, the filling is good, and the pie looks like someone cared, you’ve
nailed the homemade vibeno confession required.