Real, structural wood beams are gorgeous. They’re also heavy, pricey, and occasionally the reason your contractor starts speaking in
long, thoughtful sighs. The good news: you can get the same warm “architectural character” look without asking your ceiling to
bench-press a small tree.
This guide walks you through the most realistic ways to fake a wooden beamwhether you want a weekend DIY box beam that looks like
reclaimed timber, or a pre-made faux beam you can install with minimal drama. We’ll cover planning, proportions, finishing tricks, and
the common mistakes that scream “I made this at 11 p.m. with leftover craft paint.”
First: What Kind of “Fake Beam” Do You Mean?
“Faux beam” can mean a few different things. The best option depends on your budget, ceiling type, and how close people will get to the
beam (because yes, your guests will suddenly become wood-grain inspectors).
Option A: DIY box beam (wood or plywood)
This is the sweet spot for realism. You build a hollow, three-sided beam (a “U” shape) that slips over a ceiling-mounted cleat or nailer.
It’s lighter than solid wood, looks convincing, and is easy to customize in size and finish.
Option B: Pre-made faux beams (polyurethane/high-density foam/fiberglass)
These are factory-made “U-beams” designed to install over wood blocking. They’re lightweight, consistent, and fastgreat if you want the
look without building a beam in your driveway like a historical reenactment of carpentry.
Option C: Ultra-light DIY (thin wood skins, MDF, or craft foam)
This can work in low-risk, low-heat areas, but be smart. Some ultra-light materials can dent easily, look plasticky, or create safety
concerns if used incorrectly near heat sources. If your beam will be near a fireplace, kitchen hood, or recessed lighting, prioritize
safer, code-appropriate materials and proper clearances.
Plan Like a Designer (So It Doesn’t Look Like a Costume)
The difference between “custom architectural detail” and “random ceiling baguette” is planning. Before you cut anything, decide how the
beams should behave in the room.
Pick a style story
- Farmhouse/rustic: chunkier beams, visible texture, warm stain, optional straps or corbels.
- Modern: cleaner lines, fewer beams, matte finish, often stained darker or painted to match trim.
- Coastal/Scandi: lighter stains, subtle grain, less distressing, more “sun-bleached” than “barn-find.”
Get the proportions right
A common mistake is choosing beams that are too small for the ceiling height and room scale. If your beams are skimpy, they read as
decorative strips instead of architectural elements. If they’re too massive, your room can feel lower and heavier.
Quick visual test: use painter’s tape to outline the beam width on the ceiling. Step back to the doorway. If you squint and it looks
“right,” you’re already ahead of half the internet.
Decide spacing and layout
- Align beams with natural room features when possible: islands, long furniture runs, or window groupings.
- Avoid awkward collisions with vents, sprinklers, smoke detectors, or recessed lights.
- If beams must join (because the room is long), plan seams in less noticeable spots or disguise them with straps.
Materials and Tools (Choose Your Adventure)
For a DIY box beam (most realistic)
- Boards (common approach: 1×6 and 1×4) or plywood ripped to size
- Wood glue
- Brad nailer (or finish nails) and nails
- Stud finder
- Level and chalk line
- Cleat/nailer material (often 1×4 or 2×2)
- Construction screws (length depends on ceiling build-up)
- Stain/finish (gel stain is forgiving), rags/brushes
- Optional: wood conditioner, glaze, matte clear coat
- Optional distressing tools: wire brush, hammer, chain, awl/screwdriver
For pre-made faux beams
- Faux beam(s) sized to your room
- Wood blocking/cleat per manufacturer guidance
- Construction adhesive (as recommended), screws, drill/driver
- Miter saw or handsaw appropriate for the material
- Touch-up kit (paint/stain) if available
Method 1: Build a DIY Box Beam That Looks Like Real Timber
A box beam is basically a hollow “U” you build from wood and slide over a ceiling-mounted cleat. It’s a classic approach used by many
DIYers and pros because it delivers a true wood surface (not a printed texture), keeps weight manageable, and gives you full control over
size and finish.
Step 1: Mark your beam locations and find solid anchoring
Use a stud finder to locate ceiling joists and mark them. Snap chalk lines for straight beam runs. You want your beam fasteners to bite
into framing, not just drywall. If your ceiling is plaster, textured, or otherwise “interesting,” take extra time verifying the joists.
Step 2: Install the “nailer” (the hidden support)
The nailer is a length of wood (often a 1×4 or 2×2) secured to the ceiling along the beam run. Think of it as the spine your hollow beam
hugs. Screw it into joists using appropriate-length screws. The nailer needs to be straight, level, and firmly attached.
Pro tip: If your ceiling isn’t perfectly flat (welcome to Earth), shim behind the nailer as needed so the finished beam doesn’t look like
it’s trying to escape.
Step 3: Build the beam “U” (three sides)
There are a few ways to build the U-shape. One beginner-friendly approach uses standard boardsno fancy bevel cuts requiredso long runs
stay manageable and assembly is straightforward.
- Cut your boards to length (or to manageable sections if the room is long).
- Assemble the U-shape on a flat surface: top board + two side boards.
- Glue and fasten the joints with brads or finish nails; keep corners square.
- Dry fit the beam over the nailer before finishing to confirm clearance and alignment.
If you’re going for a chunkier look without massive weight, you can size the box beam larger by increasing the board widths or using
plywood ripped to custom dimensions. Plywood box beam techniques can also be engineered for stiffness while staying hollow, which is why
pros like the method for large, long decorative forms.
Step 4: Add “age” (optional, but highly satisfying)
If you want rustic character, you need imperfect texture. Real reclaimed beams have dents, saw marks, and softened edges. You can fake
thattastefully.
- Soften edges: Lightly sand corners so they’re less crisp.
- Wire brush: Pull with the grain to emphasize texture.
- Random dings: Tap with a hammer, chain, or a handful of screws in a sock (yes, it’s goofy; yes, it works).
- Faux checks: Use an awl or screwdriver to create small splits and wormholessparingly.
Keep it believable: distressing should look accidental, not like your beam lost a fight with a medieval flail.
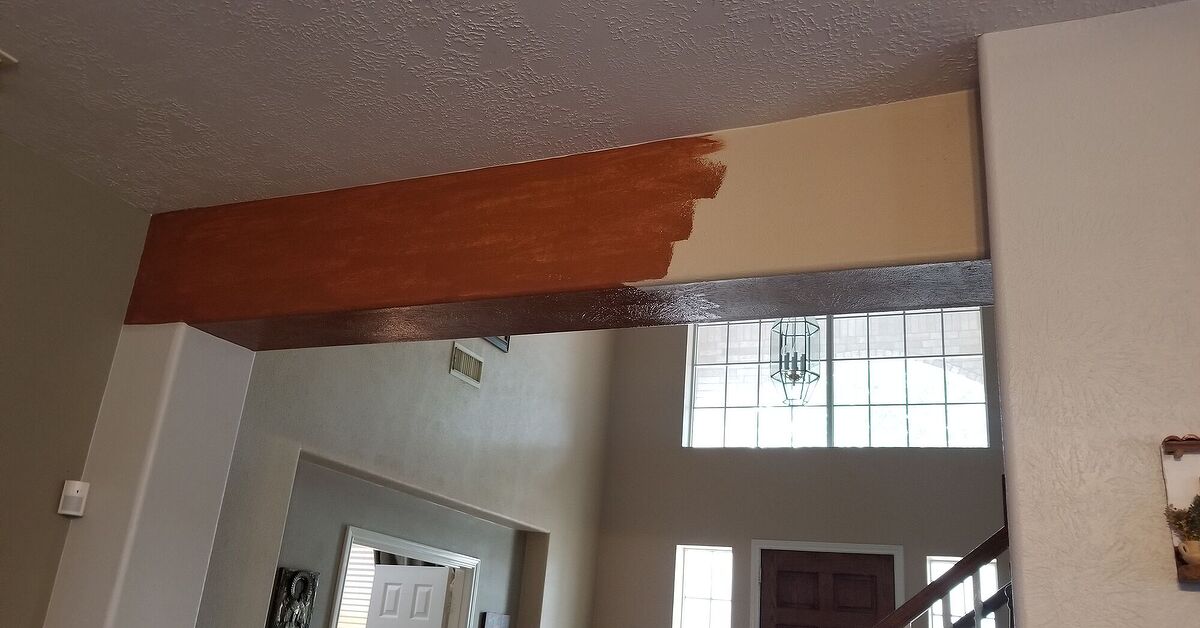
Step 5: Stain and finish for a convincing wood tone
Stain is where most faux beams become obviously faux. The goal is depth: real wood has variation. Start with a test piece using the same
wood species and sanding level.
- For even color: Use wood conditioner on blotchy woods like pine.
- For control: Gel stain sits closer to the surface and can be easier to manage overhead.
- For depth: Layer: a base stain, then a darker glaze in corners and grain, then wipe back.
- For realism: Choose a matte or low-sheen finish. Glossy beams look like furniture, not architecture.
Step 6: Install the box beam
Once finished and dry, lift the beam over the nailer. Fasten through the sides into the nailer with finish nails or screws (depending on
your design and whether you need future removal). Fill nail holes, touch up finish, and caulk tiny gaps where appropriateespecially if
your ceiling has texture.
Step 7: Hide seams like you planned them on purpose
If your beam is in sections, seams can disappear with:
- Straps: Decorative metal or wood straps “explain” the seam as a design detail.
- Scarf joints: Angled joining cuts make seams less visible than straight butt joints.
- Placement: Put seams where the eye isn’t parkedavoid the center of a main sightline if you can.
Method 2: Install Pre-Made Faux Beams (Fast, Light, and Surprisingly Legit)
Factory faux beams (often high-density polyurethane) are designed to be lightweight, hollow, and installed over wood blocking. This is a
great choice if you want speed, predictable finish, and minimal shop mess.
Step 1: Choose size, texture, and finish
Order samples if available. A beam that looks great online can read too red, too gray, or too “printed” in your room lighting. Pay
attention to:
- Grain scale (too tiny looks fake from the floor)
- Color temperature (warm vs. cool undertones)
- Finish sheen (matte is usually more believable)
Step 2: Install wood blocking (the real structure behind the fake)
Most faux beams install over a wood block/cleat secured to framing. Mark the layout, find joists, and fasten the blocking straight and
solid. This step matters more than anything elseyour beam is only as secure as what it’s attached to.
Step 3: Cut and dry-fit
Measure twice, cut once, and then measure again because ceilings are excellent at humble-bragging about their imperfections. If a beam
needs to be joined, use manufacturer guidance and keep the best factory edges where they’ll be most visible.
Step 4: Slide the beam on and secure it
Lift the beam over the blocking, align it carefully, and fasten as directed (typically screws through the beam into the blocking; some
systems also use adhesives). Touch up fastener points with the manufacturer’s recommended method.
Make It Look Expensive: The Details Pros Sweat (So You Don’t Have To)
Use shadow lines to your advantage
Real beams cast real shadows. If you add subtle depth (a slightly taller beam, or a clean edge against a lighter ceiling), it reads more
architectural. Lighting matters: warm ambient light can make beams feel richer; harsh overhead light can flatten texture.
Disguise transitions with intentional trim
Small gaps at the ceiling happen. For a polished look, consider:
- Beam straps (metal or wood)
- Small crown or trim detail where beams meet walls (style-dependent)
- Corbels (only if they match your home’s architecturedon’t force a castle vibe in a condo)
Mix finishes for realism
One flat stain tone can look manufactured. Real wood often varies slightly. Use a darker glaze in corners, or lightly dry-brush a deeper
tone along grain ridges to create depthsubtle is the whole trick.
The Most Common Mistakes (And How to Avoid Them)
- Beams that are too small: size up until they read as architectural from the doorway.
- Random placement: align with room geometry and key features.
- Shiny finish: choose matte/low sheen for ceiling elements.
- Obvious seams: plan joins or hide them with straps.
- Wrong undertone: test stain/finish under your actual lighting.
- Weak attachment: secure blocking into framing, not just drywall.
Cost, Time, and Effort: What to Expect
Costs vary wildly by beam size, number of beams, and finish expectations, but here’s the realistic comparison:
- DIY box beams (wood/plywood): Often the best value for realism. Expect a weekend for a simple install, longer if you’re
distressing and doing layered finishing. - Pre-made faux beams: Higher material cost, lower labor. Great if you want predictable results fast.
- Ultra-light DIY: Lowest material cost, but higher risk of looking “crafty” if finishing isn’t excellent.
Safety and “Don’t Get Weird With It” Notes
Faux beams are decorative. They are not structural replacements for real beams. Always secure your beam system to framing (joists/studs)
using appropriate fasteners and follow any manufacturer instructions for pre-made products. If your ceiling includes electrical runs,
HVAC, or sprinklers, plan carefully so you don’t drill into something expensiveor dangerous.
If you’re installing beams near heat sources (fireplaces, stoves, certain light fixtures), choose materials and placements that respect
clearance requirements and local codes. When in doubt, ask a qualified pro. The goal is “cozy cabin,” not “DIY cautionary tale.”
Frequently Asked Questions
Will faux beams lower my ceiling visually?
Yesslightly. That’s not always bad. In tall rooms, beams can add warmth and scale. In already low rooms, use fewer beams and keep them
proportionate so the ceiling doesn’t feel crowded.
Can I install faux beams on popcorn or textured ceilings?
You can, but expect tiny gaps. Plan to caulk neatly, add trim, or accept a slightly rustic finish. Also, older ceiling textures may
require special handling if you plan to remove or disturb them.
Should beams match my floor?
They don’t have to. Matching can look coordinated, but contrast can be more modern and intentional. The key is keeping undertones
consistent (warm with warm, cool with cool).
of Real-World Experience: Beam Lessons From the Ceiling Trenches
The first time I faked a wooden beam, I thought the hard part would be building the box. Nope. The hard part was accepting that my
ceiling was not, in fact, a perfect plane of mathematical glory. It was more like a gentle suggestion of flatnessan opinionated surface
with subtle dips that only became obvious once I held a long, straight beam against it. Lesson #1: a “level” isn’t optional; it’s your
emotional support tool.
The second surprise was stain. I assumed I’d pick a color, wipe it on, and feel instantly talented. Instead, my first test piece turned a
shade best described as “pumpkin latte chaos.” Under warm bulbs it looked orange; under daylight it looked like a sports drink. The fix
was simple but not intuitive: I layered. A calmer base stain, then a darker glaze wiped into the corners and grain, then a very light
wipe-back until the beam had depth. Lesson #2: beams look expensive when the color isn’t one-note.
My third lesson came from seams. On paper, a seam is just a line where two pieces meet. In real life, it’s the exact spot your guests
will stare at while saying, “Wow, I love what you did with the ceiling.” (Translation: “I have located your secret.”) After that, I
started treating seams like plot twists: I either hid them where nobody’s eyes naturally land, or I made them “intentional” with a strap.
Once you add a strap, the seam stops being a mistake and becomes a design decision. Lesson #3: if you can’t hide it, accessorize it.
I also learned that distressing is best done with restraint. It’s weirdly easy to get carried awayone ding looks charming, ten dings
look like your beam survived a bar fight. I had the best luck with small, varied marks: a little wire-brushing with the grain, a few
random dents, and softened edges so the beam didn’t look freshly manufactured. Lesson #4: “aged” doesn’t mean “wrecked.”
Finally, installation taught me humility. I tried to fasten a beam with too few anchor points once, thinking the beam was light enough to
behave. It behaved… for about a day. A tiny sag appeared that only I noticed, which made it ten times worse. After that, I overcommitted
to good blocking into joists, and I never regretted it. Lesson #5: the prettiest beam is the one that stays where you put it.
The overall takeaway? Faking a wooden beam is less about “tricking people” and more about respecting what makes real beams believable:
scale, shadow, texture, and thoughtful finishing. Do those well, and nobody will ask if it’s real. They’ll just say, “This room feels
amazing,” and you’ll nod like a person who totally has structural timbers in their ceiling. (You don’t have to tell them it’s a hollow
U-shaped masterpiece held up by careful planning and a suspicious amount of painter’s tape.)
Conclusion
To fake a wooden beam convincingly, choose the right approach (DIY box beam or pre-made faux beam), plan proportions and placement, and
finish like you’re trying to fool a museum curator. Secure everything into framing, keep sheen low, add subtle depth in your color, and
hide seams with intention. Done right, faux beams add instant characterand you get the charm without the “I need a crane” budget.