Installing a flagpole sounds simple right up until you realize you are about to dig a hole, pour concrete, lift a very long metal object, and hope the result does not lean like it is making a dramatic political statement. The good news is that a flagpole installation is absolutely manageable when you approach it in the right order. The bad news is that “winging it” is a fantastic way to create a crooked pole, a wobbly base, or a deeply awkward conversation with your local utility company.
This guide breaks the job into five clear steps so you can plan smarter, work safer, and end up with a flagpole that looks intentional instead of “well, it was on sale.” Whether you are installing a residential yard pole or planning a more serious in-ground setup, the same fundamentals apply: choose the right spot, confirm the rules, build a solid foundation, assemble carefully, and finish with a level, secure installation that can handle weather and daily use.
If you want the short version, here it is: the pole is only as good as the hole. But since that sentence would make a terrible full-length article, let’s do this properly.
Why Flagpole Installation Is More Than Digging a Random Hole
A flagpole is a vertical structure that deals with wind, weight, movement, and exposure every single day. That means your installation has to do more than hold the pole upright for one sunny afternoon. It needs to keep the pole plumb, protect the base from water problems, respect local setbacks and height rules, and stay safe around buried and overhead utilities.
That is why experienced installers focus on preparation before they ever touch concrete. A solid installation is part site planning, part measurements, part patience, and part resisting the urge to say, “Eh, close enough.” Close enough is great for tossing socks into a laundry basket. It is not ideal for structural work.
Step 1: Choose the Right Location
Start with visibility, clearance, and proportion
The best flagpole location is open, visible, and proportionate to the property. For most homes, a 15- to 25-foot flagpole usually looks balanced, while taller poles make more sense for large homes, commercial buildings, schools, or public sites. If the pole is too short, it disappears. If it is too tall, it can make your yard look like it is auditioning to become a courthouse.
Look for a spot where the flag can fly freely without slapping into trees, fences, rooflines, or overhead lines. That means you are not just measuring where the pole stands. You are also thinking about how the flag moves in wind, how you will access the halyard or hardware, and how close the structure is to walkways, driveways, and landscaping.
Check permits, zoning, and HOA rules before you get ambitious
This is the step many people skip because paperwork is not exciting. Concrete is exciting. Shiny hardware is exciting. Permit research feels like the boring cousin nobody invited to the cookout. Unfortunately, permit research is the cousin who stops you from doing the whole project twice.
Flagpole regulations vary by city, county, and neighborhood. In some areas, a smaller residential flagpole may not need a permit, while taller residential poles or commercial poles can trigger permit, inspection, engineering, setback, or wind-load requirements. Some jurisdictions also limit flagpole height, number of flags, or placement near lot lines. HOAs may have separate design or visibility rules too.
So before you buy the pole, call your city or county building department and ask three questions: Is a permit required, are there setback or height limits, and does the manufacturer’s installation guide need to be submitted? That five-minute phone call can save you a week of regret.
Step 2: Call 811 and Mark the Site
Yes, even if you are “only digging a little”
If your project involves digging, call 811 before you dig. Not after. Not during. Not once the shovel makes a weird metallic noise. Before.
Homeowners sometimes assume utility lines are buried far down or only run through obvious places. That is a charming thought, but utility lines are not known for respecting your assumptions. Even relatively shallow digging can hit buried electrical, gas, water, irrigation, or communication lines. A flagpole installation may look small compared with a major construction project, but it still counts as excavation.
When you contact 811, utility locators mark the approximate position of buried lines so you can avoid them. You should also wait until all utilities have responded before you start digging. If the site was marked months ago, do not trust old paint like it is sacred archaeology. Markings can expire, conditions change, and new work can happen underground. If you are digging again, request a fresh locate.
Mark the exact center point of the installation
Once utilities are addressed, mark your center point carefully. Use paint, a stake, or layout string so the foundation hole lands exactly where you want it. This is also the moment to check sightlines from the street, the front door, and the main viewing angles on the property.
A small adjustment here matters more than you might think. Move the pole a few feet too close to a driveway, and it can feel cramped forever. Put it too close to a tree, and every windy day becomes a flag-versus-branches boxing match.
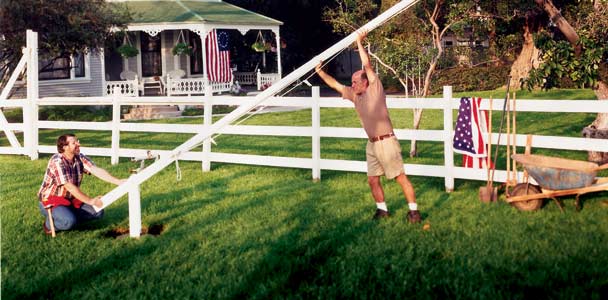
Step 3: Dig the Foundation and Set the Sleeve
The foundation is the real installation
This is the part that determines whether your flagpole stays straight and stable over time. For in-ground systems, many U.S. manufacturers recommend a foundation hole that scales with the butt diameter of the pole, often in the range of about four to six times that diameter for aluminum poles, with larger or deeper foundations in sandy soil, high-wind areas, or for taller commercial poles. In other words, there is no universal one-size-fits-all hole. The manufacturer’s chart wins.
Some manufacturer tables for commercial poles show how dramatically dimensions can change with pole height and butt diameter. A 20-foot pole and an 80-foot pole do not live in the same universe. That is why reading your installation manual is not optional. It is the difference between engineering and creative optimism.
Add drainage and set the sleeve plumb
Most in-ground installations use a ground sleeve or foundation tube. Typically, installers place gravel or crushed stone below or around the sleeve for drainage, then position the sleeve in the center of the hole, brace it, and use a level to keep it plumb on two axes while concrete is poured. Some systems place the sleeve flush with grade; others specify that the top sit one to two inches above grade. Again, your specific instructions rule the day.
Drainage matters because water is sneaky. If water sits where it should not, it can create freeze-thaw trouble, corrosion problems, or instability around the base over time. A small amount of gravel at the bottom is not glamorous, but neither is redoing the whole project because the pole base turned into a miniature swamp.
Pour concrete with patience, not bravado
As you pour concrete, keep checking the sleeve to make sure it stays vertical. Do not let the sleeve float, twist, or fill with wet concrete and debris. Covering the opening during the pour is a smart move. Once the sleeve is set, allow the concrete to cure according to the manufacturer’s guidance and the mix instructions. Some guides allow quick progress, while others recommend waiting at least 24 hours or overnight before moving on.
This is a terrific time to practice emotional maturity. Do not rush the cure. Fresh concrete has heard every impatient speech before. It does not care.
Step 4: Assemble the Pole and Hardware
Lay everything out first
Before you raise anything, unpack the sections and hardware, inspect for damage, and lay the pole out near the installation point on sawhorses or protected supports. If you have a sectional pole, check the ends for burrs, dents, or debris. Many multi-section poles are designed to fit tightly and, once fully joined, do not come apart easily. That means you want alignment right the first time.
Follow the section markings, align the pieces exactly as directed, and assemble the shaft before installing certain hardware if your instructions say so. On some systems, adding hardware too early can complicate section assembly. That is a fancy way of saying, “Read the sequence, or prepare to invent new vocabulary.”
Install the truck, finial, cleat, and halyard correctly
Once the shaft is together, install the truck or pulley assembly, finial or ball ornament, cleat, collar, and halyard according to the manufacturer’s order. Tie the rope securely, space the snaps for your flag size, and make sure moving parts rotate or track properly. If you are working with an internal halyard or counterweight system, pay close attention to the routing and hardware details, since those systems are less forgiving than a simple external rope setup.
Larger poles, commercial poles, and any installation requiring lifting equipment should not be treated like a casual Saturday side quest. If the pole is long, heavy, or awkward enough to require a hoist, second crew, or special rigging, bring in a qualified installer. Heroic overconfidence is not a recognized safety standard.
Step 5: Raise, Plumb, Secure, and Inspect
Lift carefully and orient the hardware
Once the concrete has cured and the pole is assembled, raise it into the sleeve carefully. Turn the truck, pulley, and cleat to the desired direction before final adjustment. Many installers orient the pulley or access side away from prevailing wind or toward the easiest service side of the property.
Use wedges or shims as directed to center the pole in the sleeve and fine-tune plumb. Some systems use dry sand packed between the pole and sleeve, leaving a small top void that is then sealed to help keep water out. Others rely on different finishing details. However your system is designed, the goal is the same: straight pole, stable base, protected sleeve.
Do the final inspection before you fly the flag
Before raising the flag, check every essential detail. Is the pole perfectly plumb from multiple angles? Are the hardware fasteners secure? Is the halyard running smoothly? Is the collar seated neatly? Is the flag clear of nearby obstacles? Does the installation look balanced from the curb?
Then do one more practical check: can you operate it easily? A beautiful installation that is annoying to use will somehow become everyone’s least favorite household responsibility. Make sure routine flag changes, rope handling, and maintenance feel simple and safe.
Common Flagpole Installation Mistakes to Avoid
The most common mistake is ignoring site rules and utility locating. The second is underbuilding the foundation. The third is rushing assembly because the pole “basically looks right.” That phrase has ended many DIY projects badly.
Other frequent problems include choosing a pole height that overwhelms the property, setting the pole too close to trees or structures, failing to keep the sleeve plumb during the pour, and skipping cure time. Another classic error is assuming every flagpole installs the same way. Residential telescoping poles, sectional aluminum poles, and commercial internal-halyard systems are related, but they are not twins.
When in doubt, default to the manufacturer’s instructions and local code requirements over generic internet advice. The internet is full of confidence. Your flagpole needs accuracy.
Final Thoughts
Flagpole installation in five steps is simple to understand but not something to do carelessly. Pick the right location, verify the rules, call 811, build a proper foundation, assemble carefully, and finish with a level, secure pole. Do those things well, and your flagpole will not just stand up. It will look right, work right, and hold up over time.
And that is really the goal. Nobody walks past a well-installed flagpole and says, “Wow, that sleeve alignment was excellent.” But they do notice when the pole looks clean, balanced, and professional. A great installation disappears into the landscape in the best possible way. It lets the flag be the star while the structure quietly does its job, day after day, without drama.
Experience and Lessons From Real-World Flagpole Projects
The funniest thing about flagpole installation is that nearly everyone starts with the same fantasy. In the fantasy, you buy a flagpole kit, dig one heroic hole, pour one bag of concrete, stand back, wipe your hands, and somehow transform your property into a scene from a patriotic home-and-garden show. In the real world, somebody forgets a level, somebody underestimates how heavy the pole sections feel once they are awkwardly horizontal, and somebody says, “That looks straight,” while standing on a slope. This is why experienced installers trust measurements more than eyeballs.
One of the most useful lessons people learn is that the job gets easier the moment they stop rushing. The site-selection part may feel slow, but it saves endless correction later. Walking the yard at different times of day, checking how the flag will look from the street, and noticing the path of wind around trees and rooflines can completely change the best installation point. A location that looks perfect from the driveway may turn out to be terrible once you realize the flag will spend half its life tangled in a low branch like it is trying to escape.
Another common lesson is that neatness matters more than people expect. A flagpole that is technically stable but slightly off-center in a flower bed or visually crowded by shrubs never quite looks finished. Homeowners who take the time to think about edging, base landscaping, and visual symmetry almost always end up happier with the final result. The pole becomes part of the property design instead of a random object that arrived unannounced.
Then there is the foundation lesson, which tends to arrive with great humility. Plenty of people think the exciting part is raising the pole. Veterans know the exciting part is discovering the sleeve stayed perfectly plumb after the concrete set. That is the moment the whole project either becomes easy or becomes a long and deeply personal argument with gravity. A careful installer checks plumb over and over, because fixing a crooked sleeve later is about as enjoyable as explaining to guests why the flagpole appears to be leaning into the wind on a calm day.
Experienced installers also learn that bigger is not always better. A taller pole sounds impressive until you remember that scale, wind load, permitting, and lifting complexity all increase with height. Often, the best-looking residential installation is not the biggest option. It is the size that matches the home, leaves safe clearance, and can be maintained without turning every flag change into a tactical exercise.
Finally, the best projects usually share one trait: the people doing them respected the boring parts. They called 811. They checked local rules. They read the instructions. They waited for cure time. They asked for help when the pole was too big to manage safely. In other words, they acted like grown-ups, which is not as thrilling as improvising, but it is a terrific strategy when concrete, metal, and gravity are all invited to the party.