There are many ways to deal with stress: deep breathing, going for a walk, taking a break from your screen, or dramatically whispering, “I am a calm lake,” while your inbox continues behaving like a raccoon in a trash can. But sometimes, you just need something squishy in your hand. That is where a homemade slime stress ball comes in.
A slime stress ball is exactly what it sounds like: a stretchy balloon filled with soft, satisfying slime. It is simple, inexpensive, customizable, and weirdly fun to make. You can squeeze it while studying, keep it on your desk, use it as a quiet fidget tool, or give it to someone who enjoys sensory crafts. Best of all, you do not need fancy equipment. A balloon, slime, a funnel, and a little patience can turn into a palm-sized stress-relief toy that feels much cooler than a plain foam ball.
This guide explains how to make a stress ball with slime in 8 easy steps, plus safety tips, texture ideas, troubleshooting fixes, and real-life experience notes to help your DIY project survive more than three heroic squeezes.
What Is a Slime Stress Ball?
A slime stress ball is a balloon filled with slime instead of flour, rice, cornstarch, or foam beads. Traditional homemade stress balls often use dry fillers, which can feel firm or powdery. Slime gives the ball a smoother, stretchier, more gel-like squeeze. It also bounces back slowly, which makes it extra satisfying for people who enjoy tactile sensory activities.
The basic idea is simple: make or use a soft slime, spoon it into a balloon, remove extra air, tie the balloon securely, and optionally add a second balloon layer for durability. The finished ball should feel soft but not watery, full but not overstuffed, and sealed tightly enough that it does not suddenly become “desk soup.”
Supplies You Will Need
Before you begin, set up your workspace. Slime has a unique talent for finding the one clean surface in the room and making it interesting. Cover the table with newspaper, parchment paper, or a washable tray.
Basic Materials
- 1 to 2 latex balloons or thick party balloons
- About 1/3 to 1/2 cup of soft slime
- A plastic funnel or the top half of a clean plastic bottle
- A spoon, craft stick, or small spatula
- Scissors
- Paper towels or wipes for cleanup
- Optional: permanent markers, yarn, stickers, or a mesh sleeve for decoration
Best Slime Texture for Stress Balls
The best slime for a stress ball is soft, stretchy, and not too sticky. If the slime is too runny, it may leak or make the balloon feel thin and watery. If it is too stiff, it will be hard to squeeze and even harder to push through the funnel. Aim for a texture similar to thick gel or very soft putty.
You can use store-bought slime, pre-made slime, or homemade slime made with washable school glue and a slime activator. For a cleaner project, store-bought slime is the easiest option. For a more hands-on craft, homemade slime gives you more control over color, glitter, scent, and texture.
Safety Notes Before You Start
This is a simple craft, but it still deserves a few safety reminders. Balloons can be a choking hazard for young children, especially when uninflated or broken, so adult supervision is important. Keep broken balloon pieces away from toddlers, pets, and anyone likely to put things in their mouth.
Slime should not be eaten. Wash your hands before and after making it, especially if you use slime activator, contact lens solution, borax-based recipes, glitter, fragrance, or food coloring. If you have sensitive skin, wear disposable gloves. If the stress ball leaks, throw it away rather than trying to save it like a tiny wounded jellyfish.
Also, do not use a slime stress ball around sharp objects, hot surfaces, keyboards, white carpets, or anything that would make you say, “Oh no,” in slow motion.
Easy Ways to Make a Stress Ball with Slime: 8 Steps
Step 1: Choose the Right Balloon
Start with a strong balloon. Thicker balloons work better because they can handle repeated squeezing. A standard party balloon will work, but if you have slightly larger or higher-quality balloons, use those. Avoid old balloons that feel dry, cracked, or brittle. They may break before your stress ball has a chance to become emotionally supportive.
Stretch the balloon gently with your hands before filling it. You can inflate it once and let the air out to loosen the rubber, but do not leave air inside when adding slime. Extra air creates weak spots and makes the ball feel more like a squeaky bubble than a smooth stress ball.
Step 2: Prepare Your Slime
Put your slime in a bowl and test the texture. It should stretch without sticking aggressively to your fingers. If it is too sticky, knead in a small amount of slime activator according to your recipe or product instructions. If it is too stiff, work in a few drops of warm water or lotion, depending on the type of slime you are using.
For a classic slime stress ball, use plain slime. For a fun version, add glitter, tiny foam beads, or food coloring. Just remember: the more decorations you add, the more texture you will feel through the balloon. That can be great if you want a crunchy sensory ball, but less relaxing if you prefer a smooth squeeze.
Step 3: Set Up a Funnel
Place a funnel into the neck of the balloon. If you do not have a funnel, cut the top off a clean plastic bottle and use it as a wide-mouth funnel. This works especially well because slime is thick and stubborn. It does not politely pour like water. It moves more like it has its own calendar.
Stretch the balloon opening over the funnel so it stays in place. Make sure the balloon neck is secure before adding slime. If it slips off halfway through, you will create modern art on your table.
Step 4: Spoon the Slime into the Balloon
Add slime slowly. Use a spoon, craft stick, or small spatula to push the slime through the funnel and into the balloon. Work in small amounts instead of trying to shove the entire slime blob in at once. This makes the process cleaner and helps prevent the balloon neck from stretching too much.
If the slime gets stuck, gently tap the funnel or push it down with a craft stick. Do not use anything sharp. A pencil point, skewer, or knife can puncture the balloon and instantly upgrade your craft into a cleanup mission.
Step 5: Fill Until It Feels Right
Fill the balloon until it fits comfortably in your palm. Most slime stress balls need about 1/3 to 1/2 cup of slime, but the exact amount depends on balloon size and personal preference. A smaller ball is easier to squeeze and safer for gentle fidgeting. A larger ball feels more dramatic, but it is also more likely to burst if overfilled.
Test the feel before tying. Hold the neck closed with your fingers and gently squeeze the balloon. If it feels too flat, add more slime. If it feels tight like it is preparing for battle, remove some slime. The goal is soft resistance, not a balloon that looks personally offended.
Step 6: Remove Extra Air
Before tying the balloon, carefully squeeze out trapped air from the neck. Air bubbles make the stress ball weaker and less satisfying. Hold the balloon upright, pinch the neck, and gently press the slime downward. Let the extra air escape slowly.
Do not squeeze too hard during this step. Slime can shoot upward if pressured too quickly, and nobody wants a surprise slime geyser. Slow and steady wins the squish.
Step 7: Tie the Balloon Securely
Once the slime is inside and the extra air is out, tie the balloon neck into a tight knot. Pull gently on the knot to make sure it is secure. Wipe away any slime around the outside of the balloon.
For extra protection, cut the neck off a second balloon and stretch it over the first one, placing the knot side inside the second layer. This double-balloon method makes the stress ball stronger and reduces the chance of leaks. It also gives the finished ball a cleaner look.
Step 8: Decorate and Test Your Stress Ball
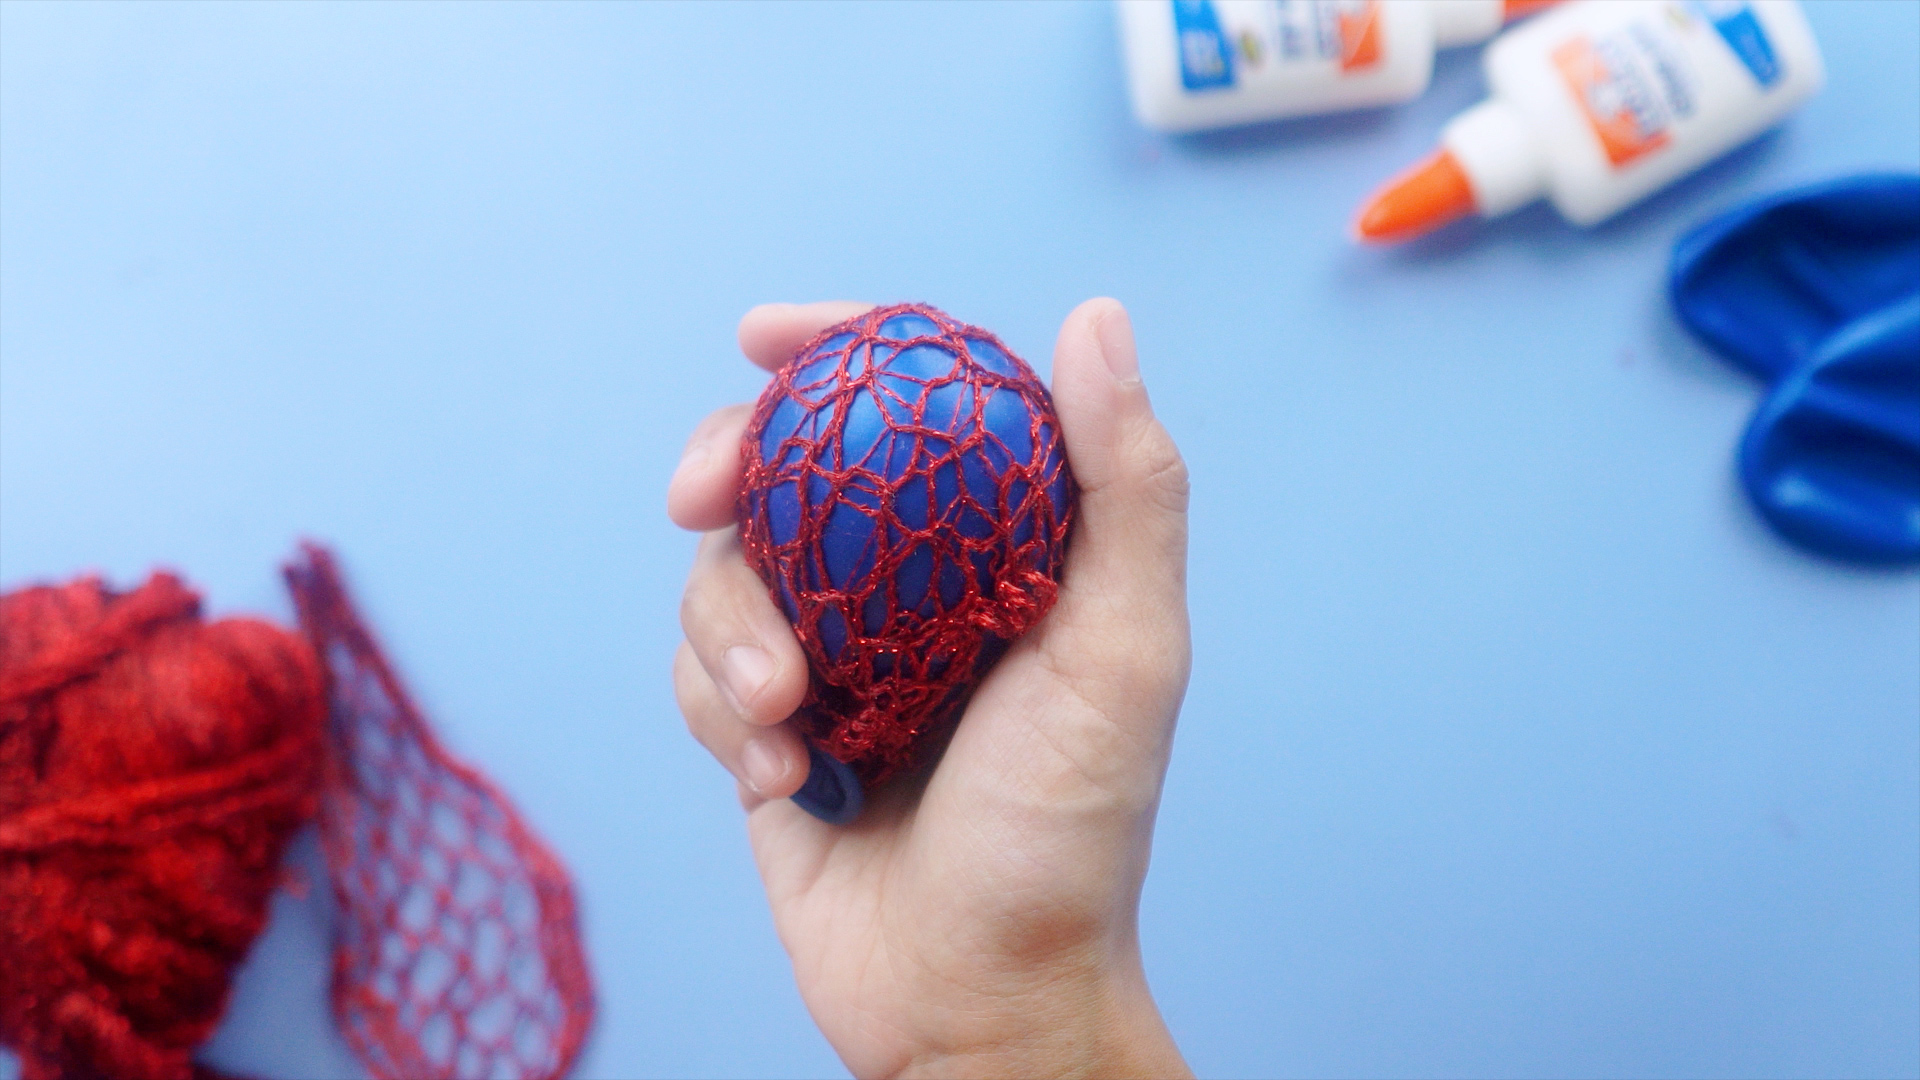
Now comes the fun part. Decorate your slime stress ball with a funny face, stripes, dots, or a tiny “do not disturb” expression. Use permanent markers carefully and let the ink dry before squeezing. You can also wrap the ball in a mesh sleeve or fishnet-style material to create a bubble effect when squeezed.
Test the stress ball gently at first. Squeeze slowly, roll it in your palm, and check for leaks. If it holds up, congratulations: you have created a small, squishy object that may be more emotionally stable than most group chats.
Texture Ideas for Different Stress Ball Styles
Soft and Smooth Stress Ball
Use plain slime with no add-ins. This creates the most classic stress ball feel. It is good for desk use, studying, and quiet fidgeting.
Crunchy Slime Stress Ball
Add foam beads to the slime before filling the balloon. This creates a crackly, textured squeeze. Use only small, lightweight add-ins and make sure the outer balloon layer is strong.
Glitter Slime Stress Ball
Use glitter glue slime or mix cosmetic-grade glitter into clear slime. This makes the ball look fun, especially if you use a light-colored or transparent balloon. Avoid loose glitter if you dislike cleanup. Glitter has the survival skills of a superhero.
Color-Changing Look
Try using bright slime inside a pale balloon. When squeezed, the color may appear more intense in stretched areas. You can also layer two balloon colors for a cool hidden-color effect.
Troubleshooting Common Problems
The Slime Will Not Go Through the Funnel
Your slime may be too thick. Knead it until warm and stretchy, then add it in smaller pieces. A wide bottle-top funnel usually works better than a narrow kitchen funnel.
The Balloon Feels Too Tight
You probably added too much slime. Remove a little before tying the knot. A stress ball needs room to move. If it is packed too firmly, it may split under pressure.
The Stress Ball Is Too Sticky Outside
Wipe the outside with a damp paper towel. If slime keeps appearing, the knot may not be sealed well or the balloon may have a tiny hole. When in doubt, double-layer it or start again.
The Ball Burst
It happens. Usually, the cause is overfilling, sharp nails, weak balloons, or aggressive squeezing. Clean the area, wash your hands, and make a new version with less slime and two balloon layers.
How to Use a Slime Stress Ball
A slime stress ball is not magic, but it can be a helpful sensory tool. The squeeze-and-release motion gives your hands something simple to do, which may help you refocus during mild stress, boredom, or restless moments. Try pairing it with slow breathing: squeeze while breathing in, hold for a second, and release while breathing out.
Use it during study breaks, before a presentation, while brainstorming, or when you need a quick screen-free pause. Keep the pressure gentle. The goal is relaxation, not proving your hand strength to an audience of office supplies.
Cleaning and Storage Tips
Store your slime stress ball in a small container, zip-top bag, or desk drawer when not in use. Keep it away from direct sunlight and heat, which can weaken balloons and change the slime texture. Do not leave it in a hot car, near a heater, or under heavy books.
If the outside gets dusty, wipe it gently with a damp cloth. Do not rinse it under running water, because water can weaken the knot area. If the balloon becomes sticky, thin, faded, cracked, or misshapen, replace it. Homemade stress balls are fun, but they are not immortal. Think of them as tiny seasonal employees.
Real-Life Experience: What Actually Works Best
After making several slime stress balls, one lesson becomes obvious fast: the balloon matters more than you think. Cheap balloons can work for a quick craft, but they often feel thinner and less reliable. A slightly thicker balloon makes the finished stress ball feel smoother, stronger, and more comfortable in the hand. Double-layering is the trick that turns the project from “cute but risky” into “I can actually keep this on my desk.”
The second lesson is that slime texture controls everything. A watery slime makes the stress ball feel floppy, and it may leak from the knot. A stiff slime makes filling difficult and creates a ball that feels more like a rubber-covered rock than a calming tool. The best slime is stretchy, glossy, and slow-moving. It should slide into the balloon with a little encouragement, not a full wrestling match.
Using a cut plastic bottle as a funnel is also much easier than using a narrow kitchen funnel. Slime does not enjoy narrow spaces. It clings, stretches, pauses, and generally behaves like it is negotiating a contract. A wider opening lets you push the slime through without turning the project into an arm workout.
Another helpful tip is to fill the balloon less than you think you should. Beginners often overfill because the ball looks small at first. But once you tie it and start squeezing, that extra pressure has nowhere to go. A slightly underfilled stress ball feels better and lasts longer. It also gives the slime room to shift, which creates that slow, satisfying squeeze people love.
Decoration is fun, but simple designs hold up best. Marker faces are cute, especially silly eyes, sleepy faces, or tiny motivational phrases like “squish me” or “breathe first.” However, heavy stickers may peel off, and glued-on decorations can make the ball awkward to hold. If you want a dramatic effect, a mesh sleeve is the best upgrade. When squeezed, the slime pushes through the openings and creates bubble-like bumps. It looks impressive, feels interesting, and makes the stress ball seem store-bought.
For classrooms, craft parties, or family activities, it helps to prepare the slime ahead of time. Making slime and filling balloons in the same session can be fun, but it can also get chaotic. Pre-made slime keeps the project moving and reduces mess. Set up a filling station with paper towels, funnels, and bowls. Let each person choose a balloon color and slime texture, then help with tying and double-layering.
The finished stress ball is best for gentle squeezing, not throwing, stomping, or testing “how strong it really is.” Spoiler: the balloon eventually loses. Used gently, though, a homemade slime stress ball can last for days or weeks. It is cheap, creative, and surprisingly satisfying. Plus, making it is half the fun. You get a craft project, a sensory toy, and a tiny reminder that sometimes the best way to handle stress is to squeeze something harmless instead of sending that dramatic text.
Conclusion
Making a stress ball with slime is one of those DIY projects that feels almost too easy for how fun it is. With a balloon, soft slime, a funnel, and a few smart safety steps, you can create a squishy stress-relief toy in minutes. The key is choosing the right slime texture, avoiding overfilling, removing extra air, and adding a second balloon layer for strength.
Whether you want a smooth desk fidget, a glittery sensory ball, or a silly handmade gift, this craft is flexible enough for kids, teens, students, parents, and adults who need a tiny squishy sidekick. Just keep it away from sharp objects, supervise younger crafters, and replace it when it starts looking tired. Your slime stress ball may not solve every problem, but it can make stressful moments feel a little more manageableand a lot more squishy.