If you’ve ever looked at modern abstract art and thought, “I could do that,” congratulationsyou’re right.
You just needed a balloon, some paint, and the courage to embrace a little chaos (the fun kind, not the “my living room is now a crime scene” kind).
Balloon smash painting is an easy, beginner-friendly way to make bold, textured abstract art with satisfying pops of color and surprisingly fancy-looking results.
This technique lives at the intersection of three beloved American traditions: DIY home decor, getting messy on purpose, and turning ordinary supplies into something that looks like it belongs in a gallery (or at least above your couch).
It’s also a great “process art” activitymeaning the joy is in experimenting and exploring, not chasing a perfect outcome. Spoiler: your “mistakes” are usually the best parts.
What Is Balloon Smash Painting?
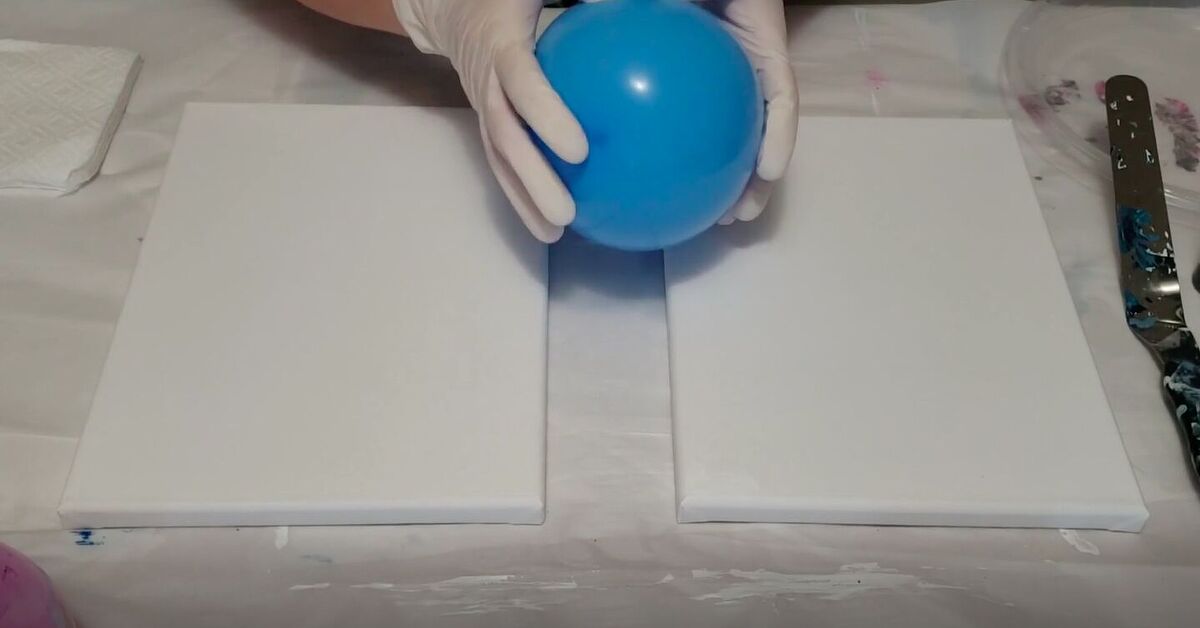
Balloon smash painting is exactly what it sounds like: you use an inflated balloon as a tool to press, stamp, drag, or “smash” paint across a surface.
Depending on how you do it, you can get everything from soft marbled blooms to dramatic, energetic bursts and layered textures.
Some artists use the balloon to “kiss” paint puddles (a gentle press-and-lift) while others go full smash-and-sweep to create big, abstract movement.
The magic comes from the balloon’s rounded, slightly squishy surface. It spreads paint in an unpredictable waylike a stamp that refuses to behaveand that’s what makes the finished piece feel alive.
Even if you’ve never painted a thing in your life, you can still end up with something you’d proudly hang, gift, or post online with a caption like: “Feeling inspired lately.”
Why This DIY Works So Well (Even If You’re Not “Artistic”)
- It’s beginner-proof: No brush skills required. The balloon does the heavy lifting.
- It’s fast: You can finish a piece in one session (drying time aside).
- It’s customizable: Minimalist neutrals, neon explosions, soft pastelsyour call.
- It’s relaxing: Repetitive stamping can be surprisingly soothing (like bubble wrap… but prettier).
- It’s budget-friendly: Balloons are cheap. Canvas panels and craft acrylics are too.
Supplies You’ll Need
You can keep this super simple or go all-in with extras. Here’s a practical list that covers both the “I have ten minutes” crowd and the “I bought a craft cart” crowd.
Core Materials
- Balloons: Standard latex balloons work well (have a few in case one pops).
- Acrylic paint: Craft acrylics are perfect. Choose 3–6 colors for a cohesive look.
- Surface: Canvas panel, stretched canvas, heavy mixed-media paper, or even a primed wood board.
- Paper plates or a palette: For paint puddles and color mixing.
- Drop cloth / trash bags: Because paint has a strong desire to travel.
- Gloves and an apron/old shirt: Optional, but your future self will be grateful.
Nice-to-Have Extras
- Pouring medium or Floetrol: Helps paint glide and blend smoothly (especially for more “fluid art” looks).
- Spray bottle with water: Light misting can help paint spread or soften edges.
- Palette knife or old gift card: For scraping paint or adding extra layers.
- Painter’s tape: To mask borders for crisp edges.
- Varnish: A final coat can make colors pop and protect the surface.
Set Up Your Space Like a Pro (Without Becoming One)
Balloon smash painting is fun, but it can get messy fastespecially if you get enthusiastic and start “testing” the balloon bounce.
Cover your work area with a drop cloth, trash bags, or flattened cardboard.
If you’re indoors, protect nearby surfaces (paint splatter can be sneaky).
Good ventilation is a smart move with acrylics, and if kids are involved, choose materials labeled appropriate for their age and keep anything with warnings out of the mix.
Pro tip: place your canvas on a cookie rack or upside-down plastic cups. That way paint can drip off the edges without gluing your artwork to the table like it’s trying to move in permanently.
Step-by-Step: Balloon Smash Painting Tutorial
Step 1: Pick a Color Plan That Can’t Lose
If you want your piece to look “intentional” (even if you’re winging it), choose one of these foolproof palettes:
- Modern neutral: Black + white + gray + one accent (gold, blush, or navy)
- Coastal calm: Teal + turquoise + white + sandy beige
- Sunset drama: Coral + magenta + orange + purple
- Earthy luxe: Olive + terracotta + cream + charcoal
- Bold pop: Primary colors + white (graphic and playful)
Step 2: Inflate the Balloon (Goldilocks Style)
Inflate your balloon to a medium size. Too small and it won’t spread paint nicely.
Too big and you’ll feel like you’re wrestling a beach ball.
Tie it off, then lightly press it with your palmif it has a little give, you’re in the sweet spot.
Step 3: Prep the Canvas Background (Optional, But Worth It)
You can balloon-smash directly onto a blank white surface, but a quick background can instantly level up the look.
Try one of these easy options:
- Solid base coat: Paint the canvas one color and let it get tacky (not fully dry).
- Soft blend: Sponge or brush two similar colors for a gradient.
- Negative space plan: Keep big areas white and focus the balloon action in one corner or down the center.
Step 4: Make Paint Puddles
Pour small puddles of paint onto a paper plate or palette. If your paint is thick, mix in a tiny bit of water or pouring medium.
You’re aiming for “pancake batter,” not “cement.”
Want those dreamy, petal-like blooms people love in balloon techniques?
Layer colors into one puddle (like a mini paint stack) so the balloon picks up multiple shades at once.
Step 5: Dip, Smash, Lift (The Classic “Balloon Kiss”)
- Press the balloon gently into the paint puddle.
- Move it to the canvas and press down lightly.
- Hold for a second, then lift straight up.
That press-and-lift creates a rounded, organic shapeoften like a flower or cloud burst.
Repeat around the canvas, rotating the balloon slightly each time so patterns don’t look identical.
Step 6: Smash and Drag (For Big Abstract Energy)
If you want more movement, try this:
- Load the balloon with paint.
- Press onto the canvas.
- Drag it a few inches in one direction (slowly) before lifting.
This creates streaks, swipes, and dynamic textureperfect for modern abstract pieces that feel like they’re in motion.
Use a light hand at first; you can always add more pressure later.
Step 7: Build Layers (Because Depth = Drama)
Let the first layer sit for a few minutes, then go back in with another color.
Layering is how you get that “I bought this at a boutique” vibe.
Add contrast: if your palette is mostly light, add a few dark accents to anchor the piece.
If it’s mostly bold, add white or metallic touches to create breathing room.
Step 8: Refine the Edges (Optional “I Totally Meant That” Move)
If paint pools heavily in one spot, dab with a paper towel.
If you want sharper edges, use a palette knife to scrape a clean line.
If you want splatter, flick a little watered-down paint with a brush.
Remember: abstract art loves confidence. If you act like it’s intentional, it becomes intentional.
Design Ideas to Make Your Painting Look Extra “Finished”
1) The Statement Corner
Keep most of the canvas minimal and concentrate balloon smashes in one corner.
This looks modern and deliberatelike you planned it while sipping iced coffee and not while standing over a tarp in socks.
2) The Center Burst
Build a cluster in the middle with radiating drags outward.
Great for entryways, living rooms, or anywhere you want “wow” without needing a second mortgage.
3) The Vertical Flow
Create a top-to-bottom cascade using a limited palette.
This looks especially good on tall canvases and works with popular home decor styles (modern farmhouse, boho, contemporary).
4) Moody Minimalist
Use black, white, and one deep accent color (like forest green or navy).
A little balloon texture goes a long way herekeep it sparse and bold.
Troubleshooting: When Your Painting Looks “Off”
- Everything turned muddy: Too many colors mixed at once. Limit your palette and let layers dry a bit between passes.
- Paint isn’t transferring well: Paint may be too thick. Add a small amount of medium or water and try again.
- It looks repetitive: Rotate the balloon, change pressure, switch between press-and-lift and drag techniques.
- Too busy: Add negative space by painting over sections with a base color, then reintroduce detail sparingly.
- Not enough contrast: Add a few darker marks or bright highlights to create focal points.
Safety and Cleanup Tips (So This Stays Fun)
Acrylic paint is generally easy to work with, but it’s still smart to treat art supplies with basic respectespecially with kids.
Use non-toxic paints labeled for your age group, avoid products with cautionary labels for younger children, and keep the area ventilated if you notice irritation.
Dress for mess, protect surfaces, and keep paint out of mouths, eyes, and the dog’s fur (ask me how I know).
Cleanup is easiest while paint is still wet. Wipe tools and surfaces right away, and rinse palettes/plates as soon as you’re done.
If paint dries on a palette knife or old card, you can often peel it off like a strangely satisfying sticker.
How to Dry, Seal, and Display Your Balloon Smash Art
Let your painting dry flat. Dry time depends on how thick your paint isthin layers may dry within hours, while heavy texture can take a full day.
Once fully dry, you can seal it with an acrylic varnish (matte, satin, or gloss).
Gloss makes colors pop and adds that “wet look,” while matte feels modern and soft.
For display, consider these easy upgrades:
- Float frame: Makes even a simple canvas look high-end.
- Gallery wall: Create 2–3 coordinating pieces with the same palette.
- Oversized impact: Go bigger than you thinkabstract art loves scale.
FAQ
Can I do balloon smash painting with kids?
Yeswith supervision and kid-safe supplies. It’s an excellent process-art activity because it encourages exploration and reduces pressure to “draw something perfect.”
Use washable surfaces, protect clothes, and keep the paint choices age-appropriate.
Do I need a pouring medium?
Not required. It helps if you want smoother glides and softer blends, but basic craft acrylics work great when slightly thinned.
Start simple, then upgrade if you fall in love with the technique.
What surface works best?
Canvas panels are affordable and sturdy. Stretched canvases look more “gallery-ready.”
Heavy art paper works too, but it may warp with heavy paint unless taped down or mounted later.
Conclusion
Balloon smash painting is the kind of DIY that feels like a cheat code: minimal skill, maximum payoff.
With a few colors, a balloon, and a willingness to get a little messy, you can create modern abstract art that looks genuinely impressive.
Whether you keep it simple with a corner cluster or go full-color explosion across a big canvas, the result is always uniquely yoursbecause no two balloon smashes ever behave the same way (kind of like toddlers in Target).
Try one painting just for fun, then make a second with a more “intentional” palette. Before you know it, you’ll be planning a whole series, naming them dramatic things like “Midnight Bloom No. 3,” and acting like you didn’t make it in your kitchen.
Experience Notes: What It’s Really Like to Make Balloon Smash Art (500+ Words)
The first time you try balloon smash painting, it’s oddly thrillinglike you’re about to break a rule, but the only thing you’re hurting is a paper plate.
You inflate the balloon and immediately realize you have to choose what kind of person you are today: the careful tapper or the enthusiastic smasher.
Most people start as “careful tapper,” because there’s a tiny voice in your head saying, “What if I ruin it?”
Ten minutes later, that voice disappears under a layer of magenta and you’re dragging the balloon across the canvas like you’re conducting an orchestra of chaos.
What surprised me most about this project is how quickly it teaches you to relax. Brushes can feel seriouslike you should know what you’re doing.
Balloons don’t have that energy. A balloon is basically telling you, “We’re just here to have a good time.”
And because the prints are unpredictable, you stop trying to micromanage every mark.
Instead, you start watching what happens, responding to it, and making little decisions: add contrast here, soften that edge there, repeat that shape, break up that cluster.
That’s real creative practice, disguised as messing around.
Another real-world lesson: your paint consistency matters more than you think.
If the paint is too thick, the balloon can “skip” and leave chunky patches that feel stuck on top rather than integrated.
If it’s too thin, everything slides and blends until the whole piece looks like a smoothie you forgot in the car.
The sweet spot is slightly fluid but still opaque, so each press leaves a clean print with crisp edges and a little blending at the boundaries.
The good news is you can adjust as you goadd a tiny bit of medium if it’s stiff, or add a bit more paint if it’s too watery.
Color choice is another big “experience” factor. On your first attempt, it’s tempting to use every color you own.
It feels logical: more colors = more interesting art. But balloon smash painting rewards restraint.
Three to five colors usually look more sophisticated than nine.
If you want something that looks modern in a living room, pick a palette that matches your spacemaybe two neutrals plus one bold accent.
If you’re making art with kids (or for a playroom), go bright and playful and let the piece be unapologetically joyful.
The most satisfying moment is when you start layering.
Your first layer is fun, but your second layer is when the piece starts looking “done.”
Adding darker accents creates depth; adding white highlights creates dimension; adding a metallic touch makes it feel intentional and finished.
I’ve also found it helps to step back every few minutes. Up close, you’ll obsess over one awkward blob.
From six feet away, that blob becomes a perfect part of the composition.
Abstract art is weird like thatand that’s part of the charm.
Finally, there’s the emotional payoff: balloon smash painting gives you a finished object you can actually use.
It’s not just an activity; it’s decor. Hang it. Gift it. Build a series.
Make one big canvas for a statement wall, or do three smaller pieces that share the same palette.
And if your first attempt looks a little “learning experience”? Keep it anyway.
You’ll be shocked how proud you feel when you compare it to your next one.
In the world of DIY, progress is the prettiest thing you can make.
