Love the look of old farmhouse windows but not the price tag, chipping lead paint,
or the joy of digging through a salvage yard in the rain? A DIY 6-pane decorative
window gives you all the vintage charm with none of the splinters and mystery odors.
In this guide, inspired by the classic Remodelaholic project and other popular DIY
tutorials, you’ll learn how to build a beautiful faux window frame that you can use
as wall art, a wreath backdrop, or a year-round focal point in any room.
We’ll walk through tools and materials, a clear step-by-step build, safe hanging
options, and creative styling ideas. Then we’ll wrap up with real-world lessons and
“I-wish-I-knew-this-sooner” tips from DIYers who’ve built their own decorative
windows. Ready to turn a few boards into a statement piece? Let’s build.
Why a 6-Pane Decorative Window Is a Smart DIY Project
Farmhouse charm without the antique hunt
Architectural salvage windows are gorgeous, but they’re often heavy, uneven, and
coated in unknown layers of old paint. Building your own 6-pane window frame lets
you control the size, finish, and condition. No rot, no cracked glass, and no
guessing what that flaky paint is made of. You get the same old-house vibe using
clean, new lumber and your favorite paint or stain.
Custom size for your wall, not someone else’s house
Old windows were built for actual houses; your wall might not be ready for a
40-pound monster frame. With a DIY version, you size the frame for your space:
small and vertical for a narrow entryway, large and horizontal over a sofa, or
square to anchor a gallery wall. You can even design the openings to match
off-the-shelf picture-frame glass or acrylic panels to make finishing easier.
Beginner-friendly woodworking
A 6-pane decorative window is basically a rectangle with a grid inside it. If you
can measure, cut straight lines, and drive a screw without closing one eye, you
can build this project. It’s a great way to practice accurate measuring, using a
miter saw or circular saw, and playing with finishes like distressing and glazing.
Tools and Materials You’ll Need
You can adjust the exact dimensions to suit your wall, but a good starting point
for a mid-size window frame (around 24 x 36 inches) looks like this:
Lumber and main components
- 1×3 or 1×4 pine boards (straight, knot-free) for the outer frame
- Additional ripped-down strips (about 1" to 1 1/4" wide) for the inner grid or muntins
- Optional: thin glass or acrylic sheets sized to fit each pane
- Wood glue and 1 1/4" brad nails or trim screws
- Wood filler for nail and screw holes
- Primer plus paint or stain and a topcoat
Tools
- Miter saw or circular saw with a straightedge guide
- Table saw (helpful for ripping the grid pieces, but you can also buy pre-cut strips)
- Measuring tape, square, and pencil
- Drill/driver with countersink bit if you’re using screws
- Brad nailer (optional but very handy)
- Random-orbit sander and sandpaper (120–220 grit)
- Safety glasses, hearing protection, and a dust mask
- Stud finder, level, and appropriate wall anchors for hanging
If you’re working in a small space or just starting out, you can have the big box
store cut the 1x boards to rough length and do the final trimming at home. The
most important thing is consistency: pieces that are supposed to match must be
exactly the same length.
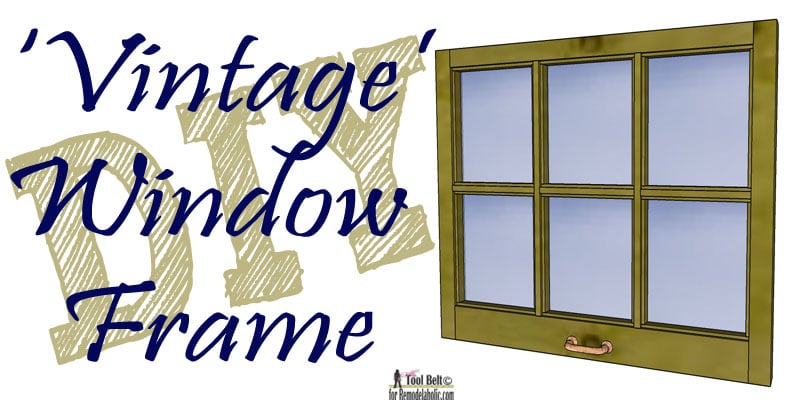
Step-by-Step: How to Build a 6-Pane Decorative Window
1. Decide on the final size and pane layout
First, measure the wall where your faux window will live. A good rule of thumb is
to fill about two-thirds the width of the furniture beneath it. For a classic
six-pane look, you’ll have two columns and three rows of openings.
For example, imagine a finished frame that’s 24 inches wide by 36 inches tall.
Once you subtract the frame thickness and muntins, each pane might end up around
9 x 10 inches. Sketch out the layout with actual numbers before cutting; this
saves you from playing “math Jenga” with boards later.
2. Cut the outer frame pieces
Use your miter or circular saw to cut:
- Two vertical stiles at the full finished height
- Two horizontal rails at the full finished width, minus the combined thickness of the stiles if you’re doing butt joints
Most DIYers use simple butt joints secured with glue and nails or screws. If you
enjoy joinery, you can step it up with pocket holes or half-lap jointsbut you
don’t have to. What matters most is that the frame is square, so dry-fit
everything and check with a speed square or by measuring diagonals.
3. Assemble the outer frame
Apply wood glue at each corner, align the pieces, and clamp if you can. Drive
brad nails or trim screws through the rails into the ends of the stiles. Wipe off
excess glue and double-check that the diagonals match. If they do, your frame is
square; if not, adjust while the glue is still wet.
4. Cut and install the vertical muntin
Measure between the inside edges of the top and bottom rails to find the length
of your vertical muntin. Cut a rip of wood to your desired widthoften about
1" to 1 1/4" looks right for a decorative grid. Test-fit the strip, then glue and
nail it in place centered left-to-right. This single piece divides the frame into
two columns.
5. Add the horizontal muntins to create six panes
Now measure the inside width between one stile and the center muntin to determine
the horizontal crosspieces. You’ll need three of these for each side, or you can
run three full-width horizontal strips all the way across the frame if that’s
easier to build.
Mark the positions for your three rows. Equal spacing looks polished, but you can
also choose a taller center pane for a more traditional, slightly formal look.
Glue and nail the horizontal strips in place, checking that they stay level as
you go. When you’re done, you should have six evenly sized openings.
6. Sand, fill, and prep for paint or stain
Once the glue has cured, sand all surfaces smooth, breaking the sharp edges
slightly so the piece looks more like an aged window and less like a brand-new
picture frame. Fill nail holes and any small gaps with wood filler, let it dry,
then sand again. Wipe the whole frame with a tack cloth or a slightly damp rag to
remove dust.
7. Add glass or keep it open
You have two main options:
-
Open frame: Leave the panes empty for pure architectural interest.
This keeps the piece lightweight and easy to hang. -
Glass or acrylic: Cut thin panels to fit each opening and secure
them from the back with small stops, mirror clips, or clear adhesive. Acrylic is
safer and lighter, especially in busy households.
If you’re going for a vintage look, you can lightly fog the glass with
frosted-glass spray or add subtle “antiquing” with glass paint to mimic age.
8. Finish with paint, stain, or a distressed look
For a farmhouse vibe, many people prefer a layered finish: stain the wood first,
let it dry, then brush on a light coat of white or cream paint. When that’s dry,
sand along edges and high spots to let the darker wood peek through. Seal with a
clear, matte topcoat for durability without shine.
For a more modern look, try a deep black, rich charcoal, or warm walnut stain
without distressing. The clean lines of the pane grid look fantastic against bold
wall colors.
9. Hang your decorative window safely
Even without glass, a solid wood frame can be heavyespecially at larger sizes.
Use a pair of D-rings and picture wire, a French cleat, or heavy-duty sawtooth
hangers rated for more than the frame’s weight. Whenever possible, screw into
studs; if that’s not an option, use wall anchors appropriate for your wall type.
If you plan to add real glass, be extra sure the hardware is secure and out of
reach of pets and kids. A decorative window should say “cozy cottage,” not “trip
to the emergency room.”
Creative Ways to Style Your DIY 6-Pane Window
1. Wreath and greenery centerpiece
One of the most popular ways to use a faux window is as a wreath backdrop. Hang
the frame over a console or mantel, then layer a seasonal wreath in the center:
eucalyptus in spring, lemons or boxwood in summer, mini pumpkins or wheat in
fall, and evergreen for the holidays. Use a wide ribbon or fishing line looped
over the top rail so the wreath appears to “float” inside the panes.
2. Gallery of photos or prints
Treat each pane like its own little frame. Attach small binder clips or
mini-clothes pins to twine stretched across the openings and hang family photos,
vintage postcards, or black-and-white art prints. This makes it easy to swap
images without taking the window off the wall.
3. Layered over a mirror
Want more light in a dark hallway? Mount a mirror behind your decorative window
so the panes break up the reflection. It creates the illusion of a real exterior
window and can bounce light around just enough to make a small space feel more
open. Adhesive mirror tiles or a cut-to-size mirror panel work well behind a
wood frame.
4. Seasonal chalkboard or sign
Paint a removable backer board with chalkboard paint or letter a favorite quote
and mount it behind the window. The grid adds instant character to any script or
typography, and you can change the board out seasonally without altering the
frame itself.
5. Farmhouse wall vignette
Pair your 6-pane window with a mix of baskets, metal signs, framed prints, and
small shelves for a curated farmhouse wall. The window acts as the “anchor” that
visually ties everything together, so the overall look feels intentional instead
of random.
Cost, Time, and Skill Level
If you keep the design simple and skip real glass, you can usually complete a
6-pane decorative window in a weekend:
- Cost: Roughly $25–$60 in lumber and supplies, depending on size and finish
- Time: About 3–5 hours of active work, plus drying time between paint or stain coats
- Skill level: Beginner to intermediate DIY; no advanced joinery required
That’s significantly less than buying a large, ready-made window frame decor
piece, which can easily run $80–$150 or moreespecially if it’s made of real
wood instead of MDF.
Experiences, Mistakes, and Smart Hacks from the DIY Trenches
Reading project plans is helpful, but hearing what actually happens in real
garages and dining-room “workshops” is even better. Here are some common lessons
and experiences DIYers often share after building their own decorative windows.
Lesson 1: Don’t cheap out on straight boards
It’s tempting to grab the first 1x4s you see, toss them in the cart, and declare
victory. Many DIYers later discover that slightly bowed or twisted boards make it
almost impossible to create tight corners and straight muntins. Take an extra few
minutes in the lumber aisle to sight down each board. If it looks like a ski or a
potato chip, put it back. Your corners, grid lines, and sanity will all be
happier.
Lesson 2: Dry-fit the grid before you touch glue
Another frequent regret: cutting all the inner strips, gluing everything up, and
only then realizing the bottom row of panes is smaller than the top. Instead,
many experienced DIYers now dry-fit all vertical and horizontal pieces inside the
frame first. They mark reference lines, tweak lengths as needed, and only commit
to glue and nails once everything looks perfectly even.
Lesson 3: Build on a flat surface, not on carpet
Decorative windows look best when they’re truly flat and square. People who build
on carpet or a slightly warped table often notice that the finished frame rocks a
little or doesn’t sit flush against the wall. Building on a level workbench,
sheet of plywood, or even a smooth floor helps keep everything aligned while the
glue dries. Clamps or heavy paint cans can act as extra “hands” to hold joints
tight.
Lesson 4: Distressing hides a lot of sins
Perfect miters are wonderful, but you don’t need cabinetmaker-level precision to
get a charming result. Many DIYers discover that a slightly distressed finish
sanded edges, layered colors, or a glaze in the cornersadds character and
cleverly disguises tiny gaps or filler spots. It’s the woodworking equivalent of
good lighting and a flattering selfie angle.
Lesson 5: Think about hanging before you start painting
One surprisingly common “oops”: finishing the frame beautifully and only then
realizing there’s nowhere sturdy to attach hanging hardware. A lot of builders
now pre-plan the hanging method early in the process, marking where D-rings,
cleats, or brackets will go while the frame is still bare wood. It’s easier to
drill pilot holes and test hardware placement before paint than after the final
topcoat is dry.
Lesson 6: Seasonal styling keeps the piece feeling fresh
People who love their decorative windows the most tend to treat them like a
flexible backdrop rather than a fixed piece of art. They swap wreaths, ribbons,
small signs, and garlands throughout the year. The frame stays put, but the look
changes from spring florals to patriotic bunting, then to pumpkins, then to
holiday greenery. It’s like having a tiny, reusable mantel for every season.
Lesson 7: Start with one, end up with three
A recurring theme in DIY blogs and forums is how “just one” decorative window
turned into a mini collection. Once builders get comfortable with the process,
they start experimenting with different shapes: arched tops, double-window sets,
or extra-tall frames for stairwells. The technique stays the samemeasure, cut,
assemble, finishbut small design tweaks keep each piece unique.
The big takeaway from these experiences? A 6-pane decorative window is forgiving,
customizable, and surprisingly addictive. Even if your first frame isn’t
perfect, it will still look charming on the walland the second one will be even
better.
Wrapping Up: Your Custom “Old” Window, Built the Smart Way
Building a 6-pane decorative window gives you the look of a well-loved vintage
find without the weight, grime, or scavenger hunt. With a few boards, basic
tools, and an afternoon of focused effort, you can create a piece that works as a
wreath backdrop, photo display, or statement art over a console or sofa.
Plan your size, choose straight boards, take your time on the grid layout, and
finish it in a style that fits your homewhether that’s bright farmhouse white,
moody black, or natural wood. Add safe, sturdy hanging hardware, and then have
fun styling it year-round. Your walls (and your decor budget) will thank you.