Rings are tiny. Important rings are tinieryet somehow they carry the emotional weight of an entire rom-com montage.
So if you’re going to stash, gift, or photograph a ring, it deserves more than a pocket, a plastic baggie, or the “temporary” spot
on the bathroom sink that becomes a permanent anxiety trap.
This project teaches you how to make a beautiful DIY ring box holderthe kind with a snug insert that keeps rings upright,
looks great in photos, and doesn’t scream “I made this at 1:00 a.m.” (Even if you did. No judgment.)
You’ll build a clean, modern holder using an inexpensive wood box and a soft velvet-style insert that cradles one to three rings.
It’s beginner-friendly, customizable, and surprisingly satisfyinglike organizing a junk drawer, but cute.
What You’re Making (And Why It Works)
A ring box holder is basically two parts:
(1) the outer box (the pretty shell) and (2) the insert (the part that actually holds the rings).
Most store-bought ring boxes look fancy because the insert is structuredrings stay upright, separated, and secure.
We’re recreating that “boutique” effect with simple materials: foam or sponges + fabric + a little patience.
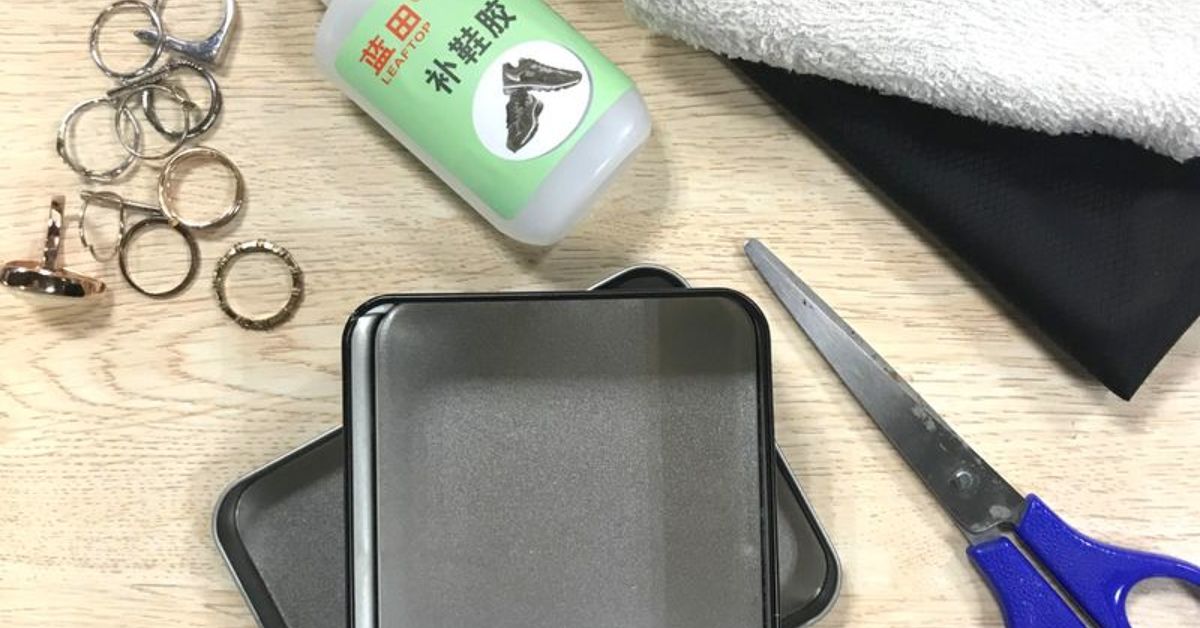
Materials You’ll Need
Pick the options you have. The goal is “secure + neat,” not “own every supply aisle.”
Base Materials
- Small wooden hinged box (roughly 2.5–4 inches wide; craft store unfinished boxes work great)
- Foam sheet (high-density craft foam) or a few clean makeup sponges
- Velvet, felt, or linen fabric (scrap-sized; darker colors hide glue sins beautifully)
- Thin cardboard, chipboard, or thin plywood (optional, to create a firm insert base)
Adhesives and Finishing
- Fabric glue or clear contact adhesive (for fabric-to-foam and fabric-to-base)
- PVA wood glue (optional, if you add trims or reinforce box parts)
- Paint or stain (optional, for the box exterior)
- Clear sealer (optional, protects the finish and helps the box age gracefully)
Tools
- Ruler or measuring tape
- Pencil or fine marker
- Scissors
- Craft knife (optional, for cleaner foam cuts)
- Sandpaper (180–220 grit is the sweet spot for small wood projects)
- Clips or rubber bands (optional, to hold fabric while glue sets)
Safety note: If you use a craft knife or spray adhesive, work slowly and use a well-ventilated area.
Your future self will thank youpreferably while breathing normally.
Step 1: Choose Your Box Style and Measure Like a Pro
Start by deciding the “vibe.” Your box can be rustic, modern, romantic, minimalist, gothic-chic, beachy, or “I found this in my craft bin and it’s destiny.”
The easiest starting point is a small unfinished wooden hinged box.
Measure the Inside
- Inside length (left to right)
- Inside width (front to back)
- Inside depth (bottom to rim)
Write it down. Not in your head. Not on your hand. On paper. Because “I’ll remember” is how craft projects become
mystery puzzles.
Insert Height Rule of Thumb
Your finished insert should sit slightly below the rim so the lid closes without squishing the rings.
Aim for the insert to be about 1/8–1/4 inch shorter than the interior depth.
Step 2: Prep and Finish the Box (The “Make It Look Expensive” Step)
You can keep raw wood (very cottage-core), but a quick finish can make a $3 box look like it came from a boutique.
This step is optional, but highly recommended if the box has rough edges or visible glue seams.
Quick Prep
- Lightly sand the exterior and edges until smooth to the touch.
- Wipe away dust with a dry cloth (or slightly damp cloth, then let dry).
Finish Options (Pick One)
-
Paint: Acrylic craft paint is easy. Two thin coats look better than one gloopy coat (science).
Add a final clear sealer if you want it more scratch-resistant. -
Stain: Gives a classic “heirloom” feel. For small projects, water-based stain dries faster,
but may raise the grainlight sanding between coats fixes that. - Minimalist: Leave it natural and seal with a clear matte finish for a clean, modern look.
Example Looks You Can Copy
- Modern: White box + black velvet insert + tiny gold dot on the lid
- Rustic: Walnut stain + olive-green felt insert + twine wrap
- Soft glam: Blush paint + champagne velvet + pearl bead handle (optional)
Step 3: Build the Insert Base (So It Fits Perfectly)
The insert base is what keeps everything tidy. You want a snug fitsecure enough that it doesn’t slide around,
but not so tight that you have to wrestle it out like a stuck jar lid.
Option A: Foam Block Base (Clean and Structured)
- Trace the inside bottom of the box onto your foam.
- Cut the foam slightly smaller than the traced line (about 1–2 mm smaller on each side).
- Test fit. Trim as needed until it drops in smoothly.
Option B: Layered Sponge Base (Soft and Easy)
If you don’t have dense foam, stack and trim makeup sponges to match the box interior.
This method is great for small round or oval boxes too.
- Cut sponges to roughly fit the interior shape.
- Layer them until you reach your desired insert height.
- Trim the top layer to level everything out.
Optional Upgrade: Add a Firm Platform
If your foam is very soft, glue it onto thin cardboard/chipboard cut to size.
This makes the insert easier to lift in and out and helps it stay flat over time.
Step 4: Create Ring Slots (The “It Actually Holds Rings” Moment)
There are two popular ways to make ring slots. Choose based on your tools and how polished you want the final look.
Method 1: The “Padded Bar” Look (Boutique Style)
This creates a raised ridge that rings slide onto, like many classic ring boxes.
- Cut a strip of foam that’s about 3/4–1 inch wide and the same length as the insert.
- Glue it near the center of the base (or slightly toward the back if you want the rings closer to the lid).
- Plan your ring spacing: for two rings, leave a small gap; for three, space evenly.
Method 2: The “Slice and Tuck” Slots (Fast and Reliable)
- Mark where you want each ring to sit.
- Use scissors or a craft knife to cut a small slit (start smallexpand later).
- Test with a ring (or a paper loop if you’re being cautious and fancy).
Spacing Tip
If you’re holding two rings (engagement ring + band), space the slots so the rings don’t overlap and scratch.
A little breathing room looks better in photos too.
Step 5: Wrap the Insert in Fabric (Where the Magic Happens)
This is the step that turns “craft project” into “wow, you made that?” The fabric smooths the foam, hides cuts,
and adds that luxe jewelry-store feel.
Cut the Fabric
- Lay your insert on the fabric.
- Cut around it, leaving about 1/2–3/4 inch extra on all sides to wrap underneath.
Glue It Neatly (No Panic)
- Apply a thin, even layer of fabric glue on the top surface of the foam/base.
- Press fabric onto the top, smoothing from center outward to avoid wrinkles.
- Flip the insert and glue the edges underneath like you’re wrapping a present for someone you want to impress.
- At corners, fold fabric like hospital corners on a bedsmall, crisp folds look clean.
Re-open the Ring Slots
Fabric will cover your slits. Use the tip of scissors (carefully) to find the slot and re-cut it.
Keep cuts shortyour goal is a clean opening, not a dramatic fabric tragedy.
Optional Detail: Add a Second Layer
For a super smooth finish, add a thin layer of felt beneath velvet.
Felt hides foam texture and helps velvet lay flatter.
Step 6: Assemble, Style, and “Proof-Test” Your Holder
Drop the insert into the box. Add the rings. Close the lid gently. If the lid doesn’t close,
your insert is too talltrim a bit from the bottom foam or reduce layers.
Quick Proof-Test Checklist
- Security: Turn the closed box upside down for a second (over a soft surface). Nothing should rattle wildly.
- Fit: Insert shouldn’t slide when you nudge the box.
- Finish: No loose fabric edges where rings can snag.
- Photo-readiness: Open lid at a slight anglerings should be visible and upright.
Styling Ideas That Look Great in Photos
- Monogram or initials on the lid (paint pen works well)
- A tiny dried flower cluster in one corner (keep it low so rings still sit flat)
- A thin ribbon pull-tab under the insert for easy removal
- Contrast insert color (black velvet + light wood is a classic)
Troubleshooting: Fix the Most Common “Oops” Moments
My fabric looks wrinkly
- Use less glue next timetoo much creates wet spots that shift fabric.
- Smooth from center outward and press for 20–30 seconds per section.
- Choose felt if velvet is fighting you; felt is forgiving and still looks polished.
The rings flop sideways
- Make the slot tighter: add a thin felt strip inside the slit.
- Use the padded bar method so rings slide onto a ridge.
- Check insert heighttoo short can make rings tip.
The lid won’t close
- Trim the underside foam by a little at a time.
- Use thinner fabric (some velvets are thick).
- Move the padded bar slightly lower if rings are hitting the lid.
Glue is showing through the fabric
- Use a clear-drying fabric glue and apply thinly.
- For velvet, consider a light adhesive layer on the foam first, then a second light pass underneath edges only.
- Darker fabrics hide adhesive marks better.
When to Use This Ring Box Holder
- Engagements and proposals: A handmade box adds personal meaningand looks great in photos.
- Wedding ceremony: A secure holder can replace a traditional ring pillow if you want something modern.
- Travel: Use a snug insert so rings don’t slide around.
- Daily storage: Give your rings a consistent “home base” so they’re not wandering your countertops.
Real Experiences: What You Learn After Making a Few Ring Box Holders (About )
The funny thing about making a ring box holder is that the first one teaches you more than any tutorial ever could.
The second one is where you feel confident. The third one is where you start getting opinionslike,
“Do we want the velvet to feel more ‘luxury boutique’ or more ‘cozy vintage’?” (Both are valid, by the way.)
One of the biggest “aha” moments is realizing the insert matters more than the box. You can paint a box beautifully,
but if the rings wobble or slide, it won’t feel finished. The insert is where the project becomes functional.
The first time you cut a slot that’s too wide and the ring leans like it’s taking a nap, you learn a valuable lesson:
start smaller than you think. It’s easy to widen a slit. It’s harder to un-cut foam without creating a patchwork situation.
Another real-life lesson: fabric has moods. Felt is the friendly golden retriever of the craft worldpredictable,
cooperative, and happy to be here. Velvet is the glamorous cat: stunning, but only if you respect its boundaries.
The first time velvet shows every tiny bump underneath, you learn to add a thin felt layer below it, or to smooth the foam more carefully.
After that, your inserts suddenly look “store-bought,” which is the highest compliment a DIY project can receive.
If you’ve ever tried to make something look neat under time pressure, you know the danger zone is glue.
Too much glue makes fabric shift and wrinkle, and then you’re chasing wrinkles around like they owe you money.
Too little glue and the corners lift later, right when you’re proud enough to show someone.
The sweet spot is thin layers applied in sections, with a little pressing time. The best part? Once you get that rhythm,
the project becomes strangely calmingmeasure, cut, press, smooth, repeat.
People also underestimate how much a ring box holder becomes part of the moment. Whether it’s for a proposal photo,
a wedding flat-lay, or simply a safe place to put rings at night, the box ends up in pictures and memories.
I’ve seen simple details make a huge difference: a tiny ribbon pull-tab under the insert (so you’re not prying it out),
a monogram on the lid, or choosing a fabric color that matches a bouquet or tie. Those choices don’t take much extra time,
but they make the holder feel intentionallike it belongs to the story of the ring, not just the storage.
My favorite part is how customizable the project becomes once you’ve made one. You start thinking in themes:
beachy linen for a coastal wedding vibe, deep green felt for a forest/outdoor feel, black velvet for dramatic modern photos,
cream fabric for a soft classic look. And because the materials are simple, you can do mini “test inserts” in leftover foam
before committing. That kind of low-stakes experimenting is the secret sauce of DIYsmall trials, fewer regrets, better results.
In the end, the best ring box holder is the one that feels sturdy, looks clean, and makes you smile when you open it.
If you can open the lid and think, “Yep. That’s the good stuff,” you nailed it.
Conclusion
A beautiful DIY ring box holder doesn’t require fancy tools or expensive materialsjust a solid little box,
a well-fitted insert, and a fabric finish that makes everything look intentional. Follow the six steps,
keep your cuts small and your glue layers thin, and you’ll end up with a holder that’s practical, photo-ready,
and genuinely gift-worthy. Tiny rings, meet your tiny throne.