If your walls could talk, they’d probably say, “Please stop hanging things with brute force.” From rogue doorknobs to “I’ll just move this couch myself,” life has a way of punching holes in drywall. The good news? Patching those holestiny nail pops or big, gaping cratersis absolutely a DIY job once you know a few basic techniques.
This guide walks you through how to patch drywall holes of every size, what products to use (spackle vs. joint compound, mesh vs. paper tape), and how to sand and paint so the repair virtually vanishes. We’ll cover everything from pin-size nail holes to “someone fell into the wall” disasters, plus real-life lessons from DIYers at the end.
Grab your putty knifewe’re about to make those walls look brand new.
Before You Start: Tools, Materials, and Safety
Successful drywall repair is 50% technique and 50% using the right stuff. Here’s what you’ll reach for most often.
Basic tools for drywall repair
- Putty knives (2–3 inches for small holes, 6–10 inches for larger patches)
- Utility knife with sharp blades
- Drywall saw or jab saw (for cutting out damaged sections)
- Sandpaper or sanding sponge (120–220 grit)
- Drill or screwdriver and drywall screws
- Taping knife (for larger joints)
- Dust brush or vacuum with a brush attachment
Common materials you’ll use
- Lightweight spackle for small nail holes and tiny dings
- Joint compound (drywall mud) for larger patches and seams
- Adhesive mesh or metal patch kits for small-to-medium holes
- Paper or fiberglass drywall tape for seams
- Scrap drywall for larger holes
- 1×3 or 1×4 lumber for backing (also called “cleats” or “backer boards”)
- Primer and matching wall paint
Safety first (yes, even for “just a little patch”)
Drywall dust is no joke. When you sand joint compound, you’re kicking fine dust into the air that can irritate your lungs and eyes. Always:
- Wear a dust mask or, better yet, an N95 respirator when sanding.
- Use safety glasses or goggles.
- Cover nearby furniture or move it out of the way.
- Open a window or use a fan for ventilation if possible.
For older homes, if you suspect previous repairs might contain asbestos (very old joint compounds sometimes did), skip the DIY sanding and talk to a pro.
How to Fix Tiny Holes and Dings (Nail Holes, Screw Pops, Small Cracks)
These are the “no big deal” repairsthink picture-hanger holes, small nail pops, and light dings from chairs or vacuum cleaners. Spackle is your best friend here.
Step-by-step: Patching nail holes and pin-size damage
- Prep the surface. Lightly scrape around the hole with a putty knife to remove loose paint or raised edges. Wipe away dust.
- Apply spackle. Scoop a small amount of lightweight spackle onto a 2–3 inch putty knife. Press it into the hole and scrape across the surface, holding the knife at a slight angle. The goal is to fill the hole and leave a very thin layer on the surface.
- Feather the edges. Smooth the spackle so it’s flush and feathered a couple of inches around the repair. Less is moreyou don’t want a big hump of material to sand later.
- Let it dry completely. Follow the product labelsome fast-drying spackles are ready in 20–30 minutes, others take longer.
- Lightly sand. Use 180–220 grit sandpaper or a sanding sponge to smooth the patch until it’s level with the wall.
- Prime and paint. Spackle and joint compound are more porous than paint, so priming helps prevent a dull “flashing” spot under your topcoat.
Fixing popped screws or nails
If you see a little bump or circle in the drywall where a fastener is pushing out, that’s a screw or nail pop. Don’t just cover itfix what’s happening underneath.
- Secure the drywall. Drive a drywall screw into the stud about 1 inch above or below the popped fastener until it’s just below the surface of the drywall (don’t break the paper).
- Set the old fastener. For a nail, tap it back just below the surface with a hammer and nail set. For a screw, you can remove it or drive it slightly deeper.
- Cover with joint compound. Apply a thin coat over the area with a 4–6 inch knife. Let it dry, sand lightly, and add a second thin coat if needed.
- Sand, prime, and paint. Blend into the wall like any other patch.
How to Repair Small Holes (About 1/2 to 2 Inches)
These are the “oops, the doorknob hit the wall” holes. They’re too big for spackle alone, but not big enough to justify replacing a whole section of drywall. An adhesive mesh or metal patch kit makes this straightforward.
What you’ll need
- Self-adhesive mesh or metal patch (sized bigger than the hole)
- All-purpose joint compound or a heavier spackling compound
- 4–6 inch putty or taping knife
- Sandpaper or sanding sponge
- Primer and paint
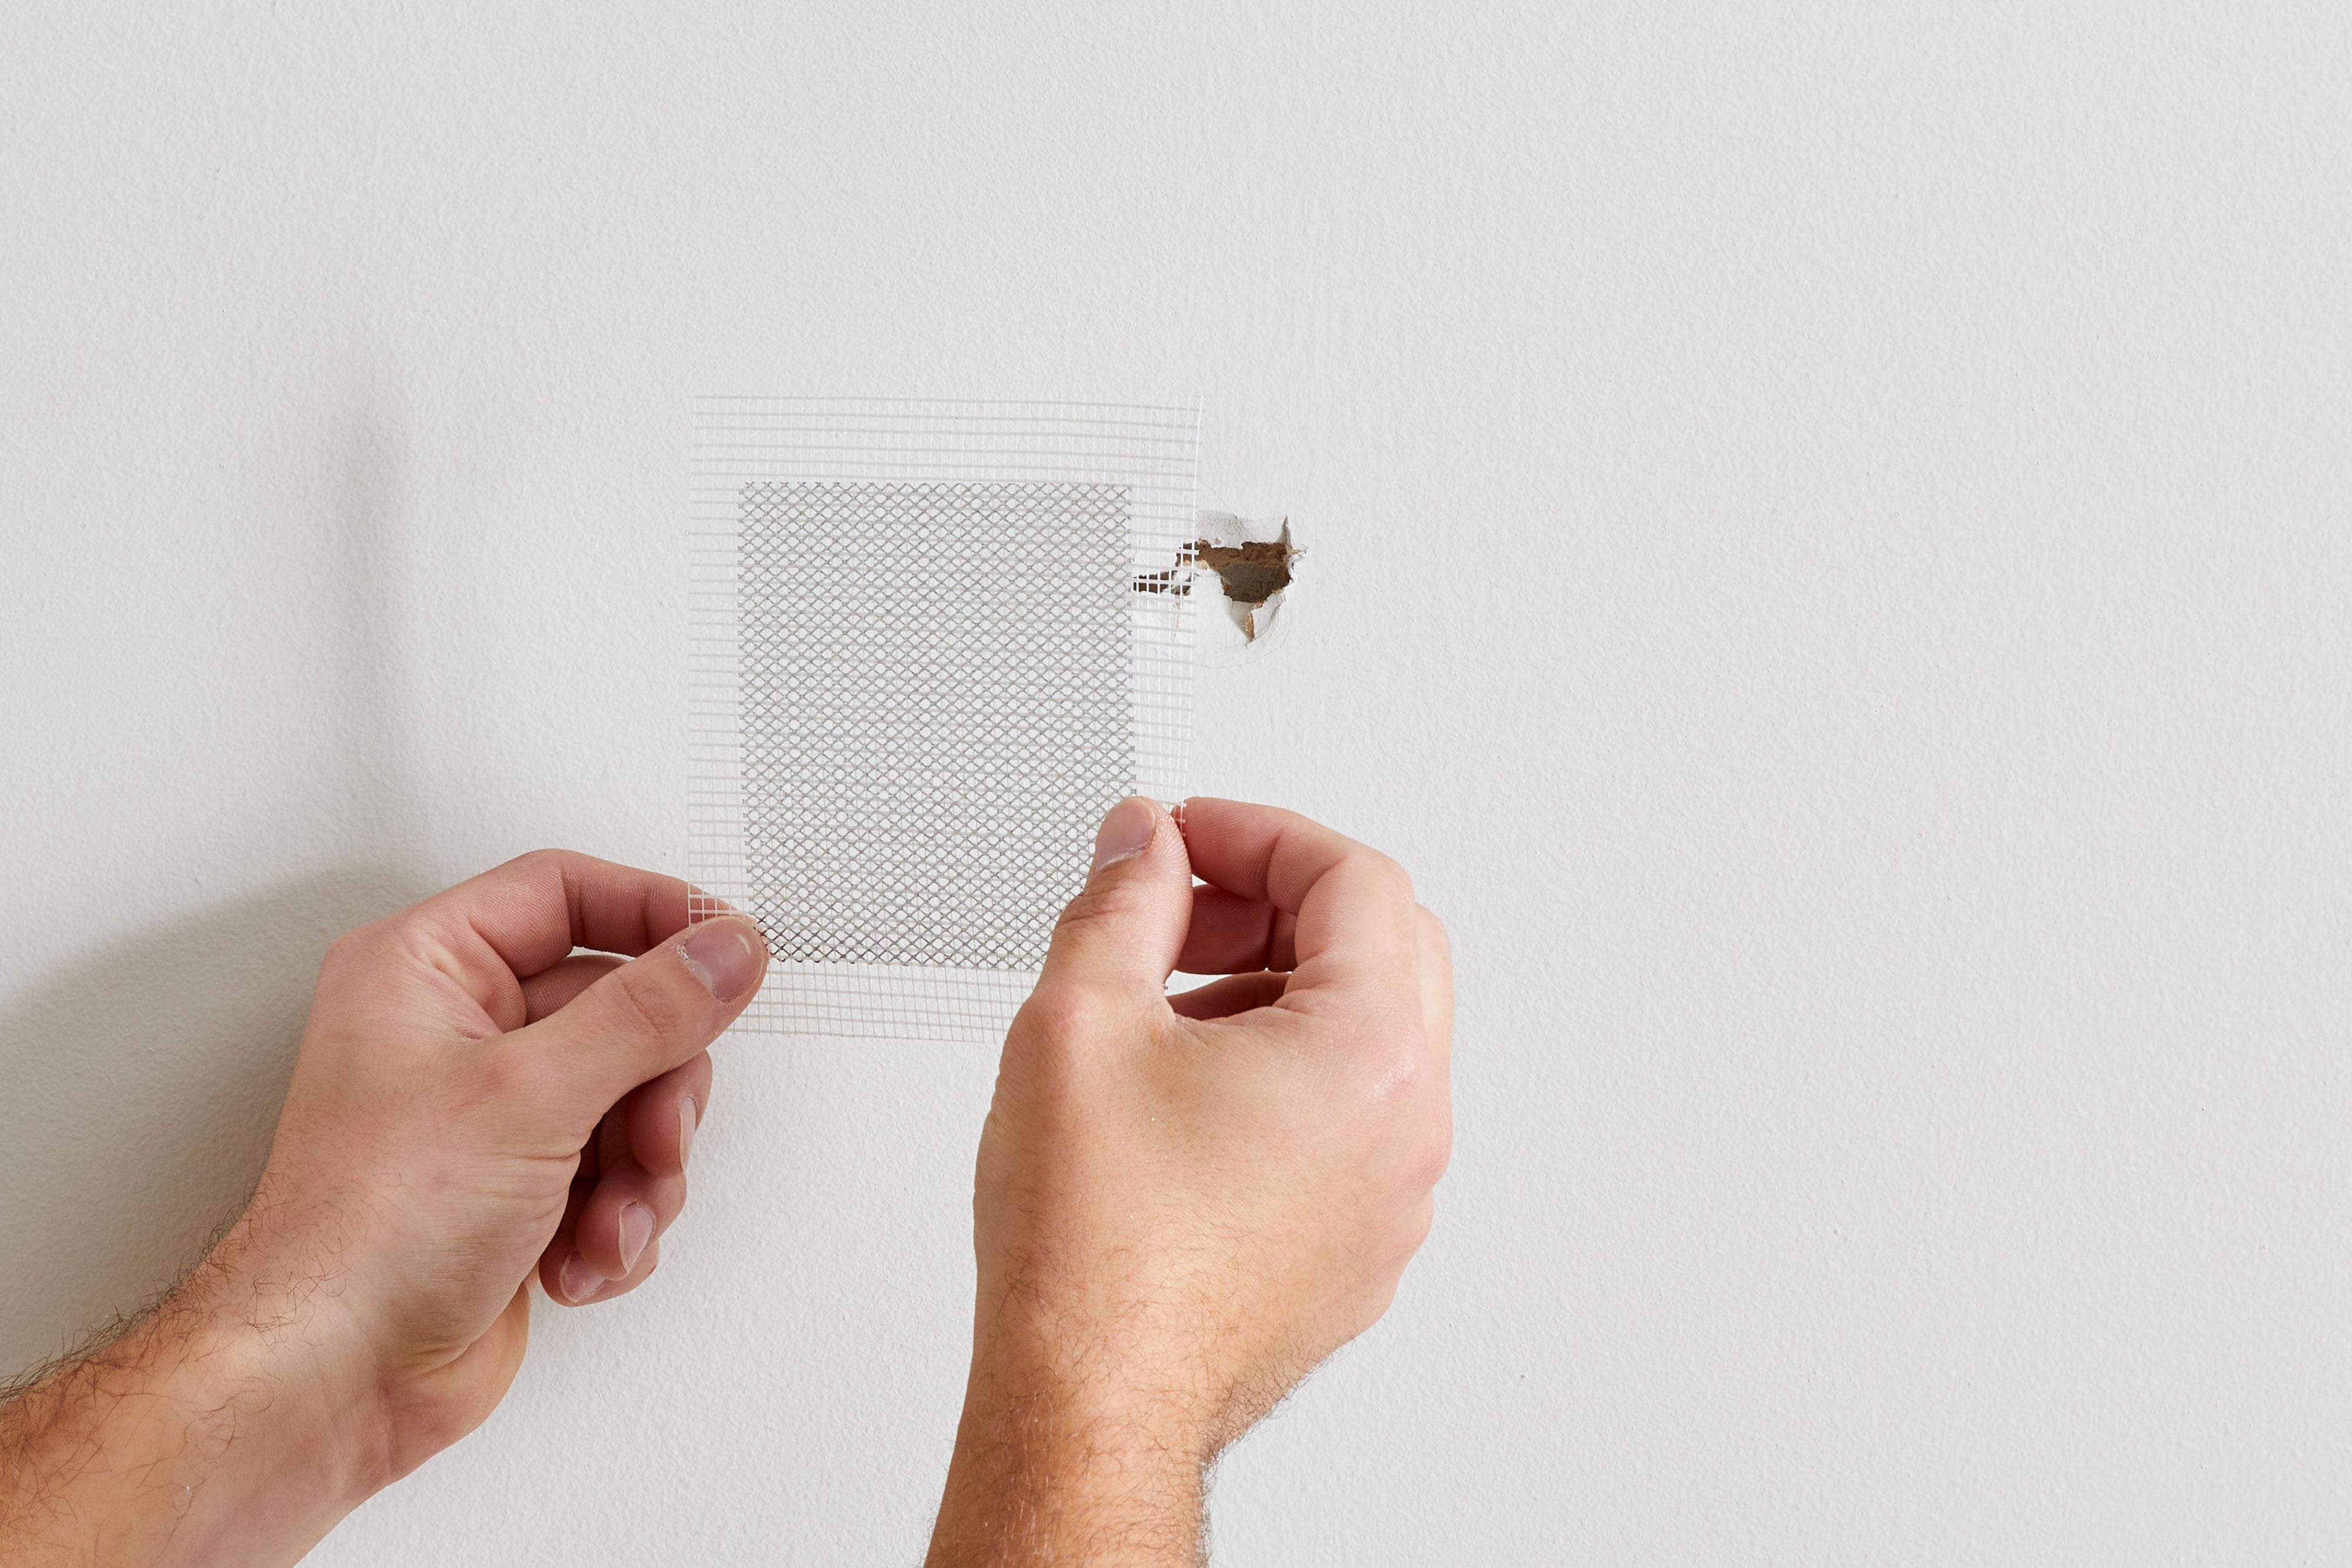
Step-by-step: Using a mesh or metal patch
- Clean the area. Remove any loose drywall chunks or crumbling edges. Lightly sand around the hole and wipe away dust.
- Apply the patch. Center the adhesive patch over the hole and press it firmly so it sticks flat to the wall.
- First coat of compound. Using a 4–6 inch knife, spread joint compound over the patch, pressing it through the mesh and covering the entire patch plus a couple of inches beyond. Feather the edges so they taper into the wall.
- Let it dry fully. Thicker coats and humid rooms take longer. Be patientrushing this is how you end up with cracks.
- Second coat. Apply a slightly wider, thinner coat to blend the repair further into the wall. Feather out 6–8 inches around the patch.
- Sand smooth. Sand with light pressure until the surface is flat and the edges disappear under your hand.
- Prime and paint. Prime the area, then repaint the whole section or wall for the best color match.
Patching Medium Holes (2 to 6 Inches)
Once the hole gets largersay, a doorknob went through the wall or a small section crumbledyou need more support behind the patch. You can still use heavy-duty metal patches, but many DIYers like a method called the “California patch” (also known as a butterfly patch) using a piece of drywall.
Option 1: Heavy-duty metal or mesh patch
For holes on the smaller end of this range, a thicker metal-backed patch may be sufficient.
- Follow the same steps as with smaller mesh patches, but expect to feather your joint compound farther out8 to 12 inches around the patchto hide the edges.
- Use multiple thin coats instead of one thick one to avoid ridges and cracking.
Option 2: California (butterfly) patch with scrap drywall
- Cut your patch. Cut a piece of drywall slightly larger than the hole. Score the back paper and snap off the gypsum around the edges so you leave a “border” of front paper about 1 inch wide on all sides. This paper will act like built-in tape.
- Trace the opening. Hold the patch over the hole and trace around the inside of the gypsum (not the paper border). This marks the exact size of the opening.
- Cut out the damaged area. Use a utility knife and drywall saw to cut along your outline. Remove the damaged section.
- Dry fit the patch. The gypsum core should fit snugly in the hole, with the paper border overlapping on the surrounding wall.
- Apply compound. Spread joint compound around the edges of the opening and on the surrounding wall where the paper border will sit.
- Install the patch. Press the patch into the hole. Smooth the paper border into the wet compound with your knife, working out bubbles.
- Build up coats. Once dry, apply 1–2 more thin coats of compound over the entire patch area, each one a bit wider than the last. Feather the edges well.
- Sand, prime, and paint. Sand lightly, prime, and paint as usual.
Repairing Large Drywall Holes
For truly large holesanything bigger than about 6 inches, or long irregular damageyou’ll treat the repair more like a small piece of new drywall installation. The steps are simple, just a bit more involved.
Step 1: Mark and cut out the damaged section
- Square up the hole. Use a straightedge and pencil to draw a square or rectangle around the damaged area. This makes it easier to fit a new piece of drywall.
- Check for wires and pipes. Before cutting, carefully look inside any existing opening. Avoid cutting into electrical or plumbing.
- Cut along the lines. Use a drywall saw to cut on your marks and remove the damaged piece.
Step 2: Install backing boards
If there isn’t a stud behind each side of the opening, you’ll add wooden backing so the new drywall has something to screw into.
- Cut pieces of 1×3 or 1×4 lumber 4–6 inches longer than the hole’s height.
- Slip a board inside the hole so it spans across the opening vertically or horizontally.
- Hold it tight to the back of the existing drywall and drive drywall screws through the wall into the board near each end.
- Repeat for any other side that needs backing.
Step 3: Attach the new drywall piece
- Cut a new piece of drywall to match the opening exactly.
- Place it into the opening so it sits flush with the wall surface.
- Drive drywall screws through the patch into the backing boards or studs. The screw heads should be slightly dimpled below the paper, not torn through.
Step 4: Tape and mud the seams
- Apply tape. Cover the seams with paper tape or self-adhesive mesh tape. Paper tape is less prone to cracking if embedded properly; mesh is easier for beginners.
- First coat of joint compound. With a 6-inch or wider knife, spread joint compound over the seams and screw heads, fully covering the tape.
- Let it dry and scrape ridges. Once dry, lightly scrape any high spots or ridges with your knife.
- Second and third coats. Apply 1–2 more thin coats, each wider than the last, feathering out 12–18 inches across the wall for large patches. The goal is a gentle, barely noticeable hump that the eye can’t detect.
Sanding, Priming, and Painting for a Seamless Finish
Great drywall repair isn’t just about filling the holeit’s about making the patch disappear after paint.
Sanding without destroying your lungs (or the repair)
- Use a sanding sponge or sanding block instead of loose paper; it’s easier to control.
- Start with 120–150 grit and finish with 180–220 grit for a smooth surface.
- Sand in gentle, circular motions, focusing on edges where the patch meets the existing wall.
- Shine a light across the wall at an angle to reveal ridges or low spots; touch up with compound if needed.
- Consider wet sanding (damp sponge) for small patches to minimize airborne dust.
Why priming matters
Primer evens out the porosity between the patched area and existing paint. Without it, your patch can look dull, shiny, or slightly off in coloreven if you used the exact same paint.
- Use a stain-blocking or drywall primer over larger patches.
- For small nail holes, a quick-dry primer or even a primer touch-up pen can do the trick.
- After priming, paint the whole section of wall (corner to corner) for the most seamless finish.
Common Drywall Patching Mistakes to Avoid
- Using spackle on big holes. If the hole is larger than about a nickel, you usually need reinforcement (patch, tape, or new drywall), not just filler.
- Applying compound too thick. Thick layers crack and are harder to sand. Use multiple thin coats instead.
- Skipping drying time. If you sand or recoat before the mud is dry, you’ll gouge the surface and create more work.
- Not checking for wires. Never blindly jab a saw into a wall without looking. Use existing openings and common sense to avoid cutting into electrical or plumbing.
- Skipping primer. This is the #1 reason patches “telegraph” through paint.
- Over-sanding. If you sand through the paper surface of the drywall, you’ll have to skim coat again to fix the fuzzed area.
Real-Life Lessons: Experiences with Patching Large and Small Drywall Holes
On paper, drywall repair is simple: cut, patch, mud, sand, paint. In real life, it usually involves a bit of improvisation, a small mess, and at least one “why did I wait so long to fix this?” moment. Here are some experience-based tips that don’t always make it into the instruction manuals.
Start small to build confidence
If you’ve never patched drywall before, don’t start with the giant crater behind the door. Begin with a few nail holes or a minor ding in a closet. You’ll get a feel for how spackle spreads, how long it takes to dry in your climate, and how much you actually need (spoiler: less than you think). Once you see how easily a tiny hole disappears, tackling a bigger patch feels much less intimidating.
Lighting is your secret weapon
One of the biggest “aha” moments for many DIYers is discovering side lighting. After your joint compound dries, turn off the overhead light and use a flashlight or work light held at a shallow angle across the wall. Every ridge, groove, or bump will suddenly appear like a miniature mountain range. It’s much easier to fix imperfections at this stage than after you’ve painted.
Feather farther than feels necessary
When you’re spreading joint compound over a patch, it’s tempting to keep everything tight and close to the hole. In reality, the larger the patch, the farther you want to feather. For medium and large repairs, extending your final coat 12–18 inches out from the hole makes the transition between old and new drywall almost invisible. It feels like extra work, but it saves you from seeing a weird hump in certain lighting later.
Don’t chase perfection on the first coat
A common beginner mistake is overworking the first coat of mud, scraping and resmoothing it until the surface looks “perfect.” The first coat’s real job is to fill gaps and embed tape. It’s okay if it looks a bit rough. Think of coat one as rough framing, coat two as shaping, and coat three as finishing. Spreading the work across several thin coats almost always leads to a more professional-looking result with less sanding.
Match textures as well as color
If your walls are textured (orange peel, knockdown, or something more custom), simply patching, sanding, and painting may still leave a visible spot. Real-world experience says it’s better to test texture in a hidden area first. Spray texture cans and small texture rollers can get you close, but you might need to adjust how heavy your application is or how long you wait before knocking it down with a knife. When in doubt, practice on scrap drywall or cardboard.
Plan your paint blending
Even if you have the original paint, it may have aged on the wall. Sun exposure, time, and previous touch-ups can all subtly change how it looks. Rather than just brushing paint over the patch, many homeowners get better results by feathering paint out with a roller beyond the repair and sometimes painting the entire wall from corner to corner. It sounds like more work than a simple touch-up, but visually, it gives you a truly seamless finish.
Take your time with sanding and cleanup
Drywall work generates dustthat’s just part of the deal. Experienced DIYers learn two main tricks: sand gently and clean as you go. Using a sanding sponge instead of aggressive power sanding helps you avoid gouging the patch. Keeping a vacuum or damp rag handy to collect dust between passes makes the final cleanup far easier. If you’re working in a lived-in room, it’s worth hanging a temporary plastic barrier or at least covering furniture; you’ll thank yourself later.
Know when to call in a pro
Most holes in drywall are absolutely DIY-friendly, but there are times when professional help is worth the cost. If the damage involves moisture, mold, or potential structural issues, or if you discover electrical or plumbing problems while opening the wall, calling a contractor or tradesperson can prevent bigger headaches. Think of your DIY skills as one tool in your toolkitsometimes the smartest move is knowing when not to use it.
The more you patch drywall, the more intuitive it becomes. You’ll get a feel for how thick to spread compound, how long to wait between coats, and how much sanding is “just enough.” Before long, you’ll look at a newly repaired wall and think, “You’d never know there was a giant hole right there yesterday.” And that’s a very satisfying feeling.