Tired of boring white curtains staring back at you every morning? Good news:
you can literally paint yourself a better view. Inspired by the Hometalk
cactus watercolor curtain trend, this DIY project turns plain panels into
soft, desert-chic art using simple paint, fabric medium, and a bit of
creativity. No fine art degree requiredif you can doodle a cactus, you can
do this.
In this guide, you’ll learn exactly how to create cactus watercolor curtains
that look like custom designer pieces. We’ll walk through the right
materials, step-by-step painting instructions, design ideas, and real-life
care tips so your hand-painted window treatments stay beautiful, not
crunchy, faded, or streaky. Grab your brushes, put on something you don’t
mind splattering, and let’s turn your windows into a mini desert gallery.
Why Cactus Watercolor Curtains Are Having a Moment
Cactus décor has quietly taken over the modern home. It hits a sweet spot:
it feels playful and trendy, but still relaxed and grown-up. Pair that with
watercolor’s dreamy, washed-out edges, and you get curtains that feel
artistic without trying too hard. Cactus watercolor curtains bring:
-
Color without chaos: Soft greens, dusty pinks, and sandy
neutrals add interest without overwhelming your space. -
Personality: Unlike mass-produced prints, each cactus
you paint has its own quirky shape and character. -
Versatility: They work with boho, Southwestern, modern,
Scandinavian, and eclectic styles. -
Budget-friendliness: Plain white curtains + a few paint
bottles = designer-level look for a fraction of the price.
And because you’re painting the design yourself, you can match your existing
rug, art, bedding, or throw pillows. Think of your curtains as a giant,
vertical canvas that just happens to block the sun.
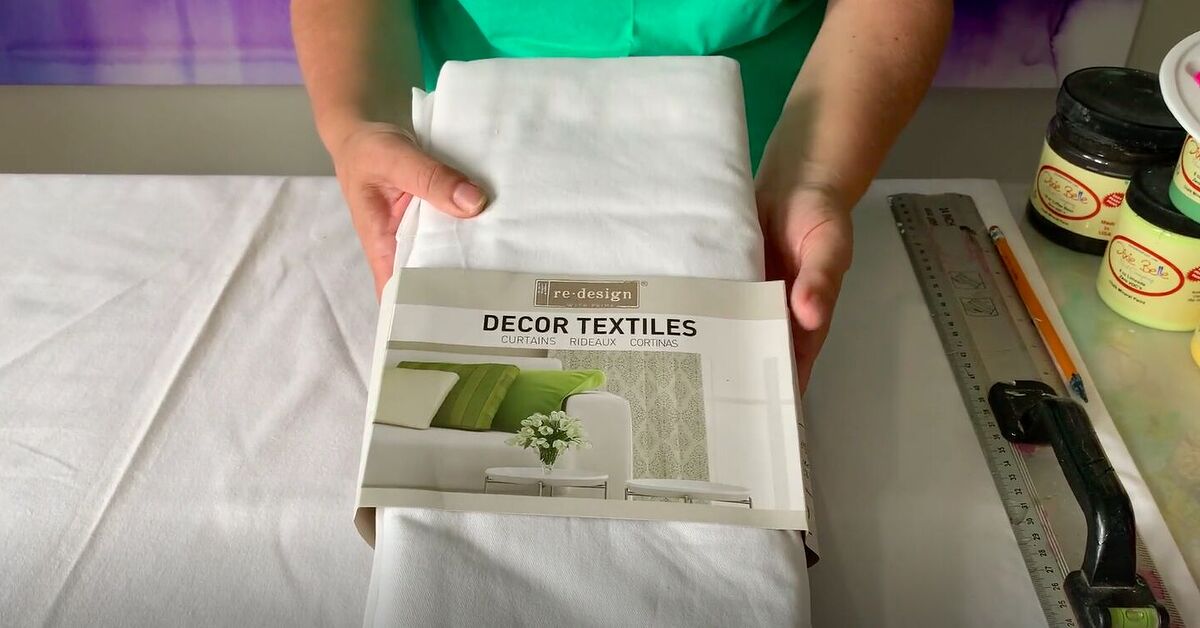
What You Need to Make Cactus Watercolor Curtains
Before you start painting, gather your supplies. Having everything laid out
will help you work quickly while the fabric is damp and blendable.
Essential Materials
-
Plain white or off-white curtains (cotton or cotton-blend
panels work best) -
Acrylic craft paint or fabric paint in cactus-friendly
colors (various greens, teal, sage, a few pinks or corals for flowers,
plus optional neutrals) -
Fabric medium (helps the paint bond to fabric and stay
flexible) - Water (for thinning paint to a watercolor consistency)
-
Paintbrushes (one medium flat brush for washes and a
couple of small round brushes for cactus details) -
Mixing cups or bowls for your paint + water + fabric
medium mixtures -
Painter’s tape (optional, to define a clean top edge for
the painted area) -
Drop cloth, old sheet, or plastic to protect your floors
or table -
An iron and ironing board or heat-safe surface for
setting the paint -
Pencil or disappearing fabric marker (optional for
lightly sketching cactus shapes)
Choosing the Right Curtains and Paint
Natural-fiber fabrics like cotton, cotton-linen blends, or canvas-style
curtain panels absorb thinned paint beautifully and give you those soft,
feathery watercolor edges you’re after. Avoid very shiny synthetics: the
paint may sit on top, streak, or peel over time.
For longevity, acrylic or fabric paint mixed with fabric medium is your
best bet. Regular watercolor paint straight from the paper palette usually
won’t hold up to washing. The fabric medium helps your design stay flexible
instead of stiff and crackly, and it improves washability while still
allowing that translucent watercolor look.
Prep Work: Set Yourself Up for Success
1. Wash and Iron Your Curtains
Wash the curtains according to the care label before you paint. This removes
any sizing or factory finishes that might prevent the paint from soaking in
evenly. Dry them completely, then iron them flat. Wrinkles may look cute in
real life, but they’re a nightmare when you’re trying to paint clean cactus
shapes.
2. Protect Your Surface and Position the Panels
Lay a drop cloth, old sheet, or plastic on your floor or table, then spread
the curtain panel out flat. If your fabric is thin, put an extra layer
underneath so the paint doesn’t bleed onto your work surface. Smooth out
wrinkles with your hands.
3. Decide Where the Design Will Go
The Hometalk-inspired look typically features watercolor cacti concentrated
along the bottom portion of the panellike a desert garden growing up from
the floor. You can:
- Paint the bottom third of the curtain with cacti and a soft color wash.
- Cluster cacti in one corner for an asymmetrical, artsy vibe.
-
Create a repeating pattern of scattered small cacti for a playful,
wallpaper-style look.
If you want a crisp separation line between the painted section and the
plain fabric, run a strip of painter’s tape horizontally across the panel
where you want the design to stop.
Mixing Paint for a Watercolor Effect
The magic of this project is in the paint consistency. You’re aiming for a
fluid, transparent washnot thick, opaque stripes.
- Add a small squeeze of acrylic or fabric paint into a cup or bowl.
-
Add a roughly equal amount of fabric medium (check your bottle for
specific ratios; many recommend around 1 part medium to 1–2 parts paint). -
Slowly thin the mixture with water while stirring until it’s the
consistency of milk. You should be able to see the brush strokes fade
softly on scrap fabric.
Test your mix on a scrap of similar fabric or on the curtain hem. If the
color is too strong and streaky, add more water. If it looks too pale or
disappears when dry, add a bit more paint.
Step-by-Step: Painting Your Cactus Watercolor Curtains
Step 1: Add a Soft Background Wash
To help your cacti feel grounded (literally), start with a light background
wash:
-
Use a large flat brush to apply a very diluted wash of sandy beige,
pale blush, or muted turquoise along the bottom of the curtain. -
Work in horizontal strokes, keeping the color darker near the bottom edge
and fading as you move upward. -
Don’t stress about perfection; soft variations and watermarks are what
make it look like a true watercolor.
Let this layer sit for a few minutes until it’s damp but not puddling
before you start adding cacti.
Step 2: Sketch or Map Out Your Cacti
If freehand drawing makes your palms sweaty, lightly sketch a few cactus
shapes with pencil or a disappearing fabric marker. Try:
- Saguaro cacti: Tall columns with a few arms.
- Prickly pear: Stacked oval pads like a cactus snowman.
-
Barrel cacti: Short, round shapes with subtle vertical
ridges.
Vary the height and width so it looks like a natural cluster, not a row of
identical green exclamation points.
Step 3: Paint the Base Shapes
Dip a small to medium round brush into your diluted green mix and begin
filling in each cactus:
-
Use light pressure and let the paint bloom outward a bitit’s okay if the
edges are slightly fuzzy. -
Drop in a slightly darker green along one side of each cactus to hint at
shadow and dimension. -
Leave a few small gaps or lighter areas to mimic highlights where the
“sun” would hit.
At this stage, think in terms of simple silhouettes instead of details.
You’re building the structure first; the personality comes next.
Step 4: Add Details and Spines
Once the base shapes are damp (not soaking wet), switch to a smaller round
brush with a slightly stronger paint mix:
-
Add vertical lines or subtle stripes down the length of each cactus to
suggest ridges. -
Use tiny flicks for spinesshort, quick strokes in clusters along the
edges or ridges. -
Mix in touches of blue-green or yellow-green to keep the greens from
looking flat.
If you like a more illustrated look, you can outline some sections with a
slightly darker, inky green once everything is dry, keeping the line light
and sketchy instead of harsh.
Step 5: Paint Flowers and Pops of Color
No cactus garden is complete without a few blooms. Mix a watered-down coral,
pink, or warm red:
-
Add small rounded shapes at the tips of certain cactus arms or pads to
mimic blossoms. -
Drop a tiny dab of deeper color in the center of each flower while it’s
still damp so it softly blends. -
Sprinkle in a few abstract dots and specks for petals that look like
they’re catching the light.
This is where your curtains start to feel less “craft project” and more
“art print.” Don’t be afraid to keep some cacti bare and some flowerythe
contrast makes the design more interesting.
Step 6: Let Everything Dry Completely
When you’re happy with your cactus watercolor scene, walk away and let the
panels dry completely. Depending on your fabric, paint thickness, and room
temperature, this can take several hours. If you move on too soon, you risk
smearing your masterpiece while heat-setting.
Step 7: Heat-Set the Paint
To help your cactus watercolor curtains survive real life (a.k.a. dust,
hands, pets, and the occasional wash), you’ll need to heat-set the paint:
-
Place a thin pressing cloth or piece of cotton fabric over the painted
area. -
With your iron on the setting recommended by your paint or fabric medium
(often medium heat, no steam), slowly press and move over each section
for several seconds. - Work in small sections until you’ve covered the entire painted area.
This step helps lock the pigment into the fibers, so your design is more
resistant to fading and washing.
Design Ideas and Styling Tips
Go Minimal or Go Maximalist
Love a calm, airy look? Stick with a few tall, simple cacti in varied
greens, leaving plenty of white space. If “more is more” is your decorating
motto, fill the entire bottom half of your curtain panel with overlapping
cacti, flowers, and splashes of color for a lush, desert-jungle feel.
Coordinate with Your Room
-
Boho living room: Pair your cactus watercolor curtains
with woven baskets, jute rugs, and terracotta pots. -
Modern bedroom: Use limited colors (e.g., greens + black
accents) and cleaner lines. -
Kids’ room: Add cute faces to a few cacti or play with
pastel colors for a whimsical feel.
Match the Height of Your Cactus Garden
If your furniture sits under the window (sofa, bench, bed), consider how
much of the design will actually show. You may want the cactus cluster
slightly higher so it isn’t hidden behind a headboard or cushion.
How to Care for Your Cactus Watercolor Curtains
You’ve spent time creating these, so treat them kindly:
- Wait at least 24–72 hours after painting and heat-setting before washing.
-
When cleaning is needed, opt for a gentle, cold wash and mild detergent,
or hand wash the lower portion only. - Avoid bleach and harsh stain removers on the painted areas.
-
Line dry or tumble dry on low, then touch up with an iron on the reverse
side if needed. -
To reduce fading, consider lining your curtains or using them in windows
that don’t get intense, direct sun all day long.
Common Mistakes to Avoid
-
Too much water, not enough paint: Your design may look
great wet but vanish when dry. Always test first. -
Skipping fabric medium: This can lead to stiff, cracked
paint or designs that wash out more easily. -
Overworking the fabric: Going over the same spot again
and again can cause muddy colors and fuzzy shapes. Let the watercolor
effect work for you. -
Rushing heat-setting: If you don’t fully heat-set, the
paint may fade quickly in the wash.
The good news? Cactus shapes are forgiving. If one looks odd, call it a
“rare variety” and keep going.
Real-Life Experiences with Cactus Watercolor Curtains
One of the best parts of a project like this is how different it looks in
every home. People who have tried cactus watercolor curtains often describe
the same thing: a moment of panic at the first brushstroke, followed by
surprise at how easy it actually is once they relax and let the paint flow.
Imagine a small apartment living room with white walls, a neutral sofa, and
no clear focal point. After painting cactus watercolor curtains for that
space, many DIYers report that the room suddenly feels “finished.” The
green cacti echo real plants in the room, and the soft fades of color tie
together throws, pillows, and art that previously felt random. The curtains
become a giant piece of original art that happens to move slightly when the
breeze comes throughinstant atmosphere.
Another common experience: this project turns into a surprisingly fun
group activity. Because cactus shapes are simple, families or roommates can
divide the curtain into sections and each paint their own “cactus patch.”
One person might favor tall saguaros, another playful prickly pears with
pink flowers, and someone else might sneak in a quirky blue cactus “just
because.” The final panel often looks like a shared sketchbook page,
capturing everyone’s personality.
Many people also realize halfway through that they’re not limited to
windows. Once you’ve tried cactus watercolor curtains, it’s easy to apply
the same technique to table runners, pillow covers, fabric wall hangings,
or even shower curtains (using the right fabric and following the same
heat-setting steps). The curtains become a gateway projectyou learn how
fabric absorbs thinned paint, how colors bloom and blend, and your
confidence with hand-painted décor jumps.
If you’re nervous about “ruining” a perfectly good set of curtains, a smart
strategy is to start with a single inexpensive panel or a thrifted sheet.
Treat it like your practice mural. Play with different cactus sizes, test
how much water you can use before things get out of control, and experiment
with flower colors or subtle backgrounds. Many DIYers discover that their
“practice” piece turns out charming enough to hang somewherelike a doorway,
laundry area, or as a fabric backdrop behind open shelving.
Over time, you’ll notice how light changes your work. Morning sun might
highlight the translucent washes; evening light might make the darker
greens and warm flowers glow. Some people even plan their color palette
around this, choosing cooler greens and blues for bright, south-facing
windows and warmer tonessage, olive, coral bloomsfor dimmer rooms that
need a cozy boost.
The biggest takeaway from real-life experience? Don’t chase perfection.
The charm of cactus watercolor curtains lies in their organic, slightly
unpredictable nature. A paint drip becomes a shadow. A wobbly line turns
into a charming ridge. A slightly crooked cactus leans as if caught in a
desert breeze. Once the panels are hung and you step back, you see the
whole story, not every tiny brushstroke.
Bring a Little Desert Sunshine to Your Windows
Creating cactus watercolor curtains is part art experiment, part home
upgrade, and part therapy session with a paintbrush. With a few basic
supplies and some simple techniques, you can transform plain white panels
into custom window treatments that feel like they were made just for your
space. Whether you go subtle and airy or bold and colorful, each cactus you
paint adds personality and charm.
So pull out those plain curtains, mix up some cactus greens, and give your
windows the desert view they deserveno watering required.