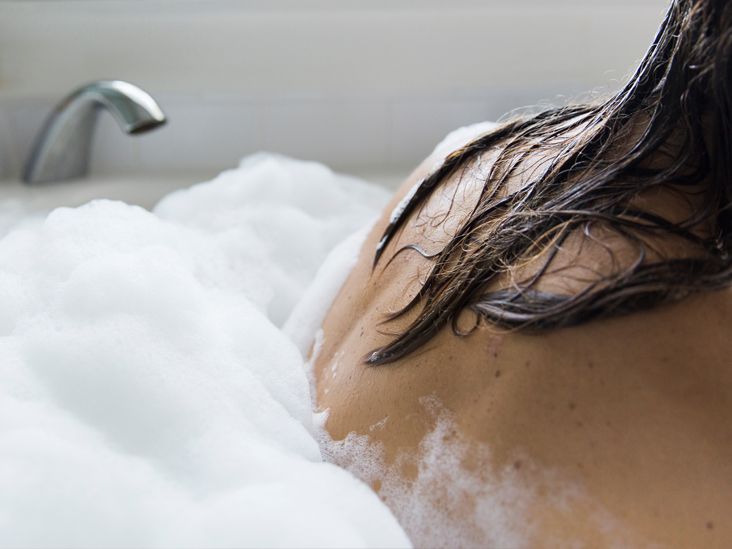
A bubble bath is basically therapy you can buy by the bottle… or make in your kitchen with a few ingredients you can actually pronounce.
Homemade bubble bath isn’t about being “crunchy” (unless you also make granola, in which case: respect). It’s about control:
you decide the scent, the softness, the foam level, and whether your bath smells like a lavender field or a lemony burst of “I have my life together.”
This guide walks you through what makes bubbles happen, the best ingredients for gentle (but legit) suds, and a few easy recipes you can customize.
We’ll also talk safety, because “relaxing” shouldn’t come with a side of itchy skin, irritated bits, or slipping like a cartoon character on a banana peel.
What Makes Bubble Bath… Bubble?
Bubbles aren’t magic. They’re chemistry doing jazz hands.
The main players are surfactants, which are cleansing molecules that help oil and water mix.
They lower water’s surface tension, so air can get trapped in tiny films of liquidaka bubbles.
Commercial bubble baths often use strong surfactants to create big, long-lasting foam.
The tradeoff? Some people find those formulas drying or irritating, especially if the product is heavily fragranced or contains harsher detergents.
Homemade bubble bath can be gentler because you can choose mild cleansers and skip extra irritants.
Why Make Homemade Bubble Bath?
- You control the ingredients. Great if you’re avoiding heavy fragrance, dyes, or certain detergents.
- You can customize the “feel.” More moisturizing? Add glycerin or a small amount of oil. More bubbles? Adjust the soap base and technique.
- You can tailor it to your skin. Sensitive skin often prefers simpler formulas with fewer add-ins.
- It’s budget-friendly. Most recipes use affordable basics (castile soap + glycerin = a classic).
- It’s giftable. Put it in a cute bottle, add a label, and suddenly you’re a person who gives “thoughtful homemade spa gifts.”
The Best Homemade Bubble Bath Ingredients (And What They Do)
1) A mild liquid soap (your bubble engine)
Many DIY recipes use unscented liquid castile soap as the base.
It’s a popular choice because it’s generally mild, easy to find, and works well for sensitive-skin versions.
Just know: castile soap often makes softer bubbles than store-bought bubble bath. Cozy foam, not nightclub foam.
2) Vegetable glycerin (your moisture + bubble booster)
Vegetable glycerin helps attract water and can make the formula feel less drying.
It also supports bubble texturethink “creamier” rather than “flashy.”
3) Distilled water (stability and consistency)
A splash of distilled water thins thick soap just enough to mix smoothly and pour easily.
Distilled water also reduces variables from minerals found in hard tap water.
4) A small amount of oil (optional, but be smart about it)
Oils like sweet almond oil or coconut oil can add a silky feel. But too much oil can:
(1) reduce bubbles, and (2) turn your tub into a slip hazard.
If you add oil, keep it modest and rinse the tub well afterward.
5) Honey or aloe (optional “skin comfort” add-ins)
Some DIY formulas include honey for a more conditioning feel, or aloe vera gel for a soothing vibe.
These add-ins are popular, but remember: homemade products don’t have the same preservatives as commercial ones, so fresh, clean tools matter.
6) Essential oils (optional, and not “more is more”)
Essential oils smell amazing, but they’re concentrated.
Oil and water don’t mix well, so undiluted essential oils can sit on top of bath water and hit your skin in “full strength” spots.
If you use them, keep the amount low and consider blending the drops into a carrier oil first.
And keep bottles away from kids and petsmany oils can be harmful if swallowed or misused.
Safety Check: Who Should Go Extra-Gentle (Or Skip Bubbles)
If you have eczema or very sensitive skin
Dermatology guidance for eczema often recommends avoiding bubble bath because it can be drying or irritating.
If you’re prone to flare-ups, consider a bubble-free soak and use a fragrance-free cleanser only as needed.
If you still want bubbles, keep it occasional, keep it mild, and moisturize after.
If you’re prone to irritation “down there”
Bubble bath can irritate sensitive genital skin, especially in children and teens.
If you notice stinging, itching, or recurrent irritation, skip bubbles and keep bath products away from that area.
A good compromise: use bubbles for the “fun” portion, then do a quick rinse with clean water at the end.
If you’re using essential oils
- Don’t add essential oils undiluted directly into bath water.
- Patch test any new ingredient if your skin is reactive.
- Keep amounts lowyour bath should smell pleasant, not like a candle factory explosion.
General “don’t ruin your evening” tips
- Use clean containers and utensils to reduce contamination.
- Make small batches (especially if you add honey, aloe, or botanicals).
- Stop using it if you notice a weird smell, separation that won’t remix, or any irritation.
Homemade Bubble Bath Recipes (That Actually Work)
Each recipe below is designed to be simple, customizable, and friendly to a wide range of skin types.
If you’re sensitive, start with the gentlest version and skip fragrance.
Recipe #1: The Gentle Everyday Bubble Bath (Sensitive-Skin Friendly)
Best for: mild bubbles, minimal ingredients, everyday use
- 1 cup unscented liquid castile soap
- 1/3 cup vegetable glycerin
- 1 tablespoon distilled water
- In a clean bowl or measuring cup, combine castile soap and glycerin.
- Add distilled water and stir gently (don’t whipfoaming now steals bubbles later).
- Pour into a clean bottle or jar with a lid.
How to use: Pour 1/2 to 1 cup under warm running water.
The “under the faucet” part mattersit’s like the bubble bath’s stage entrance.
Recipe #2: The Soft + Moisturizing Honey Soak Bubble Bath
Best for: a more “conditioning” bath feel, dry winter skin
- 1/2 cup unscented liquid castile soap
- 1/4 cup vegetable glycerin
- 2–3 tablespoons honey
- 1–2 teaspoons carrier oil (sweet almond or jojoba), optional
- Warm the honey slightly (not hotjust warm enough to pour easily).
- Mix glycerin and honey first until smooth.
- Stir in castile soap gently.
- If using oil, add it last and stir slowly.
Notes: Honey can make the tub feel slick. Use a bath mat and rinse the tub thoroughly afterward.
Recipe #3: The “Spa Night” Bubble Bath (Low-Scent, Smarter Aromatherapy)
Best for: a relaxing vibe without going fragrance-wild
- 3/4 cup unscented liquid castile soap
- 1/4 cup vegetable glycerin
- 1 tablespoon distilled water
- 1 teaspoon carrier oil (optional)
- 3–6 drops essential oil total (optional; lavender is a common choice)
- If using essential oil, blend the drops into the carrier oil first.
- Combine castile soap, glycerin, and water in a clean container.
- Add the oil mixture and stir gently.
Tip: Keep the essential oil amount conservative. You can always add more next time; you can’t un-add it once you’re already in the tub.
How to Get Better Bubbles (Without Adding Harsh Stuff)
Use the faucet like a bubble machine
Pour the bubble bath directly under running water.
Fast flow = more agitation = more bubbles. If your faucet is gentle, try holding a cup under the stream and pouring from higher up.
Check your water hardness
Hard water can reduce suds. If your bubbles are weak no matter what, it might not be youit might be your minerals.
You can still enjoy the bath, but set expectations: it may be “soft foam” rather than “cloud kingdom.”
Don’t overload with oils
Oils feel luxurious but can flatten bubbles. If your bath looks like a salad dressing experiment, scale back.
Troubleshooting: When DIY Bubble Bath Misbehaves
“It barely bubbles.”
- Add a touch more castile soap next batch (small adjustments).
- Use hotter (not scalding) running water for more agitation.
- Try a different soap base if castile is too gentle for your bubble expectations.
“My skin feels dry or itchy after.”
- Reduce or remove essential oils and fragrance.
- Shorten bath time and use warmnot hotwater.
- Moisturize right after you pat dry.
- If irritation continues, stop using bubble bath entirely and consider a fragrance-free soak instead.
“It separated in the bottle.”
That’s common if you used oils. Shake gently before each use.
If it smells “off” or looks questionable, toss it and make a smaller batch next time.
Storage and Shelf Life (Because Homemade = Fewer Preservatives)
Homemade bubble bath is basically a “fresh food” of the bathroom world.
Without commercial preservatives, it’s smartest to:
- Store in a clean, sealed bottle.
- Keep it away from direct heat and sunlight.
- Make small batches you’ll use within a couple of weeks.
- Discard if it changes smell, color, or texture in a suspicious way.
How to Turn a Bubble Bath Into a Real Reset
- Set the scene: dim light, a towel within reach, and a robe if you have one (instant main character energy).
- Protect your skin: keep water warm, not hot; limit long soaks if you get dry easily.
- Make it comfortable: a rolled towel behind your neck is underrated.
- Post-bath routine: pat dry and moisturize while skin is slightly damp.
Experiences That Make Homemade Bubble Bath Worth It (Extra )
People who try homemade bubble bath usually have one of two first reactions: “Wait, this is cute and easy,” or “Why are my bubbles so polite?”
The truth is that DIY bubble bath often creates a softer, creamier foam than the dramatic, towering bubbles you might remember from childhood commercials.
And that’s not a failureit’s a personality. Homemade bubbles are the introverts of the bath world: present, comforting, and not trying to steal the spotlight.
A common “aha” moment happens when someone realizes technique matters as much as ingredients.
Pouring your mix into still water can make the bath feel like you added… nothing. But pour it directly under a fast stream,
and suddenly you’ve got a real foam layer that looks intentional. It’s the same ingredientsjust better choreography.
People often tweak their setup after the first try: adjusting the faucet pressure, moving the bottle closer to the stream,
or adding the mix in two small pours (one at the start, one after the tub is halfway full) to keep bubbles going.
Another experience you’ll hear a lot: “My skin didn’t feel tight afterward.”
This is a big reason many switch to homemade bubble bathespecially those who get dry in winter or who react to heavily scented products.
When someone starts with an unscented castile-and-glycerin base, they often notice the bath feels gentler,
and the post-soak skin sensation is calmer. It’s not a medical cure or anything dramatic; it’s just that removing common irritants
(like heavy fragrance or harsh detergents) can be a relief for sensitive skin types.
There’s also the “custom scent discovery” phase. Some people go all-in with essential oils and then immediately learn the hard way that more drops
doesn’t equal more relaxation. The best DIY bath scent is usually subtle. Many find that a tiny amount smells cleaner and fresher,
while too much can feel overwhelmingor worse, irritating. The smartest approach people end up loving is a low-scent formula:
just enough to make the bathroom smell cozy, not so much that it follows you around like a perfume cloud.
Gift-making is another surprisingly joyful part of the DIY bubble bath experience. A simple bottle, a handwritten label,
and a “how to use” note turns your recipe into something that looks boutique.
People often keep a “default recipe” on hand for last-minute gifts: unscented base, a gentle scent option, and maybe a moisturizing version.
It feels personal without being complicatedlike saying, “I want you to rest,” without having to actually say, “You look tired.”
And finally, there’s the moment you clean the tub afterward and think, “Okay, yes, I did add oil… and yes, I did create a slip hazard.”
That experience tends to teach quick lessons: use less oil, rinse well, and keep your spa vibes safe.
The best homemade bubble bath routines are the ones that feel indulgent and practicalgentle ingredients, smart scent choices,
and bubbles that make you smile without making your skin complain later.
Conclusion
Homemade bubble bath is a small, practical luxury: a few simple ingredients, a little customization, and a bath that feels more like “self-care”
and less like “mystery chemicals.” Start with a gentle base, use fragrance carefully, and let your skin be the judge.
If you get irritation, simplifyunscented, fewer add-ins, shorter soaks. When you find your perfect mix, you’ll have a go-to recipe for stressy days,
chilly nights, and anytime you want your bathroom to feel like a tiny spa (minus the tiny spa prices).