Adobe Illustrator is a powerful tool for graphic design, illustration, and digital artwork. One of the essential functions when working on a project is the ability to organize your artwork across multiple artboards or pages. This allows you to manage different parts of your design in one file, making your work more efficient and streamlined. In this article, we will guide you through the process of adding pages or artboards in Adobe Illustrator in four simple steps. Whether you’re a beginner or an experienced designer, these steps will help you increase your productivity and ensure that your design process goes smoothly.
Why Add Multiple Artboards in Adobe Illustrator?
Before diving into the steps, it’s important to understand why you might want to add pages or artboards in Adobe Illustrator. Artboards in Illustrator act as your “pages,” and each artboard holds a separate area where you can work on distinct elements of your design. For instance, if you’re working on a flyer design, you could use one artboard for the front page and another for the back. Additionally, artboards are highly customizable, allowing you to adjust the size, orientation, and layout to fit the specific needs of your project.
Having multiple artboards in a single file makes it easier to keep track of your designs, especially when dealing with projects like brochures, presentations, or UI mockups. The ability to work across multiple artboards in Illustrator also keeps your workflow organized, reducing the need for multiple documents or files. Now, let’s jump into how to add artboards to your document.
Step 1: Open or Create a New Document
The first step to adding pages or artboards is opening Adobe Illustrator and starting with a new or existing document. You can either:
- Open an existing project by clicking File > Open and selecting your file.
- Create a new document by selecting File > New, where you can specify the document size and settings.
If you’re starting fresh, you can choose the dimensions and preset based on your design type (e.g., print, web, etc.). It’s also a good idea to set the orientation and color mode that best suits your design’s final output, whether it’s for digital or print use.
Step 2: Open the Artboard Panel
Once your document is open, the next step is to bring up the Artboard Panel. This panel allows you to add, delete, and rearrange artboards within your document. To open the Artboard Panel:
- Navigate to Window in the top menu.
- Select Artboards from the dropdown menu, which will open the Artboard Panel on the right side of your screen.
In this panel, you can see all your existing artboards and even name or reorder them for better organization.
Step 3: Add a New Artboard
Now that you have the Artboard Panel open, you can easily add a new artboard by following these steps:
- In the Artboard Panel, click on the New Artboard icon at the bottom (it looks like a small square with a plus sign).
- Alternatively, you can use the shortcut Shift + O to toggle the Artboard tool, and then click and drag on the workspace to create a new artboard.
When you click the New Artboard button, Illustrator will automatically create a new artboard in your document. You can drag and resize this artboard as needed to fit your design layout. If you need multiple new artboards, you can repeat this step, and Illustrator will add them one after the other.
Step 4: Adjust Artboard Settings
After adding a new artboard, you might want to customize its size, orientation, or position. Here’s how you can do that:
- Select the artboard using the Artboard tool (Shift + O) or by clicking the artboard in the Artboard Panel.
- Drag the edges to resize the artboard or move it around your document.
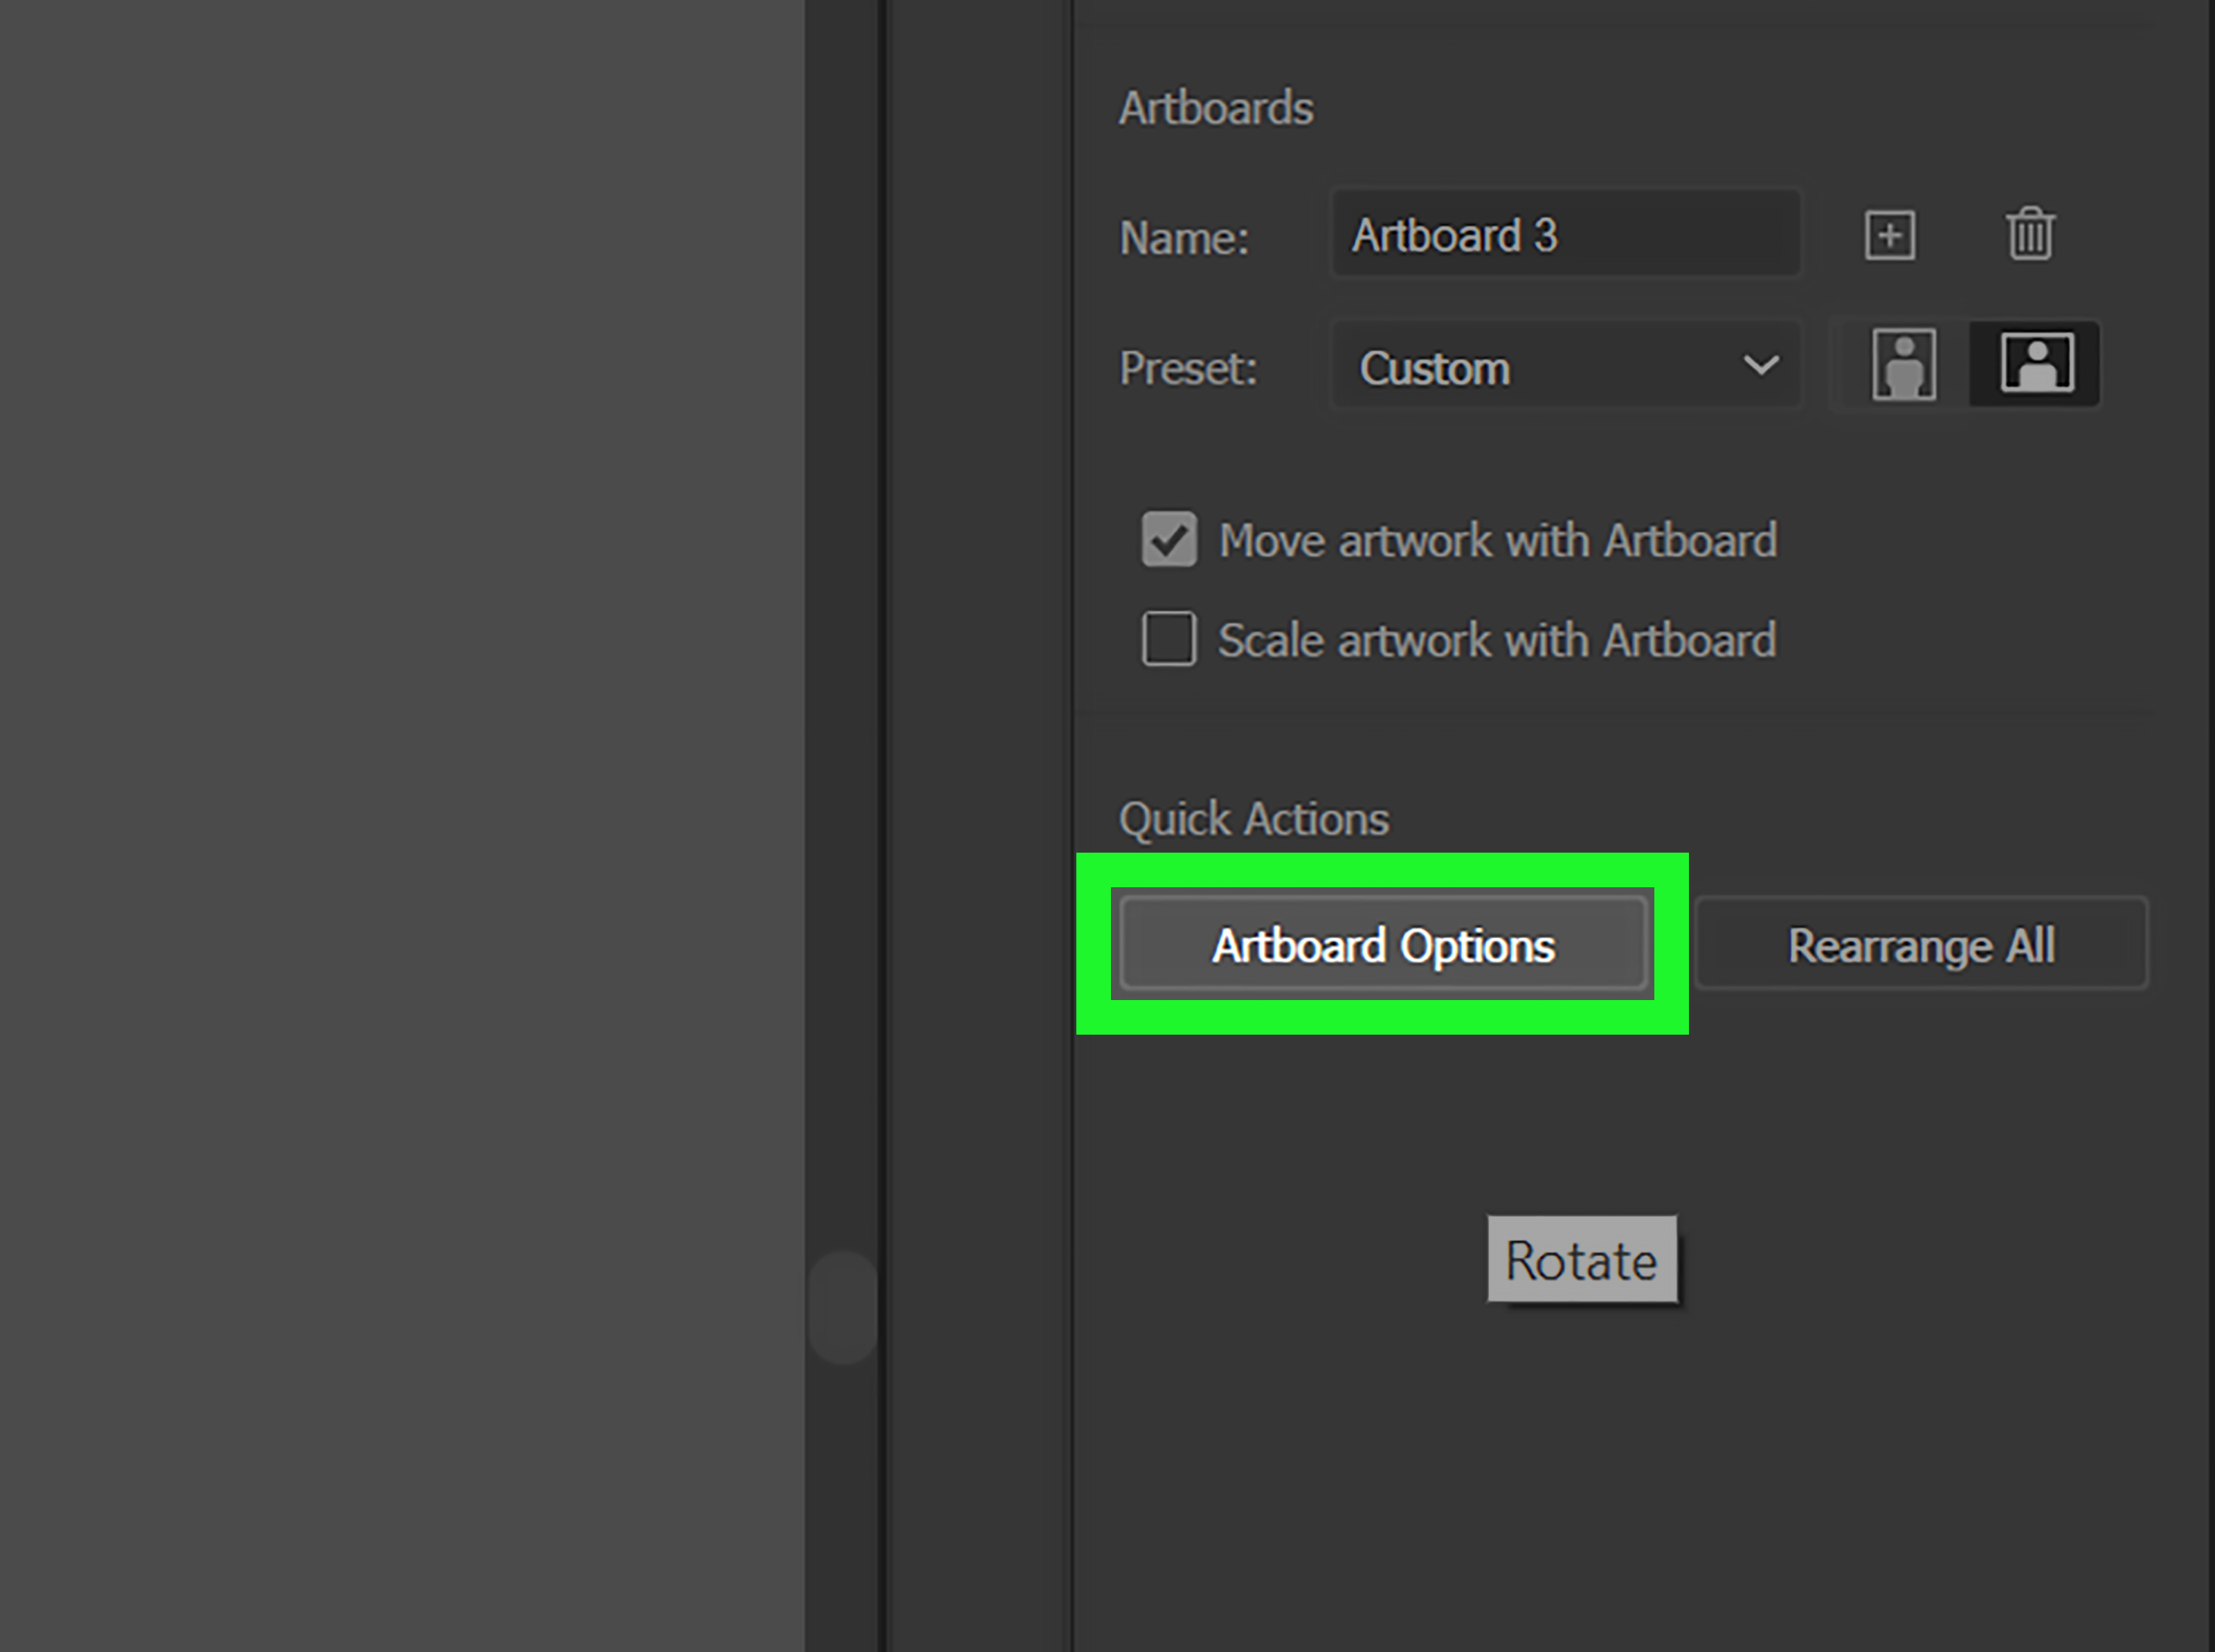
- If you want to specify the dimensions, go to the Artboard Panel and click on the Artboard Options button (it looks like a small gear icon). Here, you can enter the exact width and height you need.
- For different orientations, you can switch between portrait and landscape mode directly in the Artboard Options dialog box.
Once you’ve adjusted your artboards, you can proceed with designing your project across different artboards, keeping everything organized in one file. If you have a large project, you can also rearrange your artboards by dragging them into the desired order in the Artboard Panel.
Bonus: Adding Artboards from the Artboard Tool
Another easy way to add artboards is by using the Artboard Tool directly in the workspace. After selecting this tool, you can draw new artboards anywhere within the document. This method is particularly helpful when you want to visually lay out artboards while working on a design.
Conclusion
Adding pages or artboards in Adobe Illustrator is a straightforward process that can help streamline your design workflow. Whether you are working on a small project or a complex, multi-page design, using multiple artboards in one document will keep your workspace organized and efficient. By following the four simple steps outlined above, you’ll be able to add, adjust, and manage artboards with ease, allowing you to focus more on your creativity and less on the technicalities of file management.
With Illustrator’s powerful artboard system, you can quickly jump between designs, compare versions, and modify layoutsall within a single document. So, go ahead and experiment with adding more artboards and taking your design projects to the next level!
Additional Experiences with Artboards in Adobe Illustrator
In my experience, managing multiple artboards in Adobe Illustrator is a game-changer for large-scale projects. For example, I worked on a brochure design where I had to create separate artboards for the front and back of the brochure, along with a separate one for the inside content. Initially, managing separate files seemed like a good idea, but it quickly became cumbersome to maintain consistency across all pages.
Switching to a multi-artboard setup allowed me to see all the pages in one file, making it easier to ensure design elements aligned across the front, back, and inside pages. The Artboard Panel became indispensable, letting me quickly reorder pages or make changes to the layout in real-time. What’s even more impressive is how Illustrator lets you export all artboards at once, saving precious time that would otherwise be spent managing individual files.
Another experience worth mentioning is using artboards in combination with Illustrator’s smart guides. When working with multiple artboards, it’s easy to get lost in the design space. However, enabling smart guides helps you align objects between different artboards, ensuring that everything stays tidy and proportionate. This is particularly useful when you’re designing complex layouts, like newsletters or packaging.
Lastly, I’d recommend taking advantage of Illustrator’s ability to save preset artboard sizes. If you often work with specific dimensions, like business cards or social media graphics, creating a template with predefined artboard sizes will save you time each time you start a new project.