Winter has a talent for finding the one place your house is “basically a suggestion” instead of a solid structure. One tiny gap at the door? Congratulationsyour living room is now a wind tunnel. A single-pane window? It’s practically a refrigerated display case for your furniture.
The good news: you don’t need a smart thermostat with a master’s degree in algorithms to feel warm at home. The fastest comfort upgrades are often the least glamorous and the most “grandma-approved.” Think: blocking drafts, adding layers, and treating your home like a person who forgot a coatcover the leaky parts first.
Why Low-Tech Warmth Works (And Why It Feels Better Than Cranking the Heat)
Most “my house is freezing” complaints come down to three villains: air leaks (drafts), weak window performance, and cold surfaces (floors and glass). When cold air sneaks in, your heating system isn’t just warming roomsit’s trying to warm the outdoors, which is a hobby best left to billionaires.
Low-tech fixes work because they improve comfort in two ways:
- They reduce drafts so you stop feeling cold air on your ankles and neck (the two most dramatic body parts).
- They reduce heat loss through windows and floors so the warmth you pay for sticks around longer.
Even better: these upgrades are usually quick, renter-friendly (or at least removable), and they don’t require you to “download an app” just to feel your toes again.
The 5 Low-Tech Essentials for Keeping the House Warm
These are the five basics that show up again and again across energy-efficiency guidance, home-improvement pros, and practical winterizing advicebecause they address the biggest comfort leaks first.
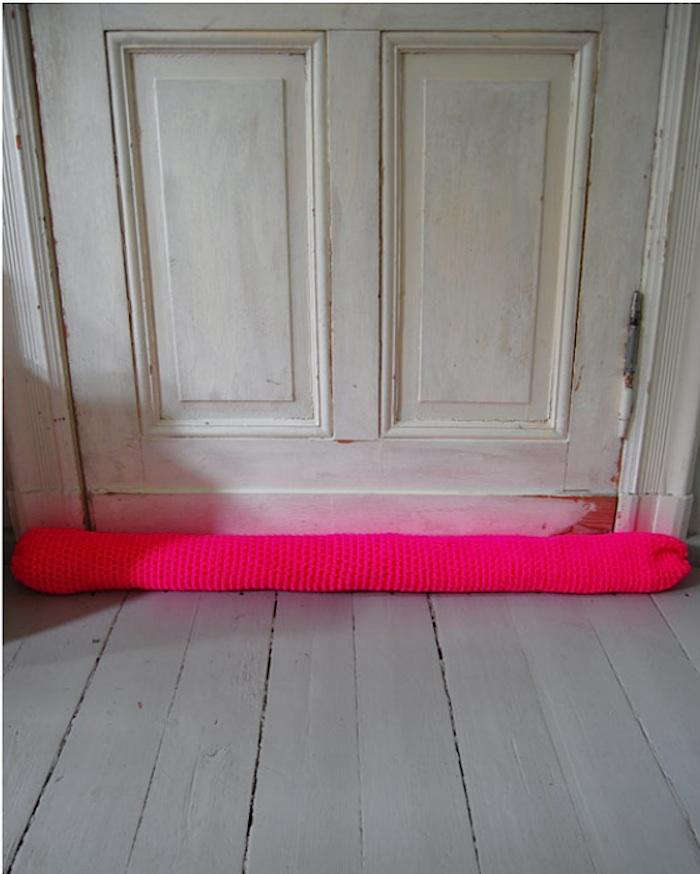
1) Draft Extruders (a.k.a. Draft Stoppers) for Doors and Problem Spots
If your home has one obvious weakness, it’s the gap at the bottom of the doorthe place where heat escapes and cold air slides in like it pays rent. A draft stopper is the simplest “install” you’ll ever do: put it where the draft is, and suddenly your hallway stops behaving like a ski resort.
Where they shine:
- Exterior doors with a noticeable under-door gap
- Interior doors to isolate a cold room (or keep heat in the room you actually use)
- Older windowsills that feel like they’re exhaling
What to look for:
- Weight + snug fit: Heavier fillers (dense foam, sand-like fillings) tend to stay put better.
- Length: Buy slightly longer than the door width and trim if needed.
- Double-sided styles: Great for interior doors because they block airflow on both sides of the gap.
DIY option (cheap and satisfying): Sew (or no-sew) a fabric tube, stuff it with old towels, scrap fabric, or foam, and call it “custom upholstery.” Your house will not know it’s wearing thrift-store couture.
Pro tip: Draft stoppers are your “instant relief.” Use them right awaythen graduate to the more permanent seal of a door sweep and weatherstripping (coming up next).
2) Weatherstripping + Door Sweeps: The Draft-Blocking Power Couple
Draft stoppers are the cozy blanket. Weatherstripping and door sweeps are the actual winter coat. They seal the moving partsdoors and operable windowswhere air leakage loves to happen.
What weatherstripping does: It compresses between the door (or window sash) and the frame to block airflow when closed.
What a door sweep does: It seals the bottom edge of the door against the threshold, eliminating that “cold ankle breeze” effect.
Quick “choose the right stuff” guide:
- Foam tape: Easy for beginners; great for small, consistent gaps.
- V-strip (tension seal): Useful along the sides of doors/windows where a springy seal helps.
- Rubber/silicone gaskets: Durable and effective for doors that see a lot of use.
- Door sweeps: Look for adjustable sweeps if your threshold gap varies.
Installation reality check: The goal is “snug,” not “welded shut.” A good seal should still let doors and windows open and close without a wrestling match.
Common mistakes to avoid:
- Skipping cleaning: adhesive won’t stick to dust and mystery grime.
- Using the wrong thickness: too thin won’t seal; too thick can prevent closure.
- Forgetting the hinge side: air can leak there too, especially on older frames.
3) Caulk the Cracks: The Small Gap Fix With Big Comfort Energy
If weatherstripping is for moving parts, caulk is for everything that should never move in the first placetrim gaps, stationary window edges, and those little cracks that look harmless until the wind starts whistling through them like a dramatic movie soundtrack.
Where caulk pays off the most:
- Between window/door trim and the wall
- Along baseboards where you can feel a draft
- Small cracks around frames (especially on older homes)
How to do it without making it look like a kindergarten craft project:
- Find the leaks: On a windy day, run your hand around trim edges and feel for airflow.
- Prep: Clean, dry surfaces matter more than people think.
- Apply a steady bead: Slow and consistent beats “squeeze-and-pray.”
- Smooth it: A damp finger or caulk tool makes it neat and sealed.
Comfort bonus: Sealing leaks doesn’t only reduce draftsit can also reduce outside noise. Your home becomes warmer and less aware of your neighbor’s extremely confident leaf blower.
Important note: If you go heavy on sealing, think about ventilation and indoor air quality (especially in very tight homes). “Warmer” is great“stuffy” is not. Keep bathroom and kitchen exhaust fans functional, and don’t block intentional vents.
4) Window Insulation Film (or Temporary Interior Storm Layers)
Windows are often the biggest heat-loss “surface area problem” in winterespecially if they’re older, single-pane, or simply not sealing well. If replacing windows isn’t in the budget (or the landlord’s mood), plastic window insulation film is one of the most effective temporary fixes.
Why it works: It creates an extra air barrier and reduces drafts. It’s like adding a clear, removable “second pane” on the inside.
What you’ll need:
- Window insulation film kit (plastic + double-sided tape)
- Scissors
- Hair dryer (to shrink the film tight)
Where it’s most useful:
- Drafty bedrooms where you feel cold near the glass
- Living rooms with big windows you can’t fully cover
- Older homes with leaky sashes (especially if storms aren’t installed)
Make it look less “science fair”: Take your time with the tape lines, trim cleanly, and shrink evenly. A tight finish looks surprisingly tidylike your window is wearing a crisp shirt instead of a plastic poncho.
Extra credit: If the draft is mainly at the bottom of the window, a small draft stopper or foam backer rod can help before you film.
5) Warm Floors: Area Rugs + Rug Pads (Because Cold Floors Are Rude)
Cold floors make a whole room feel coldereven if the air temperature isn’t terrible. That’s because your body senses heat transfer when your feet touch a cold surface. Add rugs and pads, and suddenly the room feels warmer without touching the thermostat.
How to do it right:
- Choose thicker materials: Wool and dense weaves typically feel warmer underfoot.
- Add a quality rug pad: Pads aren’t just for slip prevention; they add cushioning and can improve the “warmth feel.”
- Cover the “walking zones” first: Bedside, sofa area, desk areawhere you actually stand and sit.
Carpet/rug nerd fact (the useful kind): Flooring materials have different thermal resistance (“R-value”). Carpet and cushion systems can provide meaningful insulation compared with hard flooring alone, which is why rooms with rugs often feel less “cold and echoey.”
Design bonus: Rugs do double dutywarmer floors and a more finished room. Even if winter disappears, your place still looks better. That’s what we call a responsible purchase.
How to Prioritize (So You Get Warm Fast Without Spending Like a Movie Villain)
If you want the biggest comfort improvement per dollar, follow this order:
- Block obvious door drafts (draft stopper today, door sweep soon).
- Weatherstrip doors and operable windows where you feel airflow.
- Caulk stationary gaps around trim and frames.
- Insulate the worst windows (film kit on the coldest rooms first).
- Add rugs and pads to cold-floor zones to improve “felt warmth.”
This sequence is effective because it stops the “leaks” before piling on cozy layers. Think of it like fixing a leaky mug: you can keep pouring more tea, but sealing the crack is the real win.
Small Habits That Multiply the Results
The essentials above do the heavy lifting, but a few low-tech habits can make them work even harder:
- Close curtains at dusk: Window coverings help reduce nighttime heat loss.
- Zone your space: Keep interior doors closed to hold warmth where you actually spend time.
- Move furniture slightly off exterior walls: Especially beds and sofascold wall surfaces can make a space feel chillier.
- Don’t block heat sources: Curtains draped over radiators or vents can trap heat where it can’t help you.
Real-World Experiences: What People Notice After Adding These 5 Essentials (Extra )
Reading tips is one thing. Living with them is where the “oh wow” happensusually right around the moment your hallway stops feeling like it’s actively trying to remove your soul through your ankles.
In older homes (the charming kind with original trim and “historic character,” also known as “many creative air pathways”), the first thing households tend to notice after adding draft stoppers and door sweeps is that the temperature becomes more even. Not necessarily warmer on the thermostat, but less swingy. That cold stripe on the floor near the door? It shrinks. The spot on the couch that felt fine until the wind picked up? Suddenly it’s just… a couch again.
People also notice a change in sound. Sealing gaps around doors and windows can quiet outside noise. It’s not full recording-studio silence, but the difference is realtraffic hum softens, and the house feels calmer. Many homeowners describe it as “cozier,” which is a word that suspiciously includes both warmth and vibe. (Science agrees: comfort is not only temperatureit’s also how steady and draft-free a room feels.)
Window insulation film gets its own set of reactions. The most common: surprise that something so basic can matter. After the film goes up, people often report that rooms near big windows feel less “cold radiating” at night. You know that sensation where you’re warm, but the glass feels like an ice rink, so your body stays mildly offended? The film layer helps reduce that discomfortespecially in bedrooms where you’re trying to sleep, not train for an Arctic expedition.
Rugs and pads tend to produce the fastest “felt warmth” upgrade. People regularly mention the morning effect: stepping out of bed and not instantly regretting all life choices. Rugs also change how you use the roomyou sit on the floor with kids more comfortably, pets sprawl longer, and you naturally linger instead of migrating to the one warm chair like it’s a scarce resource. The house feels more welcoming, even if the HVAC settings didn’t change much.
Another experience that comes up often is lower thermostat temptation. When drafts are reduced and floors feel warmer, people are less likely to crank the heat “just to feel okay.” Instead of chasing comfort with higher numbers, comfort starts to show up through steadiness. That’s the sneaky superpower of low-tech upgrades: you’re not fighting winter with brute forceyou’re making the house smarter without making it “smart.”
Finally, there’s the psychological benefit: taking control. Winter can make homes feel unpredictableone day fine, next day icy. Once people plug the obvious leaks and add simple layers, the house stops feeling like it’s at the mercy of the weather. It becomes a place you can manage. And honestly, that sense of control might be the warmest thing on this list.