You know that half-can of paint you’ve been saving “just in case”? Congratulations: you’re now the proud curator of a
garage museum called Exhibit A: The Beige Era. The good news is that leftover paint is basically DIY rocket fuel.
A quart can freshen a room, rescue a sad piece of furniture, and make your home look intentionally designedwithout
committing to a full weekend of moving couches and questioning your life choices.
Below are 19 genuinely doable projects that use small amounts of paint (think: a cup, a pint, or “whatever’s rattling
around in the bottom of the can”). You’ll also get smart storage, safety, and disposal tips so your leftover paint helps
your homenot haunt it.
Before You Dip a Brush: Do a 90-Second Paint Reality Check
Leftover paint is only a bargain if it still behaves like paint. Before starting any project, open the lid and give it a
real look (and a respectful sniff).
Signs your paint is still usable
- Normal smell: Mild “paint-y” odor is fine. A sour or rotten smell is a red flag.
- Stirs smooth: Some separation is normal. If it won’t mix back together or stays chunky, skip it.
- No fuzzy surprises: Mold or weird floating bits mean it’s done.
Store leftover paint like you actually want to use it later
Paint lasts longer when it’s sealed tightly and kept in a climate-friendly spot. Translation: avoid freezing temperatures,
avoid extreme heat, and keep lids closed so air doesn’t turn your paint into pudding.
- Label it: Room name, date, sheen (flat/eggshell/satin), and brand/color code.
- Right-size the container: If there’s only a little left, pour it into a smaller airtight jar to reduce air exposure.
- Keep it comfortable: A temperature-stable interior closet or utility room beats a sweltering shed.
Safety basics (especially for older homes)
Ventilation matters. So does surface prep. And if your home was built before 1978, be cautious about sanding or scraping
painted surfacesolder layers may contain lead. When in doubt, use lead-safe practices and avoid creating dust.
- Open windows, run a fan, and take breaks if fumes bother you.
- Wear gloves and eye protection for overhead or drip-prone work.
- Keep pets and kids out of the work zone until paint fully cures.
Disposal: don’t pour paint down the drain
If you can’t use or donate your paint, dispose of it the right way. Rules vary by location, but a helpful rule of thumb:
oil-based and solvent-based products usually require hazardous waste handling, while many places allow
dried water-based (latex) paint to go in the trash. Paint recycling programs and drop-off sites are often the best option.
The 19 Cool Leftover-Paint Projects
These projects are designed for small amounts of paint and big impactvery much in the practical, make-it-better spirit
that Bob Vila fans love. Pick one this weekend, and your leftover paint stash starts shrinking fast.
1) “Color-Block” a Front Door for Instant Curb Appeal
Instead of painting the entire door, tape off a bold rectangle, arch, or diagonal section and paint just that area. It’s a
fast way to add personality without repainting the world. Pro move: remove hardware first, then repaint or refresh it separately
for a clean finish.
2) Paint Chair Legs or Chair Backs for a Subtle Statement
Dining chairs don’t have to match perfectly to look intentional. Paint only the bottom few inches of chair legs, or just the top rail
of the chair back, to create a “designer set” vibe. This works especially well when your accent color matches something else in the room
(art, rug, or curtains).
3) Add a “Secret Pop” by Painting the Sides of Drawers
Want the fun of color without staring at it 24/7? Paint the inside edges or sides of drawers. Every time you open them, you get a little
surprise. Prime slick surfaces first, and let everything cure fully so drawers don’t stick.
4) Refresh a Lamp Base (and Make It Look Like a Boutique Find)
A dated lamp can become a statement piece with a quick coat of paint. Chalk-style paint is popular for easy coverage, and a wax or clear
topcoat can add depth. Keep paint off sockets and wiring areas, and let it cure before reassembling.
5) Paint a Tile Backsplash Instead of Replacing It
If your backsplash is ugly-but-intact, painting it can be a time-saving makeover. The key is prep: clean thoroughly, scuff lightly if needed,
and use a bonding primer and paint suitable for slick surfaces. Always check what’s recommended for your specific tile type.
6) Give Picture Frames a New Life (and a Matching Set)
Mismatched frames can look curated instead of chaotic when they share a color. Paint old frames in one unifying shade (matte black, warm white,
or a bold accent), then hang them as a gallery wall. Bonus: this is a perfect “use up the last cup of paint” project.
7) Create a Freeform “Statement Wall” Without Wallpaper Commitment
You don’t need to cover the whole wall to make a wall interesting. Try a loose brushstroke pattern, abstract blobs, or a hand-painted arch behind
a bed or desk. Step back every few minutes to keep the pattern balancedthis is art, not a math test.
8) Paint a Brick or Tile Fireplace Surround for a Total Mood Shift
A fireplace can feel brand-new with paintespecially if you choose a high-contrast color that makes the room’s décor pop. Use paint appropriate
for masonry surfaces, and if the fireplace is functional, choose a low-odor option and follow product guidance for heat exposure and placement.
9) Upgrade Trim and Molding for Crisp, Custom Lines
Painting trim is one of the most dramatic “small effort, big payoff” moves. Go classic (white trim) or bold (black, navy, or deep green).
Use painter’s tape where needed and a steady brush for sharp edgesyour walls will look cleaner even if you don’t repaint them.
10) Paint the Back of Shelving or Built-Ins to Add Depth
Painting the back panel of a bookcase or glass-front cabinet adds instant dimension. It also makes displayed items stand out, like a mini museum
(but hopefully with fewer dusty participation trophies). This is a great place to use a dramatic leftover color you wouldn’t paint on a whole wall.
11) Stencil or Stripe a Flat-Weave Rug to Make It Look Custom
A simple, low-pile, flat-weave rug can become a statement piece with a taped pattern or stencil. Start with a subtle geometric border or repeating
motif. Test a small area first, and consider using a fabric-friendly additive if you want a softer feel underfoot.
12) Turn a Dated Dresser “Vintage” with Chalk Paint and a Distressed Finish
Furniture upcycling is where leftover paint shines. Paint a dresser in a soft neutral or muted color, then lightly distress edges for a worn-in look.
A dark finishing wax or glaze can highlight details and give that “antique store score” vibe without the antique-store price tag.
13) Highlight Window Grids (or Sashes) for Architectural Interest
Instead of repainting the entire window frame, paint just the interior grids or trim details. It draws the eye to the window and makes the whole wall
feel more finished. Use painter’s tape carefullythis is one of those projects where prep is 80% of success.
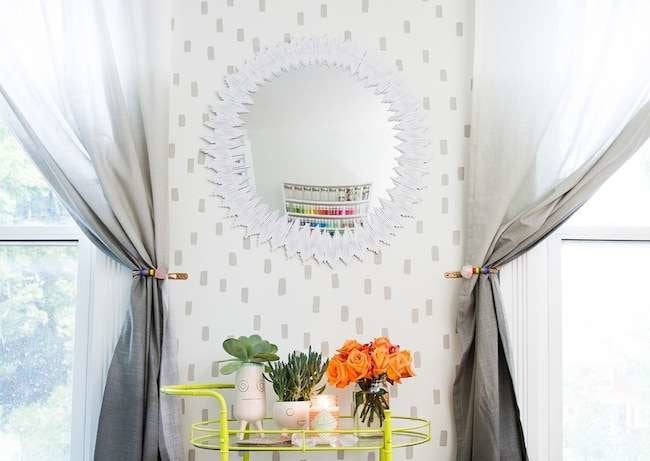
14) Give Old Curtains a Second Life with Painted Stripes
If you’re replacing curtains because they feel boring, consider painting them instead. Tape off stripes and apply thin, even coats. You’ll get a playful,
modern look with minimal spending. For softer fabric performance, a textile medium can help paint flex with the material.
15) Paint Only the Top of a Side Table for a Fast Refresh
Short on time? Paint just the tabletop. It’s a 15-minute transformation that looks intentionalespecially if the legs stay neutral. This works well on
thrifted pieces, kids’ tables, or any surface that needs a visual “reset.”
16) Dip-Dye Wooden Utensil Handles (Kitchen Cute, Not Kitchen Chaos)
Paint the handles of wooden spoons and spatulas for a pop of color, but keep paint away from food-contact areas. Tape a clean line, apply a couple thin
coats, and let the paint cure fully before use. It’s a small detail that makes everyday tools feel curated.
17) Tape a Chevron (or Geometric) Accent Wall
Want wallpaper energy without wallpaper drama? Use painter’s tape to create a chevron or geometric pattern, then paint the exposed sections. Peel tape
while paint is slightly tacky for cleaner lines. This is a perfect leftover-paint project because patterns don’t require gallons.
18) Paint Kitchen Cabinets for the Biggest “Small Paint” Wow
Yes, cabinets are a bigger jobbut you can often complete a small kitchen or a single bank of cabinets with less paint than you’d expect. Remove doors
and hardware, clean thoroughly, use a primer where needed, and apply multiple thin coats for a smoother finish.
19) Give a Light Fixture a Facelift Instead of Buying New
Light fixtures can be expensive, and paint can make an old one feel modern. Remove the fixture (or removable parts) if possible, clean it well, and use
paint appropriate for metal. Keep paint away from bulbs and wiring areas, and let everything dry fully before reinstalling.
How to Make Leftover Paint Go Further (Without Doing Anything Weird)
A little paint is surprisingly powerful when you treat it like a finishing tool, not a wall-covering marathon. If you’re trying to stretch what’s left,
these strategies keep results looking intentional.
- Use it as an accent, not a main course: Trim, shelves, furniture tops, and frames are low-volume, high-impact zones.
- Pick “micro-surfaces”: Drawer edges, window grids, and utensil handles eat up tablespoonsnot gallons.
- Do a “one-color unifier” pass: Painting multiple small items the same color makes a space look coordinated fast.
- Work in thin coats: Thick paint looks lumpy and dries slower. Thin coats look cleaner and often cover better.
Extra Field Notes (500+ Words): What People Actually Experience When Using Up Leftover Paint
Doing leftover-paint projects is a little like cleaning out a junk drawer: you start with good intentions, find a mystery object from 2019, and end up
feeling weirdly proud of yourself. Here are the most common “real life” experiences DIYers report when they decide to stop storing paint like it’s a
family heirloom and start using it.
First, the decision fatigue is real. The hardest part is often choosing the project, not doing it. A trick that helps: pick one “anchor”
color you already love in the room (maybe a pillow or a piece of art), then choose leftover paint that either matches it or contrasts it. That one simple
rule keeps you from painting random objects random colors and calling it “eclectic” (which is sometimes code for “I panicked”).
Second, prep feels boring until you skip it. People who rush into painting a greasy backsplash or dusty shelf often end up with peeling,
sticky surfaces, or a finish that looks like it was applied with a sandwich. Meanwhile, the people who take ten minutes to clean, scuff, and tape get
results that look like a professional stopped bybrieflyon their way to a much fancier house.
Third, small projects teach big color lessons. Leftover paint is a low-risk way to test bold colors. Painting just a tabletop or a shelf
back can reveal whether you truly love that deep tealor whether it was a “great in theory” situation. Many DIYers discover that they like bold color most
when it’s used as an accent, not a full-room commitment. That’s not “playing it safe.” That’s called “having eyes.”
Fourth, you’ll become a labeling evangelist. After the third time someone tries to do a touch-up and realizes their “white” is actually
“slightly warmer white that looks beige at night,” they start labeling everything. Room name. Date. Sheen. Brand. Even a tiny painted swatch on the lid.
This is the moment you transform from “person with paint cans” to “person with a system.” It’s powerful. You may start organizing other things. Proceed
with caution.
Fifth, the most satisfying wins are the sneaky ones. Painting drawer sides, window grids, and trim doesn’t just add colorit adds
definition. These projects make a home look cared for, which is the secret ingredient in “nice house” energy. The space doesn’t have to be huge or
brand-new; it just needs those crisp details that suggest someone pays attention.
Sixth, you’ll learn where durability matters. A picture frame can look great with almost any leftover paint. A tabletop, cabinet, or rug?
Different story. People often discover that higher-touch surfaces need better prep, more cure time, and sometimes a tougher topcoat. The experience is
usually: “This looks amazing!” followed by “Why is it sticking?” followed by “Oh, right. I closed the drawers too soon.” Patience pays off.
Finally, the best part is the momentum. Once someone completes one small paint makeover, the second is easier, and the third becomes fun.
You start seeing paint as a tool for quick, controlled transformationlike changing a room’s outfit instead of renovating the whole body. And somewhere
along the way, your leftover paint stash starts shrinking. That’s when you realize you didn’t just finish a DIY projectyou reclaimed shelf space. Truly
the most underrated home upgrade.
Conclusion: Turn “Leftover” Into “Level-Up”
Leftover paint doesn’t have to expire in your garage like an old gym membership. With a little planning, you can use small amounts to create high-impact
upgradesdoors, trim, shelves, furniture, textiles, and even light fixtures. Start with one project, store what remains properly, and dispose of what you
can’t use responsibly. Your home gets a refresh, your budget stays calm, and your paint shelf finally stops multiplying.