TV cabinets are often one of the most overlooked pieces of furniture in the home. They’re functional, sure, but they don’t always get the love they deserve in the design department. Fortunately, with a little creativity and elbow grease, you can transform your TV cabinet into a statement piece that complements your living room decor. Whether you’re working with a vintage cabinet or a modern piece that needs a little personality, here are 10 fantastic DIY TV cabinet makeover ideas that will breathe new life into your furniture and enhance your space.
1. Chalk Paint for a Matte Finish
Chalk paint is one of the most versatile products for a DIY TV cabinet makeover. It adheres to almost any surface and gives the cabinet a smooth, matte finish. You can easily paint over wood, laminate, or even metal with chalk paint. The best part? You don’t need to sand or prime the surface first! This makes it a quick and easy way to give your TV cabinet a modern, rustic, or shabby chic look, depending on the color and finish you choose.
Pro Tip:
If you want to add texture, consider distressing the edges after painting. This gives your cabinet an antiqued, vintage feel that’s perfect for a coastal or farmhouse-themed living room.
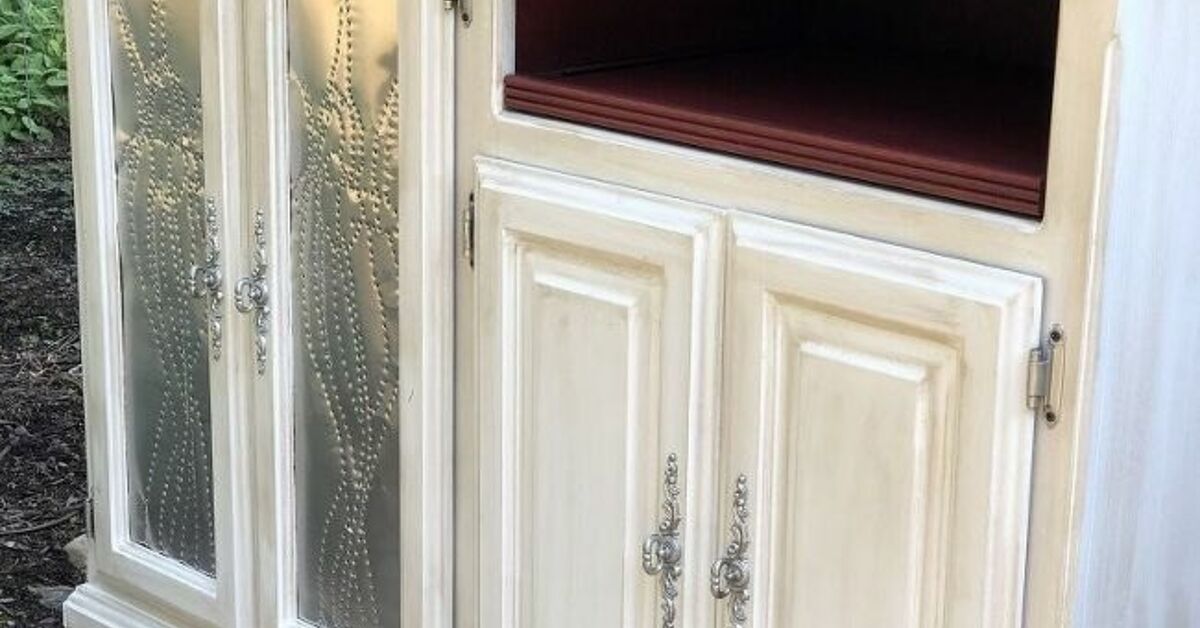
2. Add Decorative Hardware
Sometimes, all a cabinet needs is a simple update to make it feel fresh. Replacing old, worn-out handles or knobs with stylish, modern ones can instantly elevate the look of your TV cabinet. Choose from vintage-style pulls, sleek modern handles, or even leather straps for a unique touch. This small change can have a big impact, especially if you pair it with a fresh coat of paint or new finishing touches.
Tip for a Cohesive Look:
Make sure the hardware matches the other accents in your room, such as your light fixtures or coffee table legs, for a polished and cohesive aesthetic.
3. Custom Wood Paneling
If you’re craving a sophisticated, high-end look, consider adding custom wood paneling to your TV cabinet. This is a great option if you have a simple cabinet and want to elevate it into a luxury statement piece. Choose from rich, dark wood panels for a classic, timeless appearance or lighter shades for a more modern and airy feel. You can even try a chevron or herringbone pattern to give the paneling some extra flair.
DIY Steps:
- Measure the sides or front of your TV cabinet to determine how much wood you’ll need.
- Cut the wood panels to size, then attach them using wood glue or nails.
- Finish with a coat of wood stain or varnish for protection and shine.
4. Upcycle with Rattan or Woven Materials
For a chic, boho vibe, upcycle your TV cabinet by replacing the doors with rattan or woven materials. This gives your cabinet a beachy, laid-back feel, perfect for those who want to add texture and warmth to their living room. Whether you go for full woven panels or simply add accents, this style is both trendy and timeless.
DIY Steps:
- Remove the cabinet doors.
- Cut the woven material to fit the door panels and secure it with a staple gun or strong adhesive.
- Reattach the doors, and enjoy your new boho-chic TV stand!
5. Install Floating Shelves
If you’re looking to increase storage and add visual appeal, floating shelves are a great solution. Floating shelves are sleek, minimal, and perfect for displaying decor, books, or your favorite plants. Install them above or around your TV cabinet to create an organized and eye-catching design element that complements your existing furniture.
Tips:
- Ensure the shelves are securely mounted to support the weight of your items.
- Keep the shelves clutter-free for a clean, modern aesthetic.
6. Paint with a Bold Color
If you’re feeling adventurous, why not paint your TV cabinet in a bold, statement-making color? Whether you go for deep navy, emerald green, or a pop of coral, a bold color can add personality and excitement to your living room. Pair this look with neutral walls and furniture to allow the cabinet to take center stage.
Color Inspiration:
- Bold Navy: Elegant and timeless, perfect for a coastal or contemporary look.
- Emerald Green: Fresh, vibrant, and perfect for a nature-inspired or eclectic style.
- Coral: Fun and lively, ideal for adding a touch of warmth to your space.
7. Add Glass Doors for a Modern Touch
Glass doors can add a modern and sophisticated element to your TV cabinet. If you’re into a more contemporary aesthetic, swapping out solid doors for glass ones allows you to showcase your media equipment or decorative items inside the cabinet while still keeping them dust-free and organized.
DIY Steps:
- Remove the existing cabinet doors and replace them with clear glass or frosted glass for a more subtle effect.
- Install new hinges or magnetic closures to secure the glass doors.
8. Use Contact Paper for Quick Updates
If you’re short on time or want a super budget-friendly option, contact paper can transform your TV cabinet without much effort. You can find contact paper in a variety of finishes, including wood grain, marble, and geometric patterns. Simply peel and stick to cover the surfaces of your cabinet, and you’ll have a fresh new look in no time.
Pro Tip:
If you want to create a faux marble look, opt for marble-effect contact paper. This trendy finish will give your TV cabinet a high-end, polished look without the expensive price tag.
9. Add LED Lighting for a Cinematic Feel
What better way to elevate your TV cabinet than with some ambient lighting? Adding LED strip lights around the edges of your cabinet or behind your TV creates a soft, cinematic glow. This is a great way to enhance the mood of your living room while also highlighting your TV cabinet as the focal point.
Installation Steps:
- Purchase a LED strip light kit that fits your cabinet size.
- Peel and stick the LED lights to the desired location on your TV cabinet.
- Connect the lights to a power source and enjoy the soft glow!
10. Create a Vintage-Inspired Look with Decoupage
For a quirky, vintage-inspired makeover, decoupage is a fun option. You can use old magazine clippings, fabric scraps, or patterned paper to add unique designs to your TV cabinet. This technique is perfect for personalizing your furniture and giving it an eclectic, one-of-a-kind feel.
DIY Steps:
- Choose your decorative paper or fabric.
- Apply a thin layer of decoupage glue to the surface of the cabinet.
- Carefully place the paper or fabric onto the glued area and smooth it out to remove wrinkles.
- Finish with a topcoat of decoupage glue to seal and protect the design.
Conclusion
Updating your TV cabinet is a simple yet effective way to refresh the look of your living room. Whether you’re adding a pop of color, installing new hardware, or experimenting with bold textures, there’s a DIY project for every style and skill level. A little creativity and some basic tools can transform your TV cabinet from a functional piece into a focal point that enhances the overall aesthetic of your home.
Experience with DIY TV Cabinet Makeovers
One of the most rewarding parts of DIY home projects is the personal touch they bring to your space. For example, after experimenting with several of the makeover ideas mentioned above, I found that adding decorative hardware and painting the cabinet a bold color completely transformed the room. The new handles gave the cabinet a contemporary vibe, while the rich navy color made it pop against the neutral walls. A month later, I decided to add LED strip lights to highlight the cabinet’s new look, and it gave the space a cinematic feel perfect for movie nights. It’s amazing how a few simple changes can breathe new life into something as functional as a TV cabinet.